Showing posts with label make. Show all posts
September 3, 2015
Tiny Project #5: Felt Balls
We have an assortment of blocks, puzzles, cars, musical instruments and other toys for Amos, but most often he plays with household items. A spray bottle filled with water for squirting and misting outside, a potato masher and kitchen tongs for carrying random things around the living room, and a bicycle pump which he uses to "pump" wheels, tires, and pillows. He raids our kitchen drawers and cupboards for his favorite pots, bowls, and utensils and it is fun to see the creative ways he turns things into toys.
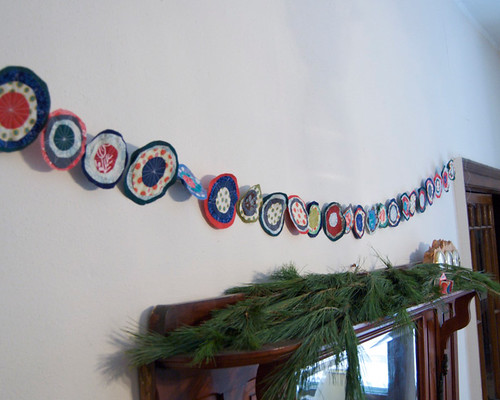
I've made Amos a few things to play with over the last couple of years, mostly soft and throw-able. Stuffed cloth blocks, bean bags, and now felt balls. Soft things that can be rolled, tossed, gathered, and occasionally thrown are nice to have available for all kinds of play, but especially when you can say if you want to throw something, you can throw this.
Instead of seeking out wool roving, I realized that I could make balls from the scrap wool that had been hibernating in my knitting basket for years. Most of the yarn wasn't a color or weight that I really liked so I gave it new life with this project. I love being able to transform unwanted materials into something that is actually enjoyable. As long as it is wool, you can use scraps, tangles, or any kind of yarn.
These felt balls don't take a long time or any excess water and soap. Wrap or scrunch your yarn into balls and use an old stocking or pair of tights to hold them in balls shapes. Toss them in with your load of laundry and you will soon have a new, soft, throw-able toy. Soft, colorful and cozy, they can also be used for cat toys, dryer balls, juggling, or playing catch indoors making them completely not essential, but still quite fun.
Felted Balls
Materials:
100% wool yarn
A jingle bell if you want your ball to rattle
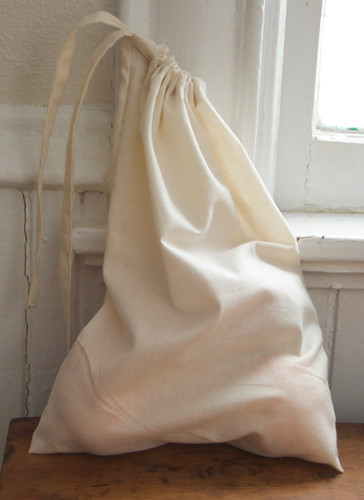
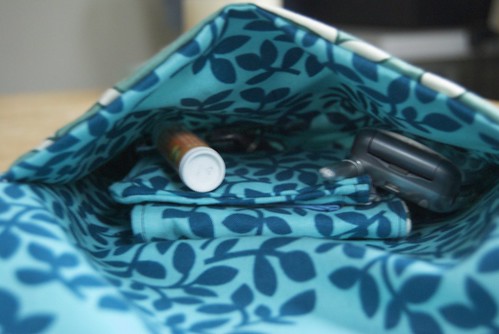
A pair of stockings or nylon tights
Cut the legs off the tights so you two have long tubes.
Roll the yarn into a tight ball using a single color or many colors together (if you are using a bell, start rolling the yarn around it so it is hidden in the middle of the ball). If you have a very tangled ball of yarn, like I did, you can scrunch it into a ball shape and wrap some more yarn around it to keep it that way. Once your ball has reached the desired size (it will shrink a bit when felted) stuff it into one of the legs of the tights. Tie both ends to keep the yarn in a tight ball.
Continue making yarn balls until you have as many balls as you wish or you have filled both stocking legs. The next time you do a load of laundry with HOT water, put the yarn filled stockings in with your dirty clothes. Transfer them, along with your clothes, into the dryer to dry.
Once they have been washed and dried, remove them from the stockings. Depending on the type of yarn you use it may just look like a very tightly rolled ball of yarn or it make be hard to tell that it started out as a long strand. Some yarn doesn't felt together easily so you may need to repeat the process to get all of the strands to stick together in a ball.
May 16, 2014
Tiny Project #1

Its a good thing I love fabric because we have an abundance of cloth in our home. Aside from the patterned yards waiting to be cut and sewn into pants or bibs or aprons, most of the cloth is less refined and heavily used. Dish towels for drying hands and dishes, wiping spills and tables, counters, and high chairs are in constant rotation in the kitchen. We use cloth napkins at meals and cloth diapers and wipes for Amos. I've retired the burp cloths but it seems like I am constantly reaching for something to clean Amos' hands or wipe his mouth after meals.
Visions of laundry piles aside, I am happy to rely on all of these different fabrics for use and constant reuse in our home. Most of the time they get the job done while also pleasing my senses with their colors, textures and general usefulness. One shortage I have discovered lately, though, is washcloths. I sometimes use them as the first step of cleaning Amos after a meal but we also need them for scrubbing him in the bath. I decided to make a few new ones and wanted to share them with you as an easy beginner sewing project and a quick way to make something useful and pretty for your home.
It may not seem like the greatest necessity and it probably isn't hard to find inexpensive and durable washcloths at a lot of stores. But, here is a chance to shift from buying to making and you can probably use things you already have at home. The only sewing skills you need are the ability to cut fabric with scissors and to sew a straight (or mostly straight) line.
Materials:
Terry cloth -- I used this fabric which I bought last year to make some baby towels, it is very thin and easy to sew. You could use an old towel but if it is too thick it can be difficult to sew through on a regular sewing machine
Cotton fabric such as flannel or a basic quilting-type cotton -- Sewing this to the terry cloth means you will have no frayed edges and it makes the washcloth sturdier if you are using a thin terry. I like using flannel but you could also choose fabrics that match your towels or fit with your bathroom colors. I made a couple of washcloths with colors that I just liked.
Cut one 10 by 10 inch square (or any size/shape that you like) of terry cloth. Place the cut terry cloth on top of your cotton fabric and cut a piece the exact same size and shape. Put the fabric together with the patterned side of the cotton fabric facing the fuzzy side of the terry cloth (if the terry cloth is fuzzy on both sides it doesn't matter which side is in but you want the sides of the fabric that will eventually be the outside of the washcloth to be facing each other with the wrong sides facing out)
Pin the fabric together or simply hold it in place. With the cotton fabric on top, stitch around the edges of the cloth, sewing them together and leaving a 2 inch unstitched hole. Having the cotton fabric on top makes it easier to stitch if the terry cloth is stretchy.
Turn the washcloth inside out so that the fuzzy terry cloth and cotton pattern are now on the outside. Make sure to poke the corners a little so that the washcloth is square. Now, stitch around the washcloth again, about 1/4 inch from the edge, making sure to tuck in the edges around the hole so that it is closed neatly.
Now you have a washcloth!
May 4, 2011
Simple Hand Salve
Planting seeds, digging in the soil, scrubbing surfaces and getting ready for spring is an exciting chance to nurture new life. But all this work can take its toll on your hardworking hands. After a day on the farm my hands are dry and rough. I made a very simple hand salve which quickly refreshes and rejuvenates my worn fingers.
It is easy to mix up and made with ingredients that you can use in the kitchen, too. The salve doesn't soak in quickly like a lotion, but it's not greasy and it is a great cure for dry skin. I use almond oil that is found with the other cooking oils in the store, it works really well as a moisturizing body oil and it is less expensive than the almond oil in the body care section.
Homemade Hand Salve
1/4 cup coconut oil
1 tablespoon grated beeswax
1 tablespoon almond oil
A few drops of your favorite essential (optional)
In a double boiler, or a heatproof bowl over a pot of simmering water, place all of the ingredients. When the are all melted, stir them together to combine completely. Pour into a shallow, wide mouth jar or other container for easy use. Let cool completely. Rub a small amount into your hands until absorbed. Use as often as you like.
P.S. The new aprons are up in my shop.
March 9, 2011
Reusable Fabric Bag Tutorial
After my discussion about wasting less and enjoying more, I wanted to bring you a way to make basic reusable bags. I make these simple cotton bags for filling with grains, beans, nuts and seeds from the bulk bins at the store where I shop. I have found that it is usually less expensive to buy from bulk bins than to purchase the same items already packaged. Filling reusable cloth bags means I waste even less.
When you purchase from bulk bins, you simply fill your bag and then make note of the product number. Many bulk aisles have twist ties or stickers you can write this number on so that the cashier knows how to charge you. I sometimes use (and re-use) twist ties around my fabric bags. You can also write the number right on the fabric, or have dedicated bags for items that you buy regularly which are labeled with the number of the product. Most bulk aisles have a scale which you can use to figure out the weight of the bag. This is called the TARE and if you let the cashier know, they will subtract it from the weight of the product. Once you have tried it, it is a very simple process. If you have further questions, I'd be happy to answer them in the comments or you can ask your friendly grocery store employee.
These bags also work well for transporting fruits and vegetables, although since they aren't air tight, they aren't ideal for storing perishable produce for several days in the refrigerator (but maybe that isn't important). I also wouldn't recommend them for flours and very fine grains that can leak through the fabric. Still, they are a perfect solution for most bulk foods.
It may seem like there are a lot of steps but they are all really quick, I just wanted to give as thorough an explanation as I could. You can make the bag even simpler by leaving out the drawstring. I think the drawstring is handy, but it is really not necessary for produce or if you are going to use a twist tie. They are easily washable so you can use them again and again.
Let me know what you think!
Materials
Cotton Fabric (I usually use plain muslin, but you can use whatever you want)
Scissors
Sewing Machine (I wouldn't recommend sewing this one by hand because you want the seams to be really tightly bound together)
An iron
A large safety pin
1. Fold and measure your fabric. You can make the bag any size you would like. I make all of mine about the same size so I can use them for anything, but you could make some larger and some smaller. Before you cut, fold the fabric over so that the bottom of the bag is a fold. You will sew the two sides. Folding it makes it easier to cut. I measured a rectangle about 11 by 14 inches.
2. Cut the fabric. The two sides and the top will be cut edges, the bottom of the bag will be where the fabric is folded.
3. I add applique to some of my bags. Here I cut out a carrot. You could add designs to your bags to indicate what you will using them for, or just keep it simple.
4. I appliqued the carrot to the front of the bag.
5. Now you will prepare to sew up the sides of the bag. Turn the fabric so the right sides (which will be the outside of the bag) are together and line up the top and sides of the bag. If you do not want a drawstring, simply sew along each long side of the bag, leaving about a half inch of fabric between the edge and the seam. If you want to add a drawstring, you will sew all the way on one side (with the same distance from the edge to the seam as above). On the other side you will sew from the bottom of the bag and stop about 3 inches from the top of the bag (where the opening will be).
6. Sew the edges.
7. If you are making the drawstring, you will now have one side of the bag where the fabric is not stitched all the way to the top.
8. For the drawstring, starting on the side where the fabric is not stitched all the way, fold the top inch of fabric down and then fold it over again. Pin it all the way around to form a band of fabric at the top of the bag with no cut edges showing.
If you are not making a drawstring, then fold the fabric at the open top of the bag over twice and pin it in place. This will create a finished edge which you will sew around.
9. At the open edges of where the drawstring will go, fold the cut edge of the fabric in, hiding the raw edge.
10. For the drawstring bag, sew around the band of fabric, keeping the stitching just above the bottom fold of the band. This will create an open space for the string of the drawstring to go through.
For the open top (non-drawstring) bag, sew around the folded open edge of the bag to create a finished top.
11. If you are not making the drawstring bag, your bag is finished and ready to use.
12. If you are making the drawstring bag, you now have the space that the string will go through.
13. This is what your opening for the string should look like.
14. To make the "string" for the drawstring, cut a 2 1/2 inch wide piece of fabric which is about two and a half times as long as the width of the bag (in the photo the strip of fabric is folded in half, but by looking at it I can see that it is more than twice as long as the width of the bag)
15. Fold the raw edges of the fabric strip into the middle and press flat with an iron.
16. Fold the now folded outer edges of the strip into the middle and press flat with an iron.
17. Sew along where the folded edges meet to create a solid strip of fabric with no raw edges.
18. Pin a large safety pin to the end of the fabric strip (which is now the string for the drawstring). Feed the pin through one of the holes which will hold the drawstring. Use your fingers to scoot the pin and fabric strip all the way around until it comes out the other side.
19. The drawstring is now ready to use.
20. Don't forget to take your bags with you when you go to the store or farmer's market.
If you have any questions or any of the steps could be clearer, please ask away!
December 6, 2010
Festive Holiday Garland Tutorial

I made this festive garland and I wanted to share. I started making these multicolored circles as ornaments that would hang alone. When I saw them all together I wanted to keep them this way. The great thing about this project is that I used scrap fabric to make it. I love mixing bright colors and patterns, but you could also use varying shades and patterns of one color. Or you could combine a couple of colors like red and green, gold and white or blue and silver.
You could put this garland on a tree or hang it anywhere that needs a bit of festivity.
Materials:
Fabric, in various colors or patterns
Scissors
A sewing machine
A sewing needle
Heavy duty thread for stringing the garland, upholstery or quilting thread works well

1. I save all of my scraps from making other things and I have plans for a few projects in mind to use them. For this project, I chose pieces that were big enough to cut large circles (about 4 inches in diameter) and three smaller sizes.
2. Cut the circles in a variety of sizes. There is no need to measure, but just make sure that there are approximately four different sizes.
3. Match up the circles. I chose to give each one four layers, starting with the largest and making sure that each circle is about a quarter of an inch smaller than the one on top so you can see each layer of fabric.

4. Sew the circles together. The back of this one shows the sewing pattern, but, to keep all the circles lined up, I sewed them from the front. You can use whatever method of attaching the circles together that you want. A simple stitch in the middle will hold them together. However, I liked sewing them together in a star pattern. It binds the layers together smoothly and adds another element of design to each piece.
To sew in this pattern, start in the middle of the smallest circle. Sew out toward the edge of the second largest circle. From there, turn and sew back toward the middle. Repeat this as few as three times or as many as five to make this star shape and completely bind the circles together.

5. A few examples of the way that I sewed the circles together. On the larger circles I often made more than five points. It is not necessary, just a bit of design. Finish sewing all of your circles together before putting them together as a garland.

6. Now its time to put all of the circle pieces into a garland. Using your needle and thread, start on the edge of the first circle. You can hide the stitching, by poking the needle into the biggest circle's fabric under the second largest circle. Choose a spot on the upper half of the circle (once the circles are stitched onto the thread, they will be able to move, to keep them from falling forward, you want to stitch through the upper half of the circle). Holding the circle so the side with all the layers is facing you, poke the needle through the back to the front.
7.Then, poke the needle toward the back. Pull the thread through the two holes.
8. Find a spot across the circle from the other needle holes and sew to the other side (in the photo the upper half of my circle is on the bottom, until I flip it over in step nine).
9. The needle is poking through to the front of the circle. Poke it through to the back of the circle again.

10. Here, you can see the way the stitching will look from the back.
11. Continue stitching circles onto the thread, sliding them down the thread as needed, until all of the circles are attached to the thread.
12. They look pretty, like Christmas lights or balls from the back.
13. Once all of the circles are stitched onto the thread, you are ready to hang your garland. Make sure to leave plenty of thread on both ends to hand it from. The circles can slide closer or farther from each other as needed.
I hung my garland over the mantle in our living room, with some pine boughs, it's looking quite festive.
November 29, 2010
In Progress

I am in a bit of a sewing frenzy this week, getting ready for a craft fair on Saturday. In all of this making, sometimes it seems like each new idea improves vastly upon all of the others. I do enjoy the process, but I will be glad when the frenzy is over. I am looking forward to making Christmas presents and working on some ideas for myself.

Today its just sewing and an attempt at sourdough baguettes, which didn't go perfectly this time but I will definitely try again.

I have projects and recipes that I want to share with you, they will be coming soon! Now I am off to deliver a bag that the owner of the bakery around the corner bought from my shop. It's all wrapped up and I'm delighted that I can hand deliver it.
November 12, 2010
Make it Yourself: A Potholder Tutorial

I've been wanting to share this simple project with you for a while. This potholder is easy to sew and very useful in the kitchen. I use mine a lot, throw them in the wash when they need it and, every so often, make a new one as the others become too worn. They also make a great handmade gift which I like to give along with a jar of preserves or salsa, and some homemade sweets or baked goods. It's a pretty simple gift that, for me, reflects things that I care about and want to share. In the next few weeks I hope to share some other ideas for handmade gifts.
As you know, I love being able to make things myself and this is another thing you can make instead of buy. It is completely utilitarian but you can make it as beautiful or simple as you want. A potholder doesn't require a lot of fabric so you can use a left over piece that you like or choose something to match your kitchen. You only need to be able to sew a straight stitch and, while a machine sews it up tightly, you can even sew it by hand.
I'll take you through the process step by step. The steps are arranged in groups of four. Each photo illustrating a step has a number which corresponds to a numbered instruction. This is my first sewing tutorial so if you have any questions or feedback, please let me know! Have fun creating!
Materials needed:
sharp scissors
pins
an iron
thread
cotton fabric (a piece at least 8 inches by 20 inches and one or two pieces for the binding which will equal a 3 inch by 30 inch strip)
batting - Do not use synthetic batting as it won't withstand heat. I usually use cotton quilt batting, but this time I used some bamboo fiber stuffing which I bought at a fabric store. There are insulated battings and fabrics, but cotton works just fine for normal everyday use.

1. Measure and cut your fabric.
2. You will be making an 8 inch by 8 inch potholder so the fabric should measure 8 inches by 20 inches.
3. Since it is 8 inches by 20 inches you will fold the fabric over into an 8 inch square with 4 inches left over. The extra four inches will wrap around the batting and overlap with the top fabric.
4. The binding for the potholder will be a thin strip of fabric that goes all the way around the edges with a few extra inches for a loop for hanging. You will need either one piece of 3 inch by 30 inch fabric or two pieces that are equivalent to that length.
Once you have cut the potholder fabric, you can add an appliqued design. Applique is simply attaching fabric (which has been cut into the desired shape) on top of another fabric. I use my machine's zigzag stitch all around the edges of the shape I have cut out to keep it secured to the fabric beneath and keep the edges from fraying. It can be a bit tricky at first to stitch around complicated shapes. Just go slowly and you'll get it with practice.

5. Make the binding tape. Taking your strip of 3 by 30 inch fabric, begin at one end and fold the outer edges into the middle. The cut edges should be facing each other and the outer edges of the strip are now at the folds.
6. Iron the fabric to keep the cut edges folded in. Continue to fold the edges in and iron them until the whole strip (or strips) is folded this way.
7. Fold the folded strip in half so that the cut edges are hidden and the two folded edges meet.
8. Iron the folded strip for a second time so that the previously folded edges meet and the whole strip is folded in half.

9. Open up the large potholder piece of fabric. Arrange batting on what will become the back of the potholder. This will be an 8 inch square starting 8 inches from one end (this part will be the top) and four inches from the other end (this part will be the overlap). Make sure that the batting reaches the corners and edges of the square (it is okay if it is slightly larger than the 8 inch space). The batting, or stuffing, should be about an inch thick.
10. Fold the 4 inch overlap over the batting.
11. Fold the top over the batting and make sure all of the batting is tucked inside the space of the fabric. You will want the batting to come close to the edge, but it can be a little bit thinner near the edges as the binding will be going around that area.
12. Beginning with the corner that you want the potholder to hang from, pin the binding around the potholder fabric. Unfold the binding slightly and place the top fold on the top of the potholder and the bottom fold on the bottom so that the binding sandwiches the potholder fabric and covers the cut edge of the potholder fabric. Pin through all four layer of fabric to hold it together.

13. Continue pinning the binding all the way around the potholder closing off any open edges of the potholder fabric and making sure that binding covers the cut edges of the potholder. If you are using more than one strip of binding, when you start a new strip, fold over the cut end of the new strip and place it overlapping with the already pinned strip so there are no raw edges.
14. When you have pinned all the way around to where you started, make sure that the raw edge of the the beginning of the binding is covered by the binding as it comes back around. The binding will extend out a few inches from the potholder to become the loop from which to hang it. Note: In the photo my excess binding is much longer than it needs to be.
15. Beginning where you started pinning the binding, sew around the potholder, making sure to sew through the top binding, top of the potholder, bottom of the potholder and bottom binding (which are all pinned together) all the way around.
16. When you reach the end of the binding, continue sewing the binding tape that will become the loop for hanging the potholder. Stitch along until you reach the end of the binding.

17. Take the binding that will become the loop and fold it in half, tucking under the raw edge, so that it meets the corner of the potholder.
18. Pin the loop in place.
19. Sew around the tucked end of the loop to securely attach it to the potholder and keep the cut end from showing.
20. Your potholder is finished and ready to be used, gifted or hung in your kitchen!
September 29, 2010
Why I DIY
I recently started reading the site Scoutie Girl, and this morning Tara posed this question: Why do you DIY? She has some great reasons to do it yourself and I wanted to share some of my motivations and thoughts on DIY, too.
Making it myself is a big part of how I interact with the world. I don't want to just be an observer and consumer. I can't help it, I am a maker and creator. By making something I am putting a bit of myself into the world and starting a sort of give and take, a dialogue between being an observer and creator. It is also really important to me to be able to rely on my own hard work and creativity. I know that I won't need to buy any salsa this year, since we have plenty that I canned in our cupboard. That is so satisfying.
I am curious and I think I often want to know what it is like to make something, whether it is a batch of homemade croissants or a skirt to wear this weekend, I want to know and understand the process. I also like to see if I can actually succeed at making something
I like a challenge. I'm not a really competitive person, but I like to think that I can make something that I need that will (ideally) be just the way I want it. I was working on a little project last night and I realized that everything I am making for Seedling Design has come from something that I wanted to make for myself. I love making things that are just right for what I need and now I am so excited to be able to share these since, I suspect, they will be just right for many other people to. It reminds me of what my Mom has always said about gift giving, that you should always give something that you would like to receive. I am thrilled to be making a small business sharing the things that I love.

My latest creation makes me wonder, though. I made a little book, almost like a planner, because I sometimes need to jot things down when I am on the go. I usually keep dates and to do lists in my head, but I am hoping I can declutter my brain a bit by having somewhere else to write them. I wanted something nice looking and handy. I love it, but I realize that Apple may have cornered this market with the ubiquitous iphone. I have a cell phone, but its not smart or anything and I'm fine with that. So, I've made the low tech, no batteries needed, perfect place to jot notes, to do lists or numbers. It may not be the thing everyone else needs, but it fits in perfectly with why I DIY.

I don't want or need anything high tech, I'm happy with what I can make myself.
I would love to know why you make things yourself, please share in the comments and check out Tara's post, too!
August 20, 2010
In the Mail

Its a lost art, people say. Communicating via pen and paper. I wonder if kids even pass notes in class any more, or if they just text back and forth. In my recent move, I found piles of letters that I have saved for years. Random records of moments in my life, received from friends and family all over the country and the world.
I think my letter writing really started when I moved to a new state after sixth grade and wanted to keep in touch with my friends. I didn't have email until I was a senior in high school and during the years leading up to that I made a number of friends who lived several towns or counties away. Of course we could have dialed each others' numbers, but I've always been more inclined to pen a letter to someone far away than to call them. Not that I don't like talking on the phone and catching up immediately, sharing laughs, and catching the cadence of someone's voice. At that time, though it was a good way to connect with and get to know people that I might not spend hours talking to on the phone.
Over the years I have kept in touch with friends far away, and some near, by writing. Letter writing is a chance to sit down, pause, and spend some time with someone who's there only in spirit. When the letter reaches their mailbox and they rip open the envelope, they get to spend a few minutes with me, wherever they are.
Now that I live a few days' drive from most of my loved ones, I am reminding myself to take up letter writing again. Even though there is email, texting, phone calls, and facebook (I draw the line at tweeting), I still value the exchange of writing. Of course I appreciate the possibility instant gratification and connection. The ability to connect any time I want certainly has its merits and so does being able to buy a snack and eat it out of the plastic bag when you are hungry. But making it yourself and sitting down to savor it is so much better.
I realize that its a bit strange to be promoting letter writing on a blog but some of you may recall the series of slow posts I started last winter (I haven't forgotten about them, there are more to come!) In honor of slowing down, why not write a letter? In these days of insta-communication, I think there is something special about going the slow route.
February 25, 2010
Pockets
Simple sewing projects can be so rewarding. Especially when they allow me to solve a problem with my own creativity. I have a few different bags that I carry with me to work or when I am out and about. I like to bring a book, maybe my journal, sometimes an additional layer of clothing, and a travel mug. The bag needs to have enough space to accommodate these things, but I don't always use the same bag and sometimes I would rather not carry a bag at all. Still, I have a few essentials that I bring everywhere: my wallet, keys, usually lip balm and most often a cell phone. It is annoying to have to shuffle these items from bag to bag and pocket to pocket. I often absentmindedly stash them in different pockets of a bag or coat or leave them among the other items and debris.
For a long time I have been meaning to solve this problem and finally, the other day, I made a little bag for stashing all of my essentials. Some might call this a purse, when I showed it to Ray he said it was a tool bag, but whatever it is called, it has, in a day or two, proven to be quite useful.
It was really simple to sew: two peices, sewn right sides together and turned inside out. I determined the best pocket to cover ratio and sewed up the sides. I almost didn't put a button on it because I wanted it to be really simple, but I'm glad I put the button and elastic tie on so that nothing slips out while its shuffling around in my bag.
January 25, 2010
Take it slow: Make Yogurt
On one of the last days of 2009, or maybe an early day in 2010, I heard a short piece on NPR about the last decade's food trends. The host of All Things Considered was chatting with an expert on what foods are popular and, aside from the ham sandwich which he said has been and will continue to be a staple for most people in the United States, the biggest edible trend in the last decade was yogurt. In a cup, a tube, or a bottle; with fruit on the bottom, mixed throughout, or just flavored; Greek, Icelandic, French; goat, soy, sheep, or coconut milk; for breakfast, lunch, and maybe dinner. Yogurt comes in a ridiculous number of manifestations and plastic packages. Honestly, its not a very exciting topic of conversation, especially when you picture all of those cups and tubs lined up under the supermarket's fluorescent glow.
These days, if I am in the supermarket, I usually breeze by that collection of colors, flavors, and thicknesses, I just grab a bottle of milk and continue on my way. Yogurt is a staple of my kitchen: sometimes I use it in cooking and baking and I look forward to eating for breakfast with granola and a bit of maple syrup. For the past few months I have been regularly making my own yogurt and for me, this is where the mundane discussion of yogurt gets exciting. Before I tell you how I have been doing this, let me tell you why I think you should join me in making your own yogurt instead of buying it at the store.
First, its economical. For less than the cost of a quart of plain yogurt I can buy a half gallon of milk (from cows that live about 7 miles from me) and make two quarts of yogurt. This alludes to another reason for make yogurt: I can buy local milk, I can buy organic milk and I can be as informed as I want to be about where the milk comes from, whereas when I buy a plastic tub of yogurt from a national brand I can't always be sure of its sources. When I make my own yogurt, I can avoid all of the sticky, sugary, gelatinous additives that are often mixed into what is a supposedly healthy food and I can add to it whatever flavors, fruits or sweeteners strike my fancy.
There are several really good locally made yogurts that I could buy, but beyond the idea of knowing what is in my food and where it comes from, but I really love knowing how it is made and that I don't have to rely on someone else to make it for me. Of course, I don't have my own cow yet and its not practical to make absolutely everything yourself, but this is one small thing that I can do. Even though its just a weekly routine, making yogurt is part of the process of slowing down and enjoying a very small luxury. Aside from the various health benefits of yogurt and cultured foods, by taking the time to do this, I am making a point of being involved in what I eat and thus taking good care of myself in a small way.
Another reason that I like making my own yogurt is that is cuts down on waste. I almost always buy milk from a local farm in returnable/reusable glass bottles so for two quarts of yogurt the only thing I toss in my recycling bin in is the little plastic milk cap. I know that yogurt cups are recycled and made into toothbrushes but if I don't use them in the first place then I avoid contributing to the use of energy and materials for making and recycling them.
Now, at this point, you are either thinking, "Get on with it -- give me the recipe" or "No way, this is going to be too complicated and time consuming." Well, please keep reading to find out how simple it can be. Its all about slowing down, yet it doesn't take much active time to make -- the yogurt cultures do the work for you.
Here are just a few more things to note about yogurt making: Whole milk is the milk I use for home yogurt making. Although commercial yogurt comes with various amounts of fat, whole milk works best in this case (and lately I've been hearing about how full-fat milk is the healthiest kind, but you can try other types if you prefer). I haven't tried goats milk or raw milk so I can't say how well those work. You don't need any special equipment, although a kitchen thermometer can come in handy. There are a variety of special yogurt makers or you could use a crock pot to the yogurt warm, but I took at tip from Harold McGee and just wrap two quart-sized mason jars in a pile of clean dish towels.
For the starter I usually grab a small cup of commercial plain yogurt which has lots of live cultures. Save a little bit of that batch as the starter for your next batch. I don't always manage to save some of the old batch to make the next one, so I have also purchased some yogurt starter from a home cheese making company so that I don't have to go out and buy more yogurt to get the next batch going. I really enjoy the soft, pourable texture of homemade yogurt, but if you prefer something firmer you can add dry milk powder to the milk when heating it. I would love to hear about your yogurt making experience and as I am hoping that home made yogurt will be one of the trends of the next decade!
Yogurt!
A half gallon of milk yields two quarts of yogurt since I think it is easier to make a larger amount each time. (Update 2014: I usually use a gallon at a time and make yogurt every other week)
1-Half Gallon of whole milk
4 tablespoons of yogurt containing live cultures
2 quart sized mason jars
Pour milk into a heavy-bottomed pot and place over medium-high heat and heat the milk to 180 degrees (if you don't have a thermometer: at this temperature the milk will be steaming and just starting to bubble). Remove from heat and let the milk cool to 120 degrees (which is very warm, but not hot). Its is pretty easy to guesstimate the temperatures without a thermometer, but it is crucial that the yogurt be cool enough when you add the starter or it will kill the cultures. It also has to stay warm enough for the cultures to thrive and grow. Whisk in the yogurt and pour the milk into the clean mason jars. Screw lids on top of the jars and place them in a fairly warm place. Cover and wrap the jars with 6-8 clean dish towels. Let the yogurt set on the counter for at least 6 hours (or up to 12 hours) at which point it should be quite thick. Move it to the refrigerator where it will keep for at least two weeks. For Greek yogurt: line a colander with clean cheesecloth and spoon in the yogurt. Let it drain until it reaches the desire consistency. For yogurt cheese let drain until it is a spreadable consistency and use as it or add salt or herbs.
January 21, 2010
Aprons
Just a quick look at some aprons I made for servers to wear at Sunday brunch at O'Naturals. Aprons are so fun, to make and to wear. I think I will be making many more in the future.
December 5, 2009
A Quick Look


Here are a few of the bags I have made recently. I've been having a lot of fun with color and shapes, and incorporating as many visually appealing veggies as I can! Come to think of it, that's often how I make dinner, too. Have a great rest of your weekend!
December 3, 2009
Finishing Touches
Its a balmy and very blustery December morning that feels like it must be March. But I hope that I didn't miss all of winter, and I am eagerly waiting for snow and the coziness that cold weather brings this time of year. In the mean time, I have been reading about other people's excitement for the season over at Habit (a beautiful poetic site that I could just keep reading and reading) and gearing up for my own projects and excitement.
Finishing touches for the holiday sale that starts tomorrow. Its the first one I've done in several years and the first one to include so much sewing. Lots of threads -- on tags and for hanging ornaments. Most of the bags, potholders and ornaments I have made are veggie themed with a few others here and there. I am looking forward to the adventure and then a few more sewing projects and a lot of time in the kitchen in the next couple of weeks.


Finishing touches for the holiday sale that starts tomorrow. Its the first one I've done in several years and the first one to include so much sewing. Lots of threads -- on tags and for hanging ornaments. Most of the bags, potholders and ornaments I have made are veggie themed with a few others here and there. I am looking forward to the adventure and then a few more sewing projects and a lot of time in the kitchen in the next couple of weeks.


December 2, 2009
Creating
I have been sewing up a storm around here. Since September I have been working on variety of sewing projects to bring to a holiday sale which is taking place this coming weekend. My normally neat work space has become littered with fabric and scrids and scraps. I much prefer to keep things organized, but there is a point when the work takes over and a messy storm ensues.

I have always enjoyed making things, its really always been a part of my life since before my mom, sister and I had "craft club" and when I would make things from clay, styrofoam and alabaster in my dad's studio. I was an art major in college and spent a lot of time hand sewing abstract and figurative forms. There is something about binding fabric together that I find amazingly satisfying. Not just the binding of fabric, but the whole act of creating: the connection between the hands and the mind, the physical and mental and the way that they work together and push each other endlessly to make new things.
My latest projects (which you will soon see here) are colorful, useful and contain a bit of my love of food and growing things, too. This week I've been finishing up the last few projects, making tags, and figuring out my display. I've so enjoyed pushing myself to do this sewing daily and weekly and I hope to continue along these lines after the sale is over. I have so many more ideas I want to try. Of course, after this weekend I will be temporarily focused on making and finishing projects for Christmas. If you don't make it to the actual sale, I will share some of my projects here, soon.

What projects have you been working on lately?
Subscribe to:
Comments (Atom)


