Showing posts with label recipe. Show all posts

March 22, 2017

Crunchy Vegetables and Bold Colors


At first it feels like gripping the textured plastic holds, twenty or thirty feet up in the air secured by a rope and a harness; unable to go any farther, readying to let go. That scary second of swinging free but no doubt that the rope will hold and you will be slowly let down until you touch the ground again. It's a feeling of jumping into the unknown when you really have nothing to lose. I can't remember a time when I didn't take as many liberties with a recipe as I needed but recently I have felt myself forging even farther ahead without holding on to a guideline to keep me safe.

The salad below is an example of something I threw together without hesitation or concern about the results. I was delighted enough to make it again a few days later and to want to share it here because the combination of crunchy vegetables, bold colors and tangy lime juice is a lovely antidote to the grey, mud, and dirty snow that surrounds us in these early days of spring.

But I've been feeling more than just improvisational moments in the kitchen. It is a letting go, uncertain of what will happen but knowing that I won't come crashing down. I don't know if it is mastery or foolishness, it feels a little wobbly and a bit rebellious but it comes down to trusting myself, at least when I am standing at the kitchen counter. Not sure how to make miso ginger dressing and no recipe seems quite right? A little of this and a bit of that shaken in a jar. A whim to make braided rolls but no bread cookbooks offer what I am looking for? Just go for it

This feeling of freedom and confidence in the kitchen is, perhaps, at odds with the uncertainty and challenges in so many aspects of life. But I feel bits of it leaking in here and there, beyond mixing bowls and sauté pans, a sense of freedom and acceptance in the rest of life. I am more concerned about the results than I am when I make a salad but sometimes I can trust myself.


Cabbage Carrot Cilantro Slaw 

I'm providing a recipe, though I encourage you to let go a bit and find creative freedom wherever you can. This colorful crunchy slaw is great on its own but we've been eating it with black beans and crepes or tortillas and whatever else you like on top. I use bottled lime juice because it is an easy way to have lime on hand but freshly squeezed lime would be great and you can adjust the amount you would like to your taste. 

2 scallions
1 large carrot, grated (about 1 1/2 cups)
3 cups of thinly sliced red cabbage (a mandoline is great for this)
1/4 cup chopped cilantro
1-2 tablespoons lime juice
1 tablespoon olive oil
Salt, to taste

Cut of the root ends of the scallions and thinly slice all the way to the end of the greens. Chop the sliced scallions into smaller pieces. Combine the chopped scallion with grated carrot, shredded cabbage, chopped cilantro, lime juice, olive oil and salt. Toss a few times until everything is mixed together.

April 4, 2012

Sweet Potato and Beet Chips

DSC_0045

I'm very fond of tortilla chips. Their crunch, their texture, their perfect complement to salsa. The kind that are made locally are very sturdy and not too salty. I know that they are not the healthiest snack so I decided to try making chips from sweet potatoes and beets for another type of satisfying crunch. I made them the same way that I occasionally make chips from leftover tortillas, brush them with olive oil and put them in the oven.

sweet-potatoes

It's nice to have something with a good crunch, a hint of salt and plenty of good vegetable flavor. I ate many sweet potato chips while waiting for subsequent batches to cook.

beetchips

I'd eaten half a sweet potato by the time I tasted the beet chips.  These crisped red roots were less sweet and more earthy than the sweet potato chips. I was amazed by the way the beet flavor was concentrated and highlighted when turned into chips. Making both vegetable chips mostly takes the right timing. Cooked too long, they hint at burnt. Taken out of the oven too soon, they won't have the crunch that is ideal in a chip. They are best eaten as soon as they have cooled, but they can be re-crisped if they loose their crunch after a day.

DSC_0052

Sweet Potato and Beet Chips
There are many options for seasoning these: cumin, cayenne, chipotle, garlic... But I like just salt and pepper so it doesn't interfere too much with the flavor of the vegetables. A mandoline is ideal for slicing these.

1 large sweet potato (I chose one that was long and uniformly round but it doesn't really matter)
1 large beet 
Olive oil
Salt and pepper 

Preheat the oven to 350'. Wash the vegetables. Peel the beet (it is fine to leave the skin on the sweet potato) and chop of the root and stem end, and the small ends of the sweet potato. Slice the vegetables into rounds, as thin as possible. They should be a little bit thicker than translucent. Place the vegetable slices in a bowl and drizzle in some olive oil. Toss so that each slice is lightly coated. Place the slices on a baking sheet, close together but not touching. Bake for about 20 minutes or until the slices have shrunk, wrinkled and become crisp. Avoid letting them turn brown. If you're not sure if they are done, take one slice out, let it cool and test it for crunch. When ready, remove the baking sheet  from the oven and let the slices cool, they will crisp as they cool. Toss with salt and pepper or seasonings of your choice.


January 5, 2012

White Bean Spread and Rosemary Focaccia

DSC_0088

Sustenance. Food that nourishes our body, work that nourishes our souls. Conversations and friendships that help us grow, spaces and places that fill our need for beauty, wonder and delight.

On dark winter days, I seek out warmth and light wherever I can. At my sunny kitchen table, in a seat next to the radiator. Piling on layers and heading out for a walk or huddling under a down comforter late in the day. As a great aficionado of coziness, I am prone to dinners in our warm kitchen and cooking at home as often as I can. That doesn't mean that I will turn down an evening out.

On the first day of 2012, Ray and I left the house in the dark of evening, bundled against the wind and harmlessly fluttering flakes of snow, to meet friends for dinner. The place we ended up was spacious but glowing with warm candlelight. The exposed brick walls and golden brown wood floors and tables exuded a toasty feeling. We relaxed into our chairs and ordered from the simple menu. Wine arrived in small juice sized glasses. The white bean dip that we ordered as a starter was silky but substantial, warm with hints of lemon. It didn't take long for me to want to recreate it at home.

Our rental kitchen rarely comes close to the glowing atmosphere of a comfortable restaurant. I try to ignore the dusty corners and dishes in the sink and come back to the feeling of arrival. We are here at the table, we will be taken care of, we will be fed. To find this sense of well being and sustenance, I planned a few hours ahead. Beans soaked in a cast iron pot while focaccia dough rose in a ceramic bowl on the counter. I cooked the beans in the pre-heating oven and then pureed them into a velvety spread while the bread baked into a golden sheet of chewy springy dough.

A simple meal for a cold winter evening, bringing warmth home in so many ways.

DSC_0087

This is the ideal lazy Sunday meal, which soaks, cooks, and rises while you are enjoying other things. There is very little active cooking time but requires some planning ahead.

Creamy White Bean Spread
There is very little hands on work with this recipe, most of time is soaking and cooking the beans. If you prefer to use canned beans, warm them up a little bit first. This spread is quite fine when cold, but best when warm. I used great northern beans, but I suspect that cannellini beans would be very good (here's a little bit about the differences)

1 cup dry white beans
1 small head of garlic
2 tablespoons lemon juice
2 tablespoons olive oil, plus a little for drizzling
salt and pepper

Place the beans in a large bowl or pot (a dutch oven works well for cooking them, but any pot will do) and cover with a few inches of water. Leave the beans to soak for 4 hours or more.

About an hour before you want to eat, place the beans and their water in an oven-proof pot (make sure there at least two inches of water covering the beans). Turn the oven to 400 and put the pot, covered, in the oven. Meanwhile, take the head of garlic and cut off the stem so that the very top of each clove is removed. Peel off most of the outer skin, but leave the skin around each clove intact. Put the head of garlic in a small oven proof dish and drizzle some olive oil to cover the top. Roast the garlic in the oven for about 20 minutes or until each clove is very soft (they will be burning hot, so poke them with a fork to check them). Let the garlic cool.

After one hour, check the beans. They should be completely soft, but not falling apart. Carefully remove the pot from the oven and let cool for a few minutes.

Spoon the beans into the bowl of a food processor. Squeeze the roasted garlic out of each clove and add to the beans. Pour in the lemon juice and olive oil. Puree for several minutes until smooth. If the mixture is too thick, add some of the cooking liquid from the beans to thin it to a smooth, spreadable consistency. Add salt and pepper to taste. Serve while warm.

Makes about 2 cups.

Rosemary Focaccia Bread
Adapted from the Bread Bible by Rose Levy Beranbaum
This dough can rise for nearly as long as the beans are soaking. If you can't leave the dough rising for four hours, let it rise in the refrigerator overnight and take it out an hour or two before shaping the dough. As always, you can use just all purpose flour, but I like the added texture and flavor that comes from the whole wheat. I used my stand mixer to mix this, but I think it would work fine to stir by hand.

2 cups unbleached all purpose flour
3/4 cup whole wheat flour
3/8 teaspoon yeast (active dry or instant)
2 cups minus two tablespoons room temperature water
3/4 teaspoon salt
3/4 teaspoon sugar
olive oil
2 teaspoons fresh rosemary (or 1/2 teaspoon dried), chopped
1/4 teaspoon salt for sprinkling on top

In the bowl of a stand mixer (or in a mixing bowl) place the flours and yeast. With the paddle attachment running on low speed, combine the flour and yeast. Keep the mixer running and slowly pour in the water. Mix until the dough comes together and then increase the speed to medium. Mix until the dough becomes smooth and shiny, about 15-20 minutes. If stirring by hand, stir until the dough is smooth and shiny, ideally for 15 to 20 minutes (the stirring helps develop the gluten). Add sugar and salt and mix well to incorporate.

Oil a bowl or container with olive oil and pour the dough into it. Cover so that it is airtight and let rise for about 4 hours, or at least until it has doubled. About an hour before you are ready to bake the dough (around the time you put the beans in the oven) coat a sheet pan with olive oil (parchment paper may also be helpful to keep the bread from sticking while it bakes). Pour the dough onto the baking sheet and gently stretch it until it covers the pan. Let the dough rise for about an hour.

If you are cooking the beans then the oven is already preheating for the bread. If you haven't turned the oven on, preheat to 475' while the dough is in its final rise. Place a rack on the lowest level in the oven and put your baking stone (if using) on the rack while preheating.

When the oven is ready and the dough has risen for an hour, drizzle a table spoon of olive oil over the dough. Sprinkle on the rosemary and salt.

Bake the bread for 12 to 14 minutes, until the top is golden brown. Remove from the oven and drizzle on more olive oil if desired. Cut or rip into smaller pieces and serve immediately.

Quick Caramelized Onions
For topping the white bean spread or the focaccia

1 medium red or yellow onion
olive oil
salt

Slice the onion into thin strips. Heat a skillet or saucepan over low heat and add a small amount of olive oil. When the pan is hot, add the onions. Cook over low heat, stirring every so often and making sure they don't burn. Cook for about 15-20 minutes or until the onions darken to a rich brown. Add salt, if desired. 

November 28, 2011

Relaxed and Productive

Thanksgiving 2011


I've decided that Monday is the new Sunday. Which explains why this post is appearing late in the day and not first thing Monday morning as I would have liked. I am generally a first thing Monday morning type of person. I like to be prompt and organized. I usually have a very long to do list at the start of the week and on Monday I feel a great deal of pressure to get it all done. I almost always work at my restaurant job on Saturdays, and often on Sundays too. On these weekend days I ignore my list, but I still go to work. When I am working at home, the first day of the week becomes a struggle between my need to be productive, my wish to accomplish everything, and the difficulty in starting the week off running.

I always have high hopes for Monday morning, but I think it's time to lower my expectations. I'm okay with easing into the week and taking more time today to get organized and start projects, but maybe I won't get very far. I'm not the greatest at finding this balance but as I think about the added holiday projects on my list I want to make sure to enjoy the process. What are you doing to find balance in this busy time of year?

Thanksgiving 2011


Our Thanksgiving day was very relaxed, but we balanced that with cooking (which was also relaxed and productive as you can see above). On the way back from our morning walk, while pie crust chilled, I envisioned with the salad we would eat. It combines good fall ingredients into a warm salad that is hearty but not heavy, a nice contrast to many Thanksgiving dishes. Since squash, cranberries and walnuts are all still in season, I wanted to share this recipe which is good on a holiday or any day.

Winter Squash, Cranberry, Walnut and Arugula Salad
The sweetness of the squash (I used butternut) and the maple mustard vinaigrette balance the tartness of the cranberries nicely. I normally like my salads lightly dressed, but I like this one a bit more heavily coated. We had mac and cheese for our meal, so I didn't add cheese to this salad but some crumbled goat cheese or grated parmesan would work very nicely in it.

2 cups of peeled and cubed winter squash
1 cup whole cranberries
cumin and cinnamon
salt and pepper
1 cup walnuts
2-3 cups arugula

2 tablespoons olive oil
1 tablespoon apple cider vinegar
1 teaspoon grainy mustard
1 tablespoon maple syrup

Place the squash in a pot, cover with water and simmer until the squash can be easily pierced with a fork. Drain the squash. Bring a cast iron skillet to medium heat. Add a small amount of olive oil or butter and add the squash. Cook, stirring occasionally until the squash cubes begin to brown. Add a small sprinkle of cumin and cinnamon as well as salt and pepper. Pour in the cranberries and continue cooking until the cranberries are hot and some of them have lost their round shape. Pour the cooked squash and cranberries into the bowl you want to serve them in. Roughly chop the walnuts and toast them in the pan same pan. When they are toasted, add them to the bowl. Toss in the arugula.

Mix the olive oil, vinegar, mustard and maple syrup, whisking to emulsify. Toss the amount of dressing you would like with the rest of the salad. Serves 2-4, depending on whether it is a main dish or a side.


October 5, 2011

Red Pepper, Goat Cheese, and Basil Frittata


I'd like to introduce you to the frittata. Perhaps you two are already acquainted? We haven't known each other for long, but it's been my recent companion when I'm making dinner for myself. We also meet for the occasional breakfast or late lunch. Though we've seen each other a lot lately, there are so many possibilities that I'll never get bored. The frittata is more laid back than a quiche, lighter and less fussy, too. It takes minutes to make, which is ideal on the nights when you want something satisfying but you can barely be bothered to cook. It can go from rustic to sophisticated and makes for a rich but nutritious meal. I could go on and on, but I'll leave you with the recipe so you can try it yourself.

DSC_0112

Red Pepper, Goat Cheese and Basil Frittata
I have an eight-inch cast iron skillet which fits this frittata perfectly. I eat some for dinner and finish the leftovers for breakfast. If you don't have a skillet this size, you could add more eggs or just end up with a thinner but larger version. I definitely recommend making this in a cast iron skillet to keep it from sticking. You can take the basic recipe and add any vegetables, cheeses or herbs that you like.

1 small red bell pepper
1 small onion
5 eggs
salt and pepper
1 tablespoon butter
1/4 cup soft goat cheese
several leaves of fresh basil

Turn on the oven to 400'. Cut the pepper into thin slices and cut those slices in half if they are too long. Thinly slice the onion. Crack the eggs into a bowl, season with salt and pepper, and beat until frothy. Place your skillet over medium heat. When the skillet is warm, drop in the butter. After the butter melts, drop in the onions and saute until very lightly caramelized. Add the peppers and saute for a minute. Pour in the eggs. Gently make sure the vegetables are evenly distributed. Crumble the cheese over the top. Rip the basil leaves into smaller pieces and sprinkle on. Continue cooking the frittata on the stove until the sides are lightly browned and pull away slightly from the skillet (2-3 minutes). Place the skillet in the oven and bake for 10-15 minutes until the frittata has puffed up and is completely cooked through. Serve warm or at room temperature.

September 9, 2011

The Taste of a Fresh Summer Peach

DSC_0045

I am enamored with fruits and vegetables. Hanging heavy from tree branches or bushes, ripening from green to red in the warm sun, piled in a bowl, chopped on a cutting board, or tucked away in a jar. This is before they even get to my plate.

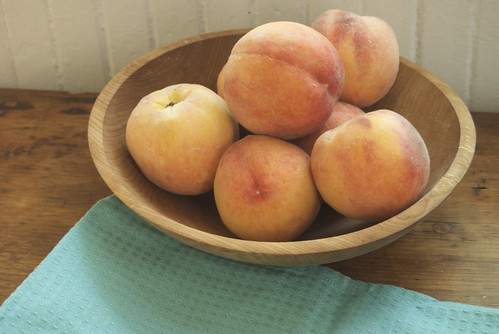
Peaches, though -- peaches! Piled into a wooden bowl, ripening in the morning sunlight. Golden flesh covered in a softly blushing fuzzy skin. They are sweet and juicy and decadent like the long lasting, utilitarian apple could never be. I am happy to eat these peaches, even though they are a gorgeous still life which I don't want to disturb.

Luckily I have more. I received a box of 25 organic Colorado peaches last week. The farm where I work offers shares of other delicacies besides the vegetables we grow, so every other week I take home my fruit share in a box. The fruit is collected from organic farms all over the country. Often it is a selection of mixed fruit, but sometimes we get just one thing: blueberries, cherries, or, last week, peaches.

When you have fruit that is nearly perfect, it is a luxury to enjoy it in abundance. The peaches need no adornment, and I've eaten many just as they are. It is almost silly to tamper with them, but I couldn't resist adding a little cream and crust to these lovely fruits.

DSC_0010

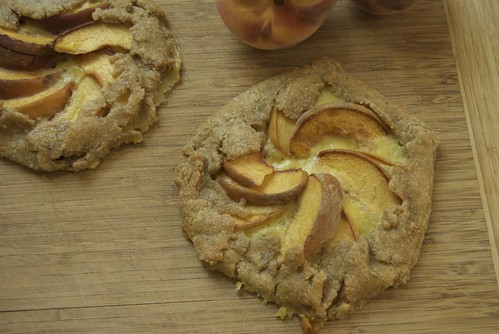
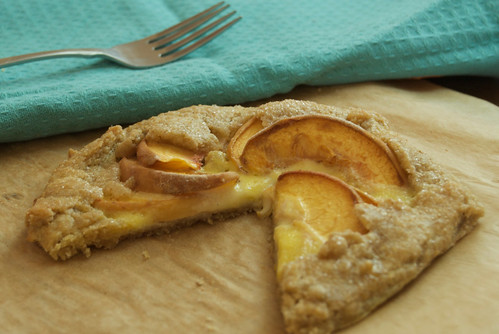
I baked these rustic, individual tarts with my favorite gallette dough and a hint of mascarpone.The crust is buttery, tender and flaky. I was inspired by this recipe to make mascarpone cheese and pair it with the peaches. The cheese is an easy way to transform cream into something even better. I was glad to learn another easy fresh cheese, which will come in handy this winter. While these tartlets are not an option year round, I will certainly be making mascarpone again, even when I can only remember the taste of a fresh summer peach.

peach and mascarpone tart


Rustic Peach Tartlets
The crust is a gallete dough adapted from Deborah Madison.

For the crust:
2 cups (8 ounces) whole wheat pastry flour
1/2 teaspoon salt
1 tablespoon sugar
10 tablespoons (5 ounces)  cold, unsalted butter
1/3 to 1/2 cup ice water

Mix the flour, salt and sugar in a bowl. Cut the butter into small pieces and drop them into the flour. Using your hands, a fork, or a pastry blender cut the butter into smaller pieces and mix it with the flour until the whole thing resembles a coarse meal, with some pieces of butter pea-size or occasionally larger. Sprinkle the ice water on top, a tablespoon at a time, and toss the mixture to combine. When you can bring the dough together without loose flour, press it into a ball. Cover and refrigerate for 15 minutes.

For the filling:
1 cup mascarpone cheese (follow Ashley's recipe to make your own, it's fun and easy!)
2 eggs, separated
1 teaspoon vanilla
2 tablespoons sugar, plus more for sprinkling
3-4 ripe peaches

Preheat the oven to 350'

Mix the mascarpone, egg yolks (save the whites for brushing on the crust), vanilla and 2 tablespoons of sugar together until smooth.

Divide the dough into 6 equal pieces. Put 5 of the pieces back in the fridge. Take one piece, flatten it into a round disk and on a lightly floured non-stick surface (I use a silpat, but parchment works well, too) roll the dough until it is about 6-inches in diameter and roughly round. Slice one peach in half, and slice each half into thin wedges, about 8 per half. Spoon two tablespoons of the mascarpone filling onto the center of the rolled out dough. Arrange the peach slices so they overlap with each other and form a circle in the center of the dough (depending on the size of the peach, you'll use about half a peach per tart-let). There should be 1/2 inch to an inch of dough beyond the edge of the fruit. 

Fold the edges of the dough over the peaches to create the edge of the tart. The folded sides will overlap. Gently press the dough together where it overlaps to contain the peaches and filling. Dip a pastry brush in the egg whites and coat the top of the crust. Sprinkle about a teaspoon of sugar over the dough and peaches. Repeat this process for the rest of the dough. Bake for 30-35 minutes or until the crust is golden brown.

Makes six individual sized rustic tarts.

July 21, 2011

Imperfect, but Joyful

DSC_0370

Here's the thing: I love food. I love creating with food and making something out of scattered ingredients. I love taking inventory of what I have on hand and creating a delicious dinner. I love harvesting new onions and the smell of the soil mixed with their onion scent, mud dripping onto my shirt as I carry them out of the field. Picking basil while its heady scent fills the air, crunching into a cucumber seconds after it has been picked, and transforming milk into tart yogurt.

I love making and sharing food here. This creative process for me is very imperfect, but joyful. Challenging but nourishing in so many ways.  Honestly, though I'm not sure what shape it will take, I've realized more and more that growing and creating food is what I hope to make my life's work.

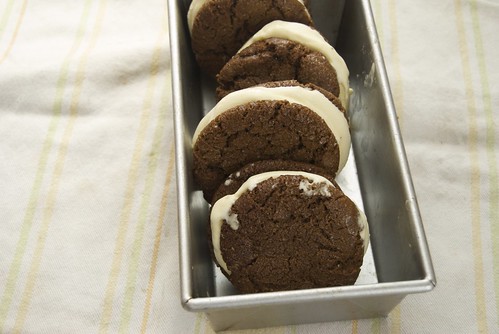
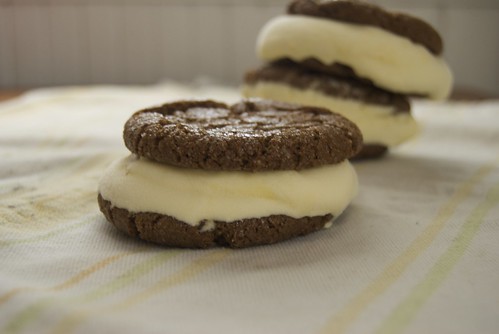
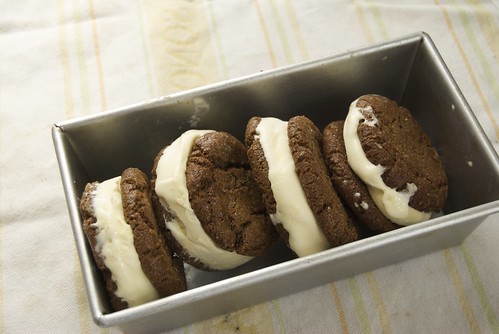
You'll notice that my offering today is a little lopsided. The cardamom ginger ice cream was soft and spreadable when I sandwiched it between two ginger molasses cookies (also it was at least 90 outside and probably 80 in the kitchen, not to mention the humidity). They didn't freeze into the dreamy perfect ice cream sandwiches that I imagined when I thought of making them. They did make for just the right treat on another very hot evening, complete with sticky fingers and dripping ice cream here and there.

DSC_0351

Sometimes, I wish I was a perfectionist. When it comes to creating I am never as focused on the perfect result as on the process, messy though it can be. I could hand you an ice cream sandwich and, most likely, you would appreciate the cool sweet gingery cream tucked between the chewy cookie layers. We would enjoy the summer evening and not even notice if it was lopsided or dripping a bit. When it comes to creating something edible, how it tastes is crucial but to taste it on this screen looks matter even more. I can always throw myself into creating without thinking twice, but my skills at executing (and photographing) the best of what I have made often fall short.

I have a strong desire to learn more about cooking and writing and photography (and sewing and farming) which I will work to fulfill. Still, for me, it is always about the process. This seems to take a meandering path, a winding road that doesn't go directly from one point to another and I can't always see what is around the next bend.

For now, we have cardamom ginger ice cream sandwich cookies. I had some frozen ginger molasses cookie dough that needed to be baked and decided that they should be paired with ice cream. I love ginger and a hint of cardamom, so I thought that would be the right match for the cookies. The recipe takes a bit of time, but a few of these in the freezer will make a heatwave a little more bearable.

DSC_0368


Ginger Ice Cream Sandwich Cookies
This ginger molasses cookie is perfect for making these ice cream sandwiches (but you can use your favorite recipe, too). The ice cream does not need the cookies, it is great on its own (the cookies are too) but they both go well together. Although I love the simple smooth cardamom ginger ice cream, it would also be really good with some chopped crystallized ginger stirred in (maybe 1/4 cup?).

There are several steps in the process of making the ice cream and the cookies, but you can make and freeze the cookies one day and make the ice cream another day. I like to refrigerate my ice cream bases overnight so they freeze well in my ice cream mixer. Once you have mixed the ice cream, freeze it for a couple of hours but take it out and spread it on the cookies before it gets too hard. Freeze the ice cream sandwiches until the ice cream is solid and then enjoy!

Cardamom Ginger Ice Cream
I adapted this recipe from David Lebovitz's vanilla ice cream recipe.

1 cup whole milk
1 pinch salt
3/4 cup sugar 
3 cardamom pods
1-2 inch piece of ginger root
2 cups heavy cream
5 egg yolks

Heat the milk, sugar, and salt in a sauce pan. Grate the ginger root and add it and the cardamom pods to the milk. When the mixture is hot but not close to boiling, remove from heat, cover, and let infuse for one hour (if you are leaving it for longer than an hour, keep cold in the fridge). After the cardamom and ginger have infused the milk, strain out the cardamom pods and grated ginger.

Place a 2 quart bowl into a larger bowl that is filled with water and ice. Place a strainer on top of the bowl and pour in the cream. Whisk the egg yolks together. Rewarm the milk and pour a small amount into the egg yolks, whisking the yolks constantly. Add a little bit more of the milk and continue whisking the yolks. Pour the egg yolks into the saucepan of infused milk and cook over low heat, stirring constantly and making sure to scrape the bottom of the pan to keep the eggs from over cooking. When the mixture thickens, remove it from the heat and pour it through the strainer into the bowl of cream. Stir to combine and refrigerate it until you are ready to mix the ice cream according to the instructions on your ice cream maker.

July 19, 2011

Scapes

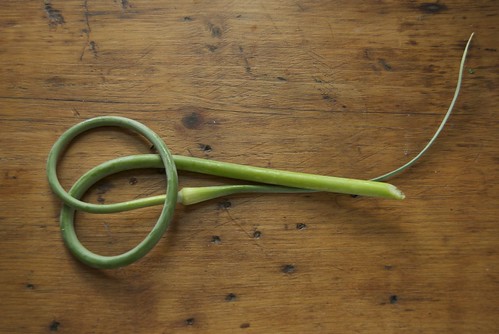
Garlic Scape

Have you tried garlic scapes? They sprout out of the stem of hard-neck varieties of garlic curling into an illegible alphabet of stems. In the northern United States, garlic is planted in the fall and begins to sprout in the early spring. Sometime in June the scapes shoot up. Eventually this stem will blossom in the garlic's "flower" and produce tiny little bulblets of garlic. These can be planted and will grow into small garlic plants, but usually individual garlic cloves are planted to become next year's crop.

Scapes

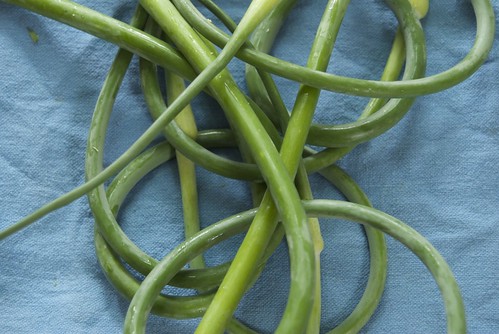
Back to these scapes. They are sweet and garlicky and easy to snap off the stem. Harvesting the scapes helps the garlic plant focus on growing a larger bulb instead of producing a flower. At the CSA where I work we spent a whole morning picking the scapes off the garlic plants. Since then, all of the members have been taking home handfuls of these twisted green stems each week. When the scapes are cooked, their flavor becomes less spicy but still pleasantly garlicky and sweeter than the flavor of a clove.

I recently picked up a copy of Put Em Up by Sherrie Brooks Vinton which is a fun and informative book about different preserving techniques and recipes. One of the sections that convinced me I needed the book was the chapter of recipes for ramps and scapes. I had more scapes than I could imagine using soon and was glad to try Sherrie's recipe for garlic scapes in oil. For me, preserving food is part obsession, part experiment. Each year I try new things that I haven't frozen, canned or fermented before.

Scapes are only available for a short part of the season which is a good reason to enjoy them while they last. If, however, you have more than enough and want to make them last even longer this recipe is a fast way to keep garlic scapes in the freezer to throw in future soups, stir fries, or scrambled eggs.

garlic scapes


Garlic Scapes in Oil
Adapted from Put Em Up by Sherrie Brooks Vinton
If you are freezing the scapes, you can spoon the cooked into ice cube trays to create small blocks of frozen scapes (once they are frozen, transfer to an airtight container). I usually put the scapes into a large plastic freezer bag and flatten the scapes into a thin layer. It is easy to break off the amount that I need this way, too.


1/4 cup olive oil
2 cups finely chopped garlic scapes


Place a skillet over medium heat. Add the oil to the skillet and once the pan is hot, pour in the the scapes. Saute over medium heat, stirring occasionally, for about 5 minutes or until the scapes are cooked but not too soft. Remove from heat and let cool. Store in the fridge for a few days or freeze for several months.

July 14, 2011

Kohlrabi and a Stir Fry Sauce

DSC_0252

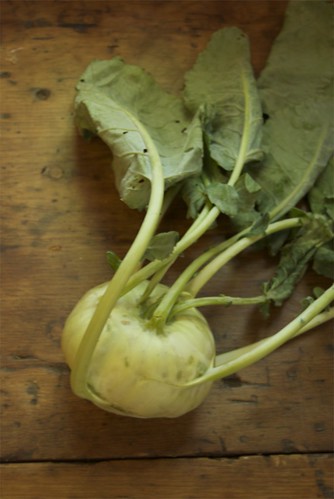
Have you met kohlrabi? Not as photogenic as tomatoes, eggplants, even summer squash, it lies on the table looking a bit awkward and uncertain. Bringing one home might make you feel that way too. Stems and leaves stick out of the green orb that makes up most of this vegetable while you wonder what to do with it and even whether it came from this planet. Or, maybe, you already know that kohlrabi is a brassica, from the same family as broccoli, cabbage, kale, bok choi, radishes and arugula. It is amazing that such a variety of vegetables can grow from the tiny, dark brassica seeds that all look similar.

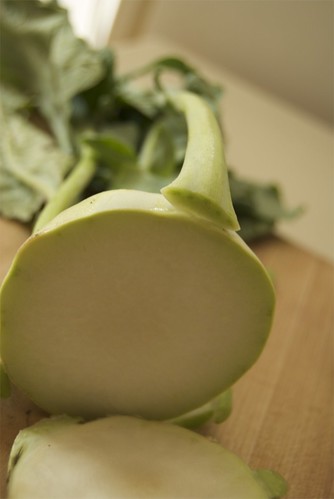
Don't fear -- an alien has not invaded your kitchen (I don't know why but these strange green vegetables -- they come in purple, too -- seem to me like something that might come from outer space). You will need a knife, however, to enjoy the crisp flesh that reminds me of the best flavors of broccoli and radishes combined. Cut it open, and slice off a piece. The outer skin is tough, but the inside is almost juicy. Although you may be tempted to ask what do I do with this thing? You have options.

DSC_0254

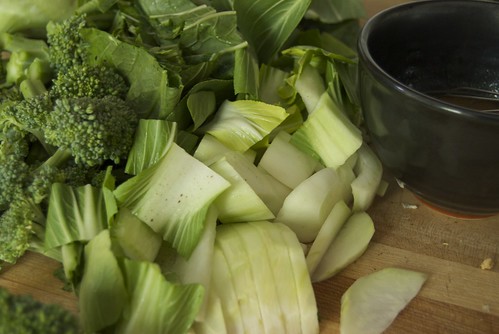
Eaten right off the cutting board it's a snack. You can cut it as you like and add it to any salad, or feature it in this one. I used it in a stir fry, mixed with a few other brassica cousins. The crunchiness of the kohlrabi mellowed, but even in the mix I could still pick out the pale green slices.

Brassicas prefer cooler weather, so you may have already eaten your spring kohlrabi, or it might not appear at your farmers' market until the fall. This year is our first time with a CSA share which means that instead of picking out only the produce that we frequently eat, I get to try vegetables that I haven't spent much time with. This week I made a very green stir fry with garlic, broccoli, bok choi and kohlrabi. I mixed up a sauce to add some sweetness and spice to the vegetables and tofu that I served them with. I suspect it will go well with any vegetable/protein combo but especially with whichever seasonal vegetables you have in your kitchen.

DSC_0256

Ginger Miso Stir Fry Sauce
You might remember miso from this dressing. It adds saltiness and depth of flavor to this sauce. I love the way the slight sweetness contrasts with the green vegetables, but you could use this on any sort of stir fry. The recipe makes about a half cup of sauce, which was just the right amount for the two-person stir fry I made. If you are stir-frying larger quantities, you can easily double the recipe.

2 tablespoons sesame oil
1 tablespoon honey
1 tablespoon miso 
1 tablespoon rice vinegar
1 tablespoon minced fresh ginger

Put all the ingredients in a small bowl and stir to combine. Stir fry vegetables of your choice (and a protein if you wish, I used tofu) until just cooked. Turn off heat and pour in the sauce. Stir and toss to coat and flavor the stir fry.

July 5, 2011

Blueberries for Pie Day

DSC_0246

Blueberries are summer. Tart but sweet juices bursting from their blue skins, a slight crunch of seeds. Wild blueberries are best. So tiny, they should be eaten by the handful. It takes more of them to make a pie, but it is worth it. One of the fields adjacent to my Dad's old new england farmhouse is full of their the low to the ground bushes. When I was young we would check the field for berries in July until there were enough to start filling containers. Sometimes they would end up in a batch of summer morning muffins, picked and tucked into batter before I came downstairs for breakfast.
DSC_0260

At least once during the blueberry season, my Dad would declare that it was time to make a pie. It took a lot of picking to get enough. On trips out the the field, we would pick a cup full here, a bowl full there until, after a few days, there were enough berries to fill a shell of rolled out dough. Still warm from the oven, the pie was a treat, but it was even better after a night in the fridge. A cold slice of blueberry pie for breakfast was part of the ritual, too.
DSC_0265


When I think of blueberries and summer, I also think of mornings in a rented lake house in western Maine. The smell of pine and a soft carpet of pine needles surrounding the house, making it easy to go barefoot. In the mornings I peer out the window, hoping to see the sun up to warm the lake and the dock where I will spend most of the day reading and dipping in the water. Sooner or later various family members gather in the kitchen for breakfast. When we first started vacationing there, it was my Mom, my step father and us five girls. Now there are husbands and children, too. Since we are always there in July, we make sure there are always pints and quarts of blueberries around. Brought from local farm stands, we eat them in pancakes, with yogurt or cereal, and by the handful.

At least once while we are there, we go for a hike before breakfast. Up a short trail through the woods frequented by mosquitos and patches of sun splashing through the trees. On the top of the very little mountain we scramble down the rock face to enjoy the view. There are scattered blueberry bushes clinging to what little soil they can find. Selfishly, we grab the few tiny fruits they make and greedily pop them in our mouths. 

DSC_0271

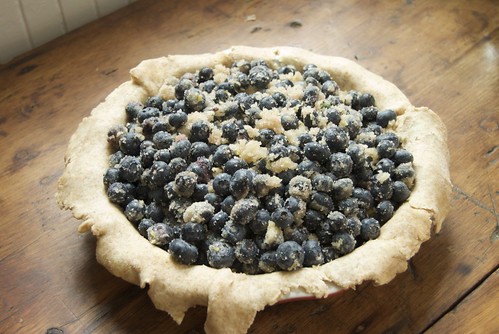
I'm not in Maine this summer. I have blueberries, though. They are the round, cultivated variety nearly the size of grapes with only a hint of tartness in their blueberry flavor. Still, they capture that summer flavor. We've been eating them in pancakes and muffins and in honor of summer and a pie party and thinking of my family far away enjoying wild blueberries and weeks at the lake I baked them into a pie.

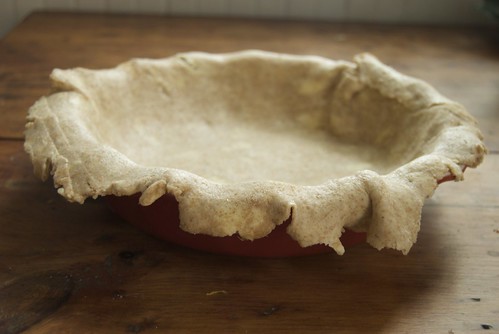
I've often hoped for perfection when making pies, but I after making this pie, I realized that there is no need for a pie to be perfect. With butter, flour, sugar, fruit and some spices it is hard to go wrong. I know the crust can be frustrating and intimidating. My King Arthur Flour Cookbooks have long and detailed instructions for attaining crust perfection, but even if you have to scrape it off the counter, patch holes, or do a single crust instead of two, just fill it with fruit, bake and enjoy.

DSC_0278


Blueberry Pie
A few notes: I increased the original crust recipe (adapted from King Arthur Flour Whole Grain Baking) because my crusts always come out too small. Fortunately I had plenty of crust. You can use all whole wheat flour, just make sure you chill the dough overnight. For the filling, I add a little flour to thicken it slightly, but I don't cornstarch or any other thickeners. The filling will be juicy with berries. I made this vanilla ice cream to go with it.

Crust - makes enough for a 9 inch double crust pie (or maybe more than enough if your better at crust than I am)
2 cups (7 ounces) unbleached white flour
1 cup (5 ounces) whole wheat flour
1 tablespoon cane sugar
1/2 teaspoon salt
15 tablespoons (7.5 ounces) cold unsalted butter
4 tablespoons (2 ounces) orange juice
4 tablespoons (2 ounces) ice water (or more as needed)


Mix the flours, sugar and salt together in a medium bowl. Cut the butter into small pieces and blend into the flour with knives, a fork, a pastry cutter or your fingers. Break up the butter and combine it with the flour until most of the butter is combined with the flour but there are some large pieces, too. It will be unevenly crumbly, resembling a coarse meal with larger chunks. Sprinkle in the orange juice and gently toss the dough to distribute the liquid evenly. Add the water a tablespoon at a time until the dough is wet enough to come together in a ball. Press the dough together to get any remaining flour. Divide the dough in half, wrap each half in parchment paper and refrigerate for at least 30 minutes or up to 3 days (ideally overnight!).


When you are ready to make the pie, roll out one half of the dough. I usually roll my dough on parchment or a silpat to keep it from sticking. I flip it over often and dust it with a bit of flour. Try to keep the dough fairly circular and roll it until it is a couple inches larger all around than your 9-inch pie pan. If the dough is stuck to the parchment when you are done rolling, just flip the dough stuck tot the parchment over onto the pie plate and center the circle of dough on the plate before you peel off the parchment. Add the filling. Roll out the second crust and place it on top of the filling. Tuck both layers of dough on top of the edge of the pie plate. If there is a lot more dough than you need around the edges, you can trim it, but leave enough to make a pretty edge around the plate. Press the two layers of dough together and form a nice edge with your fingers or a fork. Cut slits in the top of the pie to let out the steam. 


Blue Berry Filling
8 cups Blueberries
zest and juice of one lemon
2 tablespoons flour
1 cup cane sugar
1/2 teaspoon nutmeg
3 tablespoons butter


Mix the blueberries, lemon zest and juice, flour, sugar and nutmeg in a bowl. Stir gently so the blueberries don't get crushed and so that the sugar, flour, zest, juice and nutmeg are evenly distributed. Pour the filling into the prepared pie crust and place dots of the butter on top. Cover with the top crust and follow instructions above


Baking: Preheat the oven to 450' Bake the pie for 15 minutes, turn the oven down to 350' and bake for 15 more minutes. Let the pie cool for an hour or two before eating.

May 25, 2011

Green Garlic and Arugula Pesto

DSC_0399

When you work all day outside, pulling and hoeing weeds, and you come home with a bunch of green garlic, freshly picked, still caked in soil and you are so hungry and have been wracking your brain all day to think of what to make for dinner, well here is what you do.

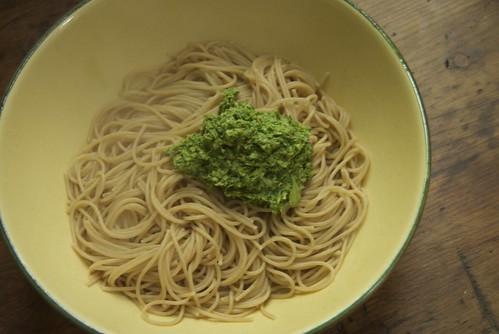
You wash off the green garlic, take one of the stems, cut off the roots and discard. Chop the rest of the green garlic, all the way up the green part, into one inch pieces.*  Drop them into the bowl of the food processor. Put a pot of water on to boil and take a package of whole wheat pasta out of the cupboard.

Dinner will be ready soon, just a few more things you have to do. Take some sunflower seeds (about 1/4 cup) and toast them until they are golden brown. Drop these into the food processor with the chopped green garlic. Add a 1/2 teaspoon of salt, some grated parmesan and enough fresh arugula to nearly fill the food processor. Top with a squeeze of lemon and the let the machine whir. As it pulverizes the leaves, shoots and seeds, pour in enough olive oil to create a soft paste -- a pesto.

When the water is boiling, add enough pasta for you and anyone else who will be sharing your meal. When the pasta is cooked, drain out most of the water, but leave enough to turn the pesto into a sauce that will cling to the strands of pasta. Mix as much of the pesto as you wish with the pasta and the bit of cooking water.

Before you dig into this simple pasta with green green garlic and arugula pesto, remember this is a different pesto than you might be used to. It is a bit spicy, a bit bitter, and very green. Don't expect it to taste like the basil pesto that will be to die for during the height of summer. This one lively and unexpected like spring and the first taste of something grown in the soil nearby.

*green garlic is young garlic, pulled before it makes a bulb in the ground, or the new shoots that have grown up from a bulb of garlic that stayed for another year in the ground. It looks a bit like a large scallion or a leek, but it tastes like garlic, just a little less strong. I suspect lots of farms in the northern part of the USA have it this time of year, but if you can't find it you can use regular garlic.

May 6, 2011

Creme Fraiche and Sweet Potatoes

DSC_0374

When I was cleaning and getting ready for spring a few weeks ago I needed to freshen up my routines and recipes in the kitchen, too. First I added a couple of new made from scratch staples: butter and also creme fraiche, which can become cultured butter or be enjoyed for its creamy texture and sour, cultured flavor.

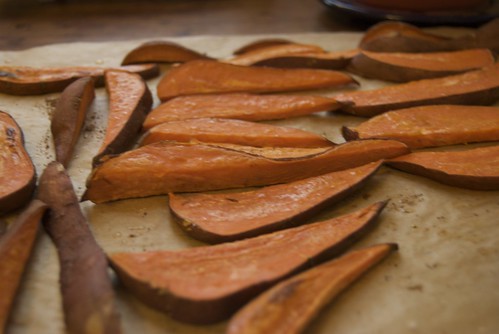
I also bought a new cookbook, Plenty by Yotam Ottolenghi. The recipes are all vegetarian, loosely categorized by ingredient. The photographs make everything look irresistible and I've had fun to trying some new flavors and ways of using vegetables. The recipe for sweet potato wedges with lemongrass creme fraiche made use of one of my new ingredients in a way I hadn't tried before. Although roasting sweet potatoes seems more of a wintery practice, these wedges would work well at a spring picnic or as part of a cook out along side whatever you are grilling. Local, spring produce is still a little ways off here, so I don't mind cooking up a batch of root vegetables, especially when they are accompanied by dipping sauce of cultured cream, lemon grass, citrus and ginger which tastes like the sweet surprise of spring.
Making creme fraiche could not be easier. If you're hesitant to try making yogurt or cheese, here is a homemade dairy product that is fool proof and does all the work for you.  Simply pour a cup of best quality heavy cream into a clean glass jar and add a quarter cup of cultured buttermilk. Stir, cover, and let sit for 12 to 48 hours until the cream is much thicker and has separated slightly (there will be a thin watery liquid as well as the thick cream). That's all there is to it. Now you can make it into cultured butter, strawberry creme fraiche sherbet (can't wait til strawberries are in season here!), use it in place of sour cream, or make this flavorful dipping sauce.


DSC_0384


Sweet Potato Wedges with Lemongrass Creme Fraiche
Adapted from Plenty, by Yotam Ottolenghi
The recipe makes a lot of sauce and since we had some left over, I used it in place of sour cream with some bean and cheese quesadillas. I think it would be good on other kinds of vegetables, too.

For the Sweet Potatoes:
3 medium sweet potatoes (about 2 pounds)
Olive Oil
1 1/2 teaspoons ground coriander
3/4 teaspoon sea salt
1/2 cup chopped fresh cilantro
1 fresh jalapeno (or red chile) finely diced (feel free to adjust the amount to your taste)

Preheat the oven to 400'. Wash the potatoes and cut into wedges. Line a sheet pan with parchment paper. Brush the paper lightly with olive oil. Place the wedges on the parchment, brush them lightly with olive oil, and sprinkle with the coriander and salt. Roast for about 25 minutes or until tender and golden brown. Remove from the oven and let cool slightly (or serve at room temperature, they are good this way, too).

For the dipping sauce:
1/2 lemongrass stalk
3/4 cup creme fraiche
grated zest and juice of two limes
1 inch fresh ginger, peeled and grated
1/2 teaspoon salt

Using the part of the stalk closer to the root (so it hasn't dried out), chop the lemongrass very finely. Whisk all of the ingredients together. When you are ready to serve, place the sweet potato wedges on a serving dish and sprinkle the cilantro and jalapeno on top. Serve with the sauce on the side. 

Serves about 4 people.

April 13, 2011

Friendship and Fritters

DSC_0349

Over the weekend I had a visit from my nearest, and one of my dearest friends. She lives 6 hours away, but made the drive to spend a weekend relaxing, taking walks, cooking good meals, and catching up. The things friends do, right?

We also managed to make at least four recipes that were new to both of us which really helped push me out of my cooking rut. We had a flavorful Asian inspired dinner, a flourless chocolate cake, gluten free muffins and ricotta fritters. It was a welcome change to cook the recipes together and though we have different ways of working, our cooking roles flowed as easily as our conversation. There are the friends that you reconnect with like no time has passed and then there are the friends that you don't see often, but you stay in touch and are part of each others lives over distance and time.

Throughout the weekend we talked often about where we've been and more so where we think we might end up and where we want our lives to go. As a kid, it is so easy to take friendships for granted. Then, when everyone goes off to pursue their own path it seems like we can't do enough to keep our connections with friends as strong as we want them to be. Even though I have lost the simplicity of youthful friendships, as I've gotten older I have realized that there are friends I will never grow apart from. We might not talk for a month, or see each other for eight, but there are certain friendships that I know I will have for life.

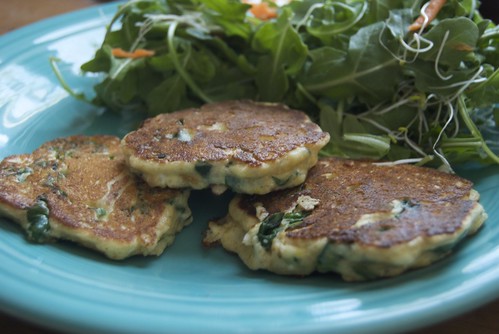
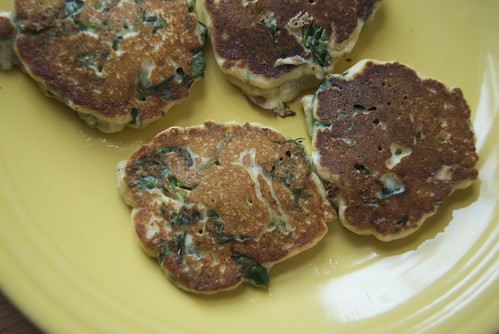
On Sunday, I showed Emily how to make ricotta cheese and she asked for suggestions for cooking with ricotta. A perusal of cookbooks led us to a recipe in Deborah Madison's Vegetarian Cooking for Everyone for ricotta and spinach fritters. This recipe seemed just right for an early spring meal when we don't yet have newly harvested local produce but eggs and cheese are available. It makes the right amount for two people, accompanied by a salad, but could serve more. I think this would also make great little appetizers as mini, bite sized fritters.

DSC_0347


Ricotta and Spinach Fritters
Adapted from Vegetarian Cooking For Everyone by Deborah Madison
These have a great flavor as is. You can also add fresh or dried herbs. We made a batch that included a heaping spoonful of pesto and I also tried some with lemon zest and thyme. I think there are a lot of possibilities for flavor variations that you could try. 

4 cups of spinach leaves
1 cup ricotta cheese
2 eggs
1/2 teaspoon salt and freshly ground pepper
1/4 cup flour
1/2 cup grated Gruyere cheese
2 tablespoons grated parmesan
Clarified butter or oil for frying

Rinse the spinach leaves, shake out excess water and place in a skillet over medium heat until wilted and tender. Remove from heat, squeeze out any water and chop finely. Combine all ingredients, except the butter or oil, with the chopped spinach.

Place a skillet over medium heat, film with butter or oil. Drop the batter by spoonfuls and fry over medium heat until browned on the bottom. Flip and cook on the second side. Serve warm. Makes eight 2 1/2 inch fritters.

April 11, 2011

Clarified Butter

DSC_0295

Now that I have finished my big spring cleaning, I am glad to report that the weather has caught up with my spring mind set. The sunny days, budding trees and warmer temperatures are reinforcing my need to embrace and incorporate new things into my days but also reminding me that I need to get back into healthy routines. Now that the kitchen is spruced up and my apron is freshly washed, I'm ready to keep up routines as incorporate new ones.

I enjoy my kitchen routines. I make yogurt every week or so, I feed my sourdough starter daily and bake bread weekly, and I frequently make batches of hummus, almond butter and granola. Having staple foods that I make from scratch helps me to feel connected to my home and my food. With both newness and routine in mind, I finally got around to making clarified butter. It could not be simpler to make and is not only useful for cooking but also more healthful to use than many oils.

Clarified butter is ideal for high heat cooking. In a process slightly more time consuming than melting butter, you remove the milk solids which give regular butter a very low smoke point. The smoke point of an oil is the point at which it begins to break down and loses its flavor and nutritional value. Different oils have different smoke points and the oil isn't healthy to cook with at temperature above its smoke point.
DSC_0299


Although you can find oils from all kinds of nuts, seeds and olives with different smoke points, most of them are grown and processed far away. I like using olive oil, almond oil, coconut oil and others for their flavor and different purposes but it is nice to find a cooking oil that doesn't come from an exotic location. Locally produced butter is easily transformed into something you can use for cooking pancakes, sauteeing vegetables, and browning veggie burgers and fritters in a cast iron pan. 

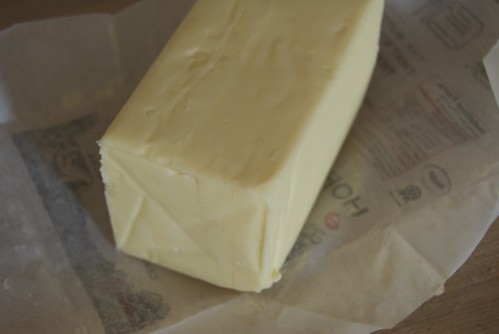
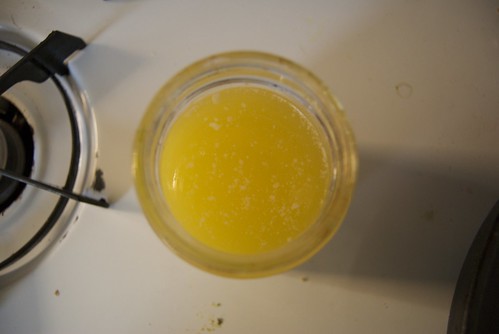
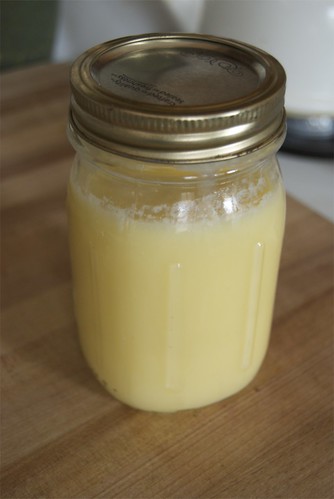
I had read about clarified butter in Heidi Swanson's Super Natural Cooking a while ago, but I just putting off making some of my own. She recommends using it for a lot of the recipes in her book and I tend to use it for whatever I am cooking in my cast iron skillet. Simply melt a pound of butter in a sauce pan. Keep the heat low so it melts slowly. When the block of butter has become a golden liquid, turn off the heat (cooking it longer, until the milk solids begin to brown will make ghee, a version with a deeper, nuttier flavor, often used in Indian cooking). Skim off any foam that has formed on top and discard it. Carefully pour the bright yellow melted butter into a pint sized jar. When you have poured off nearly all of the liquid butter, you will see the cloudy white milk solids in the bottom. Pour out as much of the bright yellow part as you can without getting any of the milk solids. Discard the milk solids.

The clarified butter will be a gorgeous, soft yellow when it solidifies. Store it in at room temperature for up to a month or keep it refrigerated for even longer.

DSC_0302

March 23, 2011

Dark Chocolate Cupcakes with Raspberry Whipped Cream Frosting

chocolatecupcakeswithraspberrycream

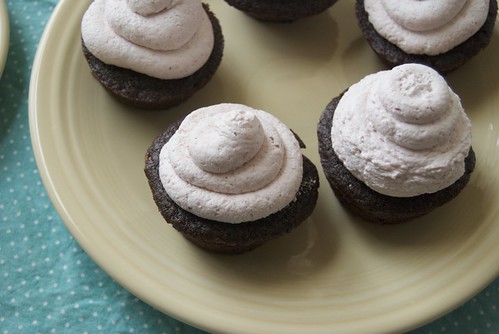
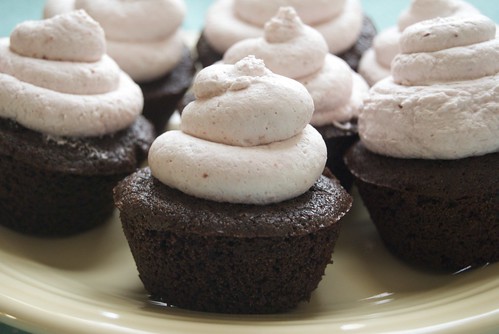
I hope the cupcake aprons got you inspired to do some baking. For me, it wasn't enough to sew cupcakes, I needed to bake some, too. I tied on my apron, gathered ingredients and mixed up a batch.  Cupcakes remind me of my elementary school where on your birthday you would bring in a treat for the class. After every child had a cupcake at their desk, the birthday girl (or boy) would pick a friend and walk around the school bringing any extra cupcakes to teachers from years past. I have no idea if this was normal for elementary school or just an odd tradition at the school I went to.

I know that cupcakes became very trendy a couple years ago and although bakeries may have moved on to donuts or pie as the next big I still think of them as a fun occasional treat. They're not just for birthdays any more. Cupcakes are a light hearted, informal dessert that can be dressed up fancy or just simple and fun. Made with dark chocolate cake and a light but rich and creamy frosting these cupcakes bring a little decadence to any occasion. This recipe is perfect for sharing with a group of friends, but there is no obligation to give one to your teachers or every single person in your class, though I am sure they would enjoy them if you did.

chocolatecupcakes

Dark Chocolate Cupcakes with Raspberry Whipped Cream Frosting
These cupcakes are best eaten within 24 hours of frosting since the topping is whipped cream and quite perishable. The cake recipe is adapted from the King Arthur Flour Whole Grain Baking Book. 

3 ounces (6 tablespoons) unsalted butter
3 3/4 ounces (1/2 cup) brown sugar
2 1/2 ounces (1/3 cup) granulated sugar 
1/4 teaspoon salt
2 eggs
1 teaspoon vanilla extract
4 3/4 ounces (1 1/4 cup) whole wheat pastry flour
2 ounces (2/3 cup) unsweetened natural cocoa powder 
3/4 teaspoon baking soda
4 ounces (1/2 cup) plain yogurt
3 ounces (just under 1/2 cup) water

Preheat the oven to 350'. Lightly grease and flour 12 muffin cups (one muffin tin). With a stand mixer or beaters, mix the butter and sugars until they are fluffy and light, scraping the sides and bottom of the bowl to make sure it is all mixed. Add the eggs one at time, beating until each one is thoroughly incorporated. Mix in the vanilla.

Whisk together the flour, cocoa and baking powder. Add half of the flour mixture and mix until combined. Add the yogurt and water and mix until smooth. Add the rest of the flour mixture and mix until evenly moistened. Scrap the bottom and sides of the bowl as needed.

Spoon the batter into the prepared tin, filling each cup about 2/3 full. Bake for 20-25 minutes or until a toothpick inserted in the center comes out clean. Let cool in the pan for 10 minutes and then remove from the muffin tins and let cook on a rack.

For the Frosting:
1 cup heavy cream

1/3-1/2 cup seedless raspberry jam

Whip the cream until stiff. Stir in the raspberry jam until it is thoroughly combined with the cream.
More jam will give the cream a stronger raspberry flavor and be a bit sweeter. Start out with a smaller amount and keep adding until you like the taste.

When the cupcakes are completely cool, spoon, spread, or pipe with a pastry bag the raspberry frosting onto the cupcakes. Enjoy as soon as possible.

March 21, 2011

Sweet New Aprons for Baking


I've been inspired by fun baking projects to cook up a new batch of aprons. Perfect for making messes in the kitchen and serving pretty and tasty treats. I made a couple of half cupcake aprons as well as a full one. They are sturdy and add a good layer of protection against flour and sugar that might go flying when you start to mix.

I know not everyone is a messy baker like me. Perhaps you'd just like to show your unique style while you share your delicious baked goods. I'll post the cupcake recipe on Wednesday.


If you're looking for something a little less sweet, I'll be adding more veggie aprons to the shop this week, too.

March 16, 2011

Icing on the Cake

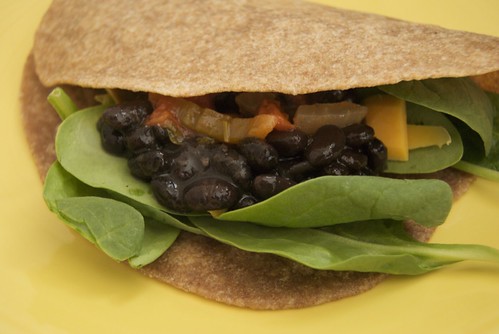
tortilla and black beans

Black beans are a staple in our kitchen. I cook up a batch nearly every week. They're not fancy food, nothing glamorous or particularly photogenic about them. But they taste so good and never disappoint. Often I'll serve them on top of brown rice, garnished with grated cheese, salsa and veggies. I think I love them best, though, with a batch of home made flour tortillas.

Tortillas are high on my list of things that I could easily buy but they are so much better made from scratch. I tell myself I am saving money since we already have flour, water, salt and oil. I'm just making silly excuses. Tortillas are usually inexpensive to buy, but the homemade version are a simple luxury. When we have black beans for dinner these warm floury disks are the icing on the cake, if beans can be called cake and homemade tortillas can be called icing.

I know that most people these days are looking for ways to save time and buying a bag of tortillas and can of beans will make a good meal in fewer minutes than cooking it all from scratch. On the other hand the minutes of kneading, rolling and cooking might give you the time you wouldn't other wise have to day dream, talk, catch up on the day's news, listen to music or a podcast.

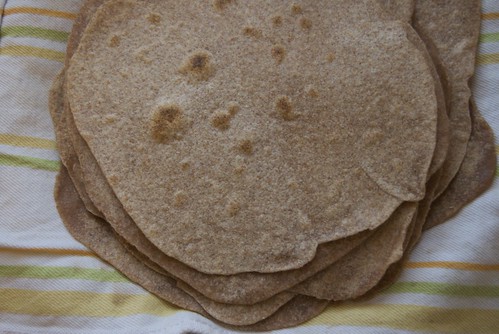
whole wheat tortillas


Black Beans and Whole Wheat Tortillas
Making beans and tortillas this way takes extra time but most of that is not doing active work, just letting things cook or rest. Sometime this fall, from a few different sources, I discovered my new favorite method of cooking beans. It requires a bit of planning ahead but no need for hours of soaking the dry beans. I'll list the ingredients and then explain.

1 cup dry black beans
1 medium onion
2 cloves garlic
1/2 teaspoon cumin
1/2 teaspoon salt
Water
1/2 cup chopped cilantro

Turn the oven to 350 degrees. In a dutch oven or other oven proof pot and lid, place the dry beans. Dice the onion, mince the garlic and toss them into the pot. Add the cumin and salt. Add water to the pot until the beans are covered by at least an inch. Cover the pot and put it in the oven. After about 30 minutes, open the oven, take the lid off and make sure the beans are simmering away, make sure the water has not evaporated and add more water if it has. Check after another 30 minutes to see if they are ready -- they should hold their shape but give no resistance when you bite into one. If you are planning on serving them soon, remove the pot from the oven.  If you are cooking them ahead of time, you can turn off the oven when the beans are done and leave them there for a few hours. When you are ready to eat, you can reheat them on the stove.

If the beans are soupier than you want them to be, simmer them on the stove to evaporate some of the water. I love the flavor of the beans just like this, but once they have cooked you could add corn, peppers, chilies, tomatoes. Just make sure you don't add anything acidic (like tomatoes, vinegar or lime juice) before they are fully cooked as acid will keep them from cooking. A few minutes before you are ready to serve them, stir in the cilantro. Yields about 4 cups of beans.

I like to set up a little buffet with beans, fresh greens, avocado, salsa, grated cheese and sometimes rice to go in the tortillas.

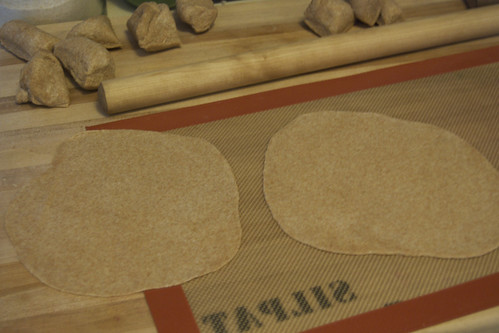
rollingout tortillas

Whole Wheat Tortillas
You can make these entirely with whole wheat or with a mix of white and wheat flour. Adding white flour will make them a softer and more flexible. Once the tortillas cool the might become a little bit stiff, just gently reheat them so they can be easily folded.

3 cups (14 ounces) whole wheat flour or 2 cups whole wheat and 1 cup white flour
1/2 teaspoon salt
1/4 cup (2 ounces) olive oil
about 3/4 cup very warm water

In a medium bowl, mix the flour and the salt. Add the oil and stir to distribute in the flour. Add the water, a little at time. Mix the water into the flour to create a smooth, elastic dough. Add more water if you need to, but the dough should hold together well and be slightly stiff but easily kneadable. Cover the dough and let rest on the counter for at least 30 minutes or up to 4 hours.

Divide the dough into 12 pieces, as evenly as possible. Place a cast iron skillet (at least 12 inches in diameter) over medium-high heat. Take a piece of dough and use your hands to shape it into a small disk, about an inch thick. On a floured surface (or on parchment or other non-stick surface), begin rolling the dough with a rolling pin. Turn it frequently to keep the tortilla fairly round (the shape does not affect the taste!). Roll it until it is about 1/8th of an inch thick and 7-10 inches in diameter. 

When the pan is hot, place the rolled out tortilla flat on the pan (do not grease or oil the pan). When it begins to bubble and puff up a little bit, flip it over. You will see it puff up a bit on the other side, too. Cook the tortilla until the bubbles are just beginning to brown, if you cook it too long it won't fold and bend easily. While one tortilla is cooking, you can roll out the next one. If you get ahead on rolling, don't stack the uncooked tortillas because they will stick together. After each tortilla is cooked, stack in in a clean tea towel on a plate. They are best served warm, but will keep in an airtight container for a few days.

February 21, 2011

Whole Wheat Maple Walnut Sticky Rolls for a Lazy Sunday

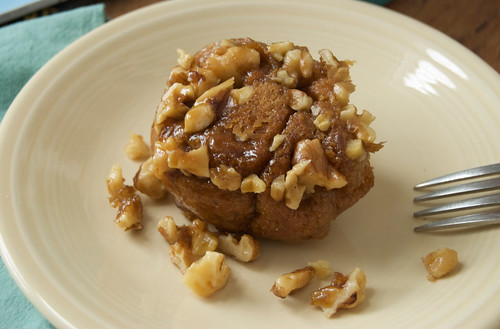
maplewalnutstickyroll

Last week the air smelled of spring. I walked on the sunny side of the street, wearing only a sweater and a scarf for warmth. It was such a welcome break from temperatures frozen around zero degrees. Of course, in February, I don't expect that to last.

In the past 24 hours we have gotten at least a foot of snow, but I'm not complaining.

Sometimes I just need a break and while I wasn't planning to go anywhere or do anything on Sunday, the snow helped me feel cozy and just where I wanted to be. This is the time of the year when everyone grows sick of winter and snow, but I don't mind a little more hibernation.

I often imagine winter as the time when I will lay low, catch up on reading and the pile of other projects that I haven't worked on in the summer or fall. In reality, I am as busy as ever in winter. I don't get as much time to knit, bake, and be cozy doing very little as I would like.

To remedy this, I sometimes plan for a day to do nothing. As you know, if you are busy most of the time and don't have regular evenings and weekends off, a day with no set plans or projects to accomplish is a huge luxury. Sometimes these days off are filled with serendipitous wanderings and small adventures, but on this snowy Sunday I hardly left the house. I had magazines to read, a movie to watch and that's about it.

Occasionally I thought, Oh, I should really work on... But no, not happening today.

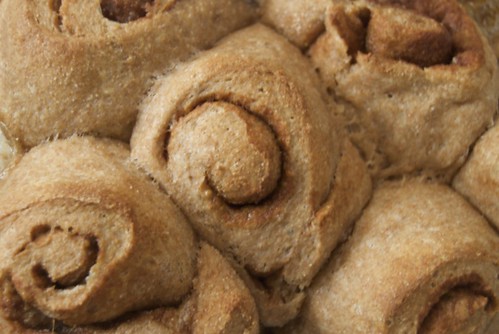
Though I intended to do very little, I make a batch of sticky rolls that paired perfectly with the lazy, snowy Sunday that I was trying to achieve. They are sweet, soft and decadent, but the whole wheat flour keeps them down to earth.

Sticky rolls seem like something that would be too labor intensive and take too long for a relaxed Sunday morning. Actually they fit in very well. I mixed the dough the night before, took it out of the fridge in the morning and cuddled back into bed for an hour or so. I got up again to roll out the dough and then let it rise. If you are feeling ambitious you could take a walk while the dough expands, maybe invite some friends over since this recipe makes plenty to share. Once the oven is ready it doesn't take long for them to bake. Let them cool a little while you make tea and cut up fruit (or continue relaxing in whatever way you please) and then you have breakfast for a lazy, cozy Sunday.

DSC_0175


Whole Wheat Maple Walnut Sticky Rolls
This recipe is adapted from Molly Katzen's Sunlight Kitchen. I use all whole wheat flour which makes for a softly textured roll with plenty of flavor. I recommend making the dough the night before so you have less to do in the morning. Also, letting the flour "soak" in the dough overnight makes it easier to digest. I've tried this with both maple sugar and brown sugar, they both work fine. You can substitute pecans instead of walnuts.

For the Dough:
1/4 cup lukewarm water
1 1/4 teaspoons yeast
3 tablespoons sugar
1 1/4 teaspoons salt
1/2 cup plain yogurt
1 large egg
3 tablespoons unsalted butter, melted
2 1/3 cups whole wheat flour

For the Filling:
2 tablespoons unsalted butter, softened
1 teaspoon cinnamon
2 teaspoons maple sugar

For the Stickyness:
8 tablespoons unsalted butter
1/2 cup maple sugar or brown sugar
3/4 cup maple syrup
3/4 cup walnuts, coarsely chopped

Place the warm water in a medium sized bowl, sprinkle in the yeast and let stand for about 5 minutes. Measure the yogurt into a 2 cup measure add the egg and beat to combine. Mix in the sugar and salt. Pour the contents of the measuring cup as well as the melted butter in the yeast mixture. Add2 cups of the flour, one cup at a time. Add additional flour as needed to create a smooth and soft but sticky dough. Let rise for one hour, OR refrigerate for up to 4 days until you are ready to use it.

If the dough has been refrigerated, let it sit at room temperature for about an hour. Grease two eight inch round cake pans or a baking tray and set aside. Using parchment or another non-stick surface (since the dough is so sticky you might want to spray your surface with non stick spray or grease it with butter) prepare the dough. Stretch it and spread it into approximately 10 by 16 inch rectangle. Spread the softened butter on the dough. It doesn't have to cover every single surface of the dough, but it should be evenly distributed. Mix the cinnamon and sugar together and sprinkle evenly on the buttered surface of the dough. Starting with one of the long ends, roll up the dough into a tight spiral and pinch the end to seal it. Let it rest while you make the stickyness.

Melt the butter in a sauce pan over low heat. Add the sugar and stir until is melted into the butter. Once the sugar is liquid, add the maple syrup and stir just until the mixture is uniformly combined. Remove from heat and pour into the pan or pans. Sprinkle the walnuts on top of the syrup. Gently cut the rolled dough into about 16 equal pieces and place them, spiral up, into the pans of syrup. You can lean them against each other, or keep them an inch or two apart. Cover with a clean dishtowel and let rise for about an hour. 

Before the hour is up, preheat the oven to 350'. Bake the sticky rolls for about 20 minutes, until they become golden brown on top and completely baked inside. Remove from the oven and place them sticky side up on a serving plate. If there is extra syrup, spoon it on top of the rolls. Let the rolls cool for at least 20 minutes before eating so you don't burn your mouth. They taste best within a few hours of baking.

February 9, 2011

On My To Do List

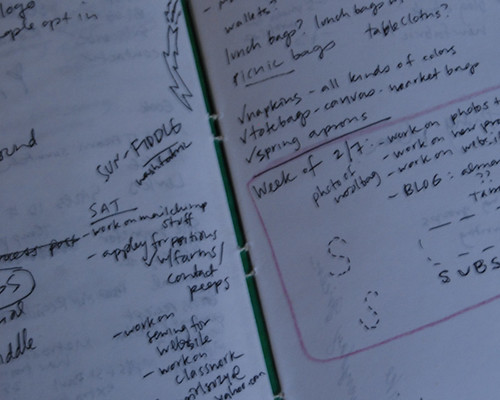
Are you a list maker? How do you stay organized and on top of things? I often make piles to keep things neat. A stack of things is less distracting than having papers and books strewn across my desk. I also make lots of lists. I like having a reminder of everything that I hope to accomplish in the short term. I used to write my To Do lists on scraps of paper. More recently I've created a dedicated notebook for to do lists, thoughts, ideas and information that I need to jot down somewhere.

DSC_0127

I used to make the mistake of keeping these lists and important dates or events in my head. Although they usually stayed up there, I felt like I had to constantly remind myself of what I needed to do. I would become very overwhelmed. So I started writing it down. I love having a space to keep my ideas. It gets messy as I scribble down thoughts and rewrite my lists but when I need a clear space to think and work, I close the book. When I know there are things I need to get done, I open to my most recent draft of To Do and attempt to cross off and item or two.

almonds


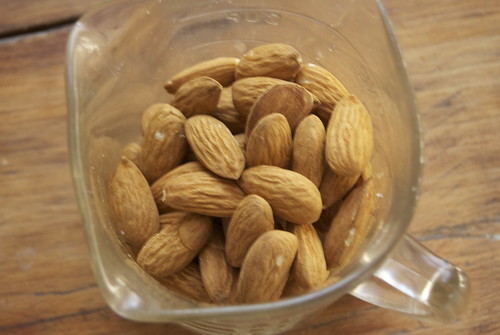
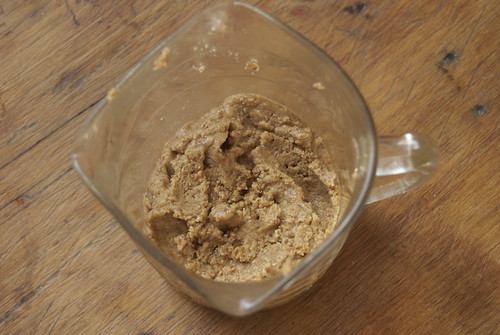
One thing that was on my mental list for a couple of months until I finally penned it down was making nut butters. Despite my penchant for making food from scratch I hadn't really thought about making peanut or almond butter until I saw recipes here and there. It took some time for me to get around to making almond butter, but it turns out to be really simple. A few handfuls of nuts, cracked and whirred in the food processor yields a creamy spread that is perfect on toast, apples or bananas, in a sandwich or straight from the spoon.

Although I have crossed make almond butter off my list, I am sure that I will keep making it regularly. I might have to add homemade Nutella to my next to do list.

almond butter


Almond Butter
I have used both raw and roasted almonds for this nut butter, but the roasting really brings out the flavor of the almonds and I think it is much better that way.

2 cups almonds
1/2 teaspoon salt, optional

Almond oil, or other neutral oil, optional

Spread the almonds on a baking sheet and roast at 350 for about 15 minutes, checking frequently to make sure that they are roasting but not burning. The skin will get darker and the meat of the almond will turn golden brown. Let cool.

Place the almonds and salt (if using) in the bowl of a food processor. It will be quite loud at first, but turn on the food processor for a minute or so. After a minute, scrape down the sides with a spatula and process for another minute. Scrape the sides again. Continue doing this for several minutes (stopping to scrape the sides regularly) until the almonds become a smooth paste. If you want a smoother, softer almond butter, you can add the oil, a teaspoon at a time, and process the paste to blend. 

2 cups of almonds yields about 3/4 of a cup of almond butter.