Showing posts with label main dish. Show all posts

October 5, 2011

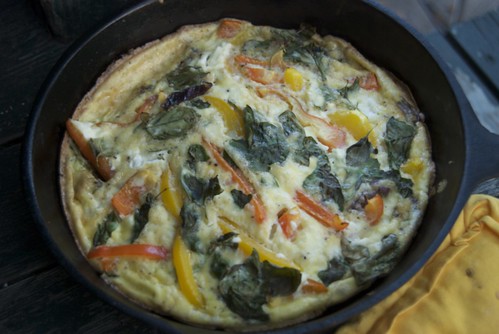
Red Pepper, Goat Cheese, and Basil Frittata


I'd like to introduce you to the frittata. Perhaps you two are already acquainted? We haven't known each other for long, but it's been my recent companion when I'm making dinner for myself. We also meet for the occasional breakfast or late lunch. Though we've seen each other a lot lately, there are so many possibilities that I'll never get bored. The frittata is more laid back than a quiche, lighter and less fussy, too. It takes minutes to make, which is ideal on the nights when you want something satisfying but you can barely be bothered to cook. It can go from rustic to sophisticated and makes for a rich but nutritious meal. I could go on and on, but I'll leave you with the recipe so you can try it yourself.
DSC_0112

Red Pepper, Goat Cheese and Basil Frittata
I have an eight-inch cast iron skillet which fits this frittata perfectly. I eat some for dinner and finish the leftovers for breakfast. If you don't have a skillet this size, you could add more eggs or just end up with a thinner but larger version. I definitely recommend making this in a cast iron skillet to keep it from sticking. You can take the basic recipe and add any vegetables, cheeses or herbs that you like.

1 small red bell pepper
1 small onion
5 eggs
salt and pepper
1 tablespoon butter
1/4 cup soft goat cheese
several leaves of fresh basil

Turn on the oven to 400'. Cut the pepper into thin slices and cut those slices in half if they are too long. Thinly slice the onion. Crack the eggs into a bowl, season with salt and pepper, and beat until frothy. Place your skillet over medium heat. When the skillet is warm, drop in the butter. After the butter melts, drop in the onions and saute until very lightly caramelized. Add the peppers and saute for a minute. Pour in the eggs. Gently make sure the vegetables are evenly distributed. Crumble the cheese over the top. Rip the basil leaves into smaller pieces and sprinkle on. Continue cooking the frittata on the stove until the sides are lightly browned and pull away slightly from the skillet (2-3 minutes). Place the skillet in the oven and bake for 10-15 minutes until the frittata has puffed up and is completely cooked through. Serve warm or at room temperature.

July 14, 2011

Kohlrabi and a Stir Fry Sauce

DSC_0252

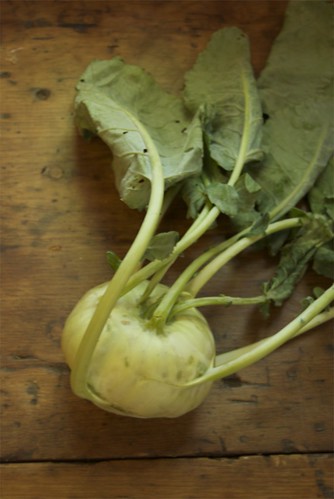
Have you met kohlrabi? Not as photogenic as tomatoes, eggplants, even summer squash, it lies on the table looking a bit awkward and uncertain. Bringing one home might make you feel that way too. Stems and leaves stick out of the green orb that makes up most of this vegetable while you wonder what to do with it and even whether it came from this planet. Or, maybe, you already know that kohlrabi is a brassica, from the same family as broccoli, cabbage, kale, bok choi, radishes and arugula. It is amazing that such a variety of vegetables can grow from the tiny, dark brassica seeds that all look similar.

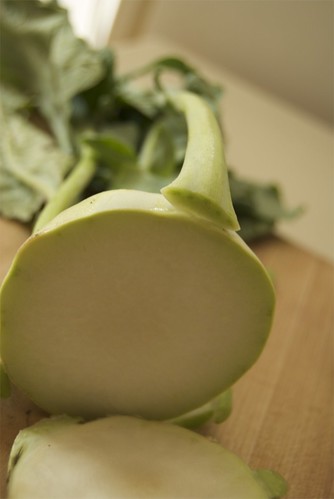
Don't fear -- an alien has not invaded your kitchen (I don't know why but these strange green vegetables -- they come in purple, too -- seem to me like something that might come from outer space). You will need a knife, however, to enjoy the crisp flesh that reminds me of the best flavors of broccoli and radishes combined. Cut it open, and slice off a piece. The outer skin is tough, but the inside is almost juicy. Although you may be tempted to ask what do I do with this thing? You have options.

DSC_0254

Eaten right off the cutting board it's a snack. You can cut it as you like and add it to any salad, or feature it in this one. I used it in a stir fry, mixed with a few other brassica cousins. The crunchiness of the kohlrabi mellowed, but even in the mix I could still pick out the pale green slices.

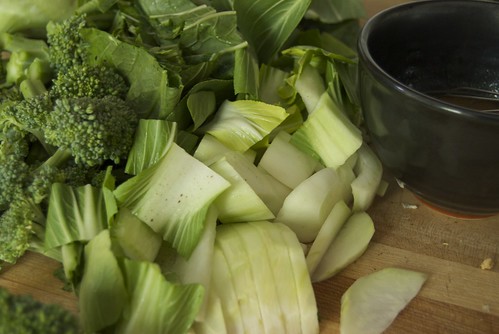
Brassicas prefer cooler weather, so you may have already eaten your spring kohlrabi, or it might not appear at your farmers' market until the fall. This year is our first time with a CSA share which means that instead of picking out only the produce that we frequently eat, I get to try vegetables that I haven't spent much time with. This week I made a very green stir fry with garlic, broccoli, bok choi and kohlrabi. I mixed up a sauce to add some sweetness and spice to the vegetables and tofu that I served them with. I suspect it will go well with any vegetable/protein combo but especially with whichever seasonal vegetables you have in your kitchen.

DSC_0256

Ginger Miso Stir Fry Sauce
You might remember miso from this dressing. It adds saltiness and depth of flavor to this sauce. I love the way the slight sweetness contrasts with the green vegetables, but you could use this on any sort of stir fry. The recipe makes about a half cup of sauce, which was just the right amount for the two-person stir fry I made. If you are stir-frying larger quantities, you can easily double the recipe.

2 tablespoons sesame oil
1 tablespoon honey
1 tablespoon miso 
1 tablespoon rice vinegar
1 tablespoon minced fresh ginger

Put all the ingredients in a small bowl and stir to combine. Stir fry vegetables of your choice (and a protein if you wish, I used tofu) until just cooked. Turn off heat and pour in the sauce. Stir and toss to coat and flavor the stir fry.

April 13, 2011

Friendship and Fritters

DSC_0349

Over the weekend I had a visit from my nearest, and one of my dearest friends. She lives 6 hours away, but made the drive to spend a weekend relaxing, taking walks, cooking good meals, and catching up. The things friends do, right?

We also managed to make at least four recipes that were new to both of us which really helped push me out of my cooking rut. We had a flavorful Asian inspired dinner, a flourless chocolate cake, gluten free muffins and ricotta fritters. It was a welcome change to cook the recipes together and though we have different ways of working, our cooking roles flowed as easily as our conversation. There are the friends that you reconnect with like no time has passed and then there are the friends that you don't see often, but you stay in touch and are part of each others lives over distance and time.

Throughout the weekend we talked often about where we've been and more so where we think we might end up and where we want our lives to go. As a kid, it is so easy to take friendships for granted. Then, when everyone goes off to pursue their own path it seems like we can't do enough to keep our connections with friends as strong as we want them to be. Even though I have lost the simplicity of youthful friendships, as I've gotten older I have realized that there are friends I will never grow apart from. We might not talk for a month, or see each other for eight, but there are certain friendships that I know I will have for life.

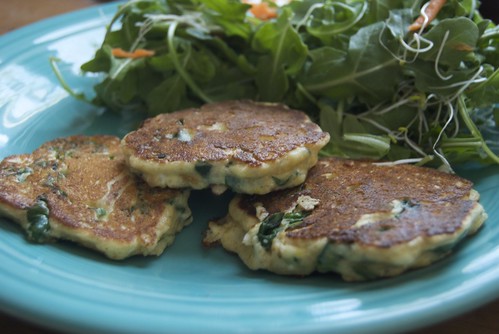
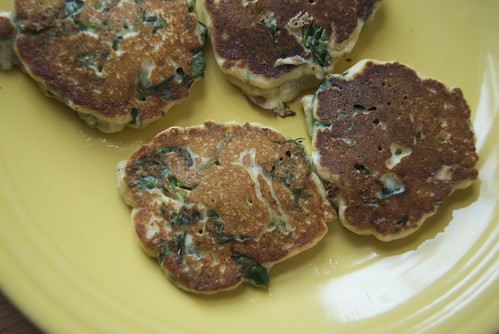
On Sunday, I showed Emily how to make ricotta cheese and she asked for suggestions for cooking with ricotta. A perusal of cookbooks led us to a recipe in Deborah Madison's Vegetarian Cooking for Everyone for ricotta and spinach fritters. This recipe seemed just right for an early spring meal when we don't yet have newly harvested local produce but eggs and cheese are available. It makes the right amount for two people, accompanied by a salad, but could serve more. I think this would also make great little appetizers as mini, bite sized fritters.

DSC_0347


Ricotta and Spinach Fritters
Adapted from Vegetarian Cooking For Everyone by Deborah Madison
These have a great flavor as is. You can also add fresh or dried herbs. We made a batch that included a heaping spoonful of pesto and I also tried some with lemon zest and thyme. I think there are a lot of possibilities for flavor variations that you could try. 

4 cups of spinach leaves
1 cup ricotta cheese
2 eggs
1/2 teaspoon salt and freshly ground pepper
1/4 cup flour
1/2 cup grated Gruyere cheese
2 tablespoons grated parmesan
Clarified butter or oil for frying

Rinse the spinach leaves, shake out excess water and place in a skillet over medium heat until wilted and tender. Remove from heat, squeeze out any water and chop finely. Combine all ingredients, except the butter or oil, with the chopped spinach.

Place a skillet over medium heat, film with butter or oil. Drop the batter by spoonfuls and fry over medium heat until browned on the bottom. Flip and cook on the second side. Serve warm. Makes eight 2 1/2 inch fritters.

January 25, 2011

The Dinner Game

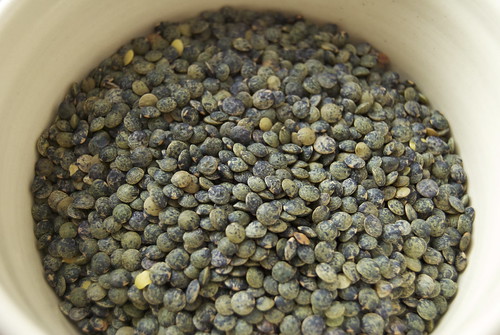
green lentils


I have a very practical little game that I like to play -- perhaps you've played it before? I'll call it the dinner game. I play it when I am at work sometimes or busy with something else and wondering what I will make for dinner. It does not involve a cookbook (though it could, I suppose), nor does it involve a trip to the store. Instead, I mentally take stock of what I have in my kitchen and puzzle out how to put it all together into a meal. Often I'll start with one simple idea and then realize other possibilities or ingredients I can incorporate to make something even better.

I am starting to imagine this as an actual game that the food obsessed could play while relaxing after cooking and eating. It has been played on cooking competition shows like Top Chef when the contestants are limited to making something with ingredients only from a vending machine, or only ingredients that carnivorous dinosaurs would eat. But in my kitchen the ingredients aren't usually too obscure, so I guess I shouldn't feel quite so self satisfied. Still, it's fun to go from lentils, potatoes, carrots, goat cheese, tomatoes to here's dinner.

I came up with this gardener's pie with just such a process. If you're wondering, gardener's pie is the all veggie version of shepherd's pie: a hearty stew blanketed in flavorful mashed potatoes. Perfect for the cold winter weather that seems to be all around. I didn't invent the dish, my mom makes a different version of gardener's pie, but it was fun to realize that all the ingredients I had would come together into this warm and well filled pot.

gardeners-pie


It isn't the most photogenic dish, but I've included a glimpse of the final product. It is mostly a one pot meal, except that the potatoes get cooked separately and then mashed. I also added some roasted garlic, but you can make it more simply, if you want. My recipe is a good guideline for the gardener's pie and you can vary it, using whatever vegetables you have in your refrigerator or pantry.


Gardener's Pie
As I mentioned above, you can substitute any of your favorite vegetables or whatever you have available for the ones that I used. You could add some sweet potatoes to the potato topping and substitute already cooked beans for the lentils. Although I think this recipe is great as it is, this dish is great for using what you already have in your kitchen. 

olive oil
1 cup yellow onion, diced
1 large carrot, diced
4 cups canned diced tomatoes
1 cup french green lentils
1/4 teaspoon salt
3 tablespoons chopped fresh parsely
I cup broccoli, chopped
I cup cauliflower, chopped
salt and pepper to taste

For the potatoes:
1 1/2 pounds potatoes, cut into smaller pieces for boiling
4 cloves garlic
1/4 cup milk
salt and pepper to taste
3-4 tablespoons chevre (or as much or as little as you want to add to the potatoes)

1 teaspoon chopped fresh rosemary

In a 3 1/2 quart dutch oven, heat about a tablespoon of olive oil. Add the diced onion and cook for a few minutes over medium heat. Add the carrot and parsley and cook, stirring occasionally, until the onion is just beginning to brown. Add the tomatoes, lentils and salt. Let it all simmer for 30 minutes or until the lentils are tender, adding more water if necessary to cook the lentils. When the lentils are cooked, stir in the broccoli and cauliflower. Add salt and pepper if needed.

While the lentils are cooking, preheat the oven to 350'. On a baking sheet or small baking dish, place the garlic cloves in their skins. Bake until the garlic is soft (about 20 minutes). Meanwhile, place the potatoes in a pot and cover with water. Bring to a boil and cook until the potatoes can be easily pierced with a fork. Drain the potatoes. Squeeze the soft garlic out of its skin and mash it into the potatoes. Add the milk, a little at at time (using more if necessary) and mix and mash the milk and potatoes together until the potatoes are soft and creamy. They do not have to be entirely smooth. Add salt and pepper to taste

Once the lentils are cooked and all the vegetables have been mixed in, add the chevre to the potatoes, a small spoonful at a time. Do not incorporate it entirely, it is nice to find little pockets of the cheese in the potatoes. Spread the potatoes evenly on top of the veggie and lentil mix and sprinkle the rosemary on top. Bake in the oven for 15 minutes. Let cool slightly before serving to avoid burning your mouth.


Serves 4-6

December 17, 2010

Creating and Homemade Lasagna

I haven't been doing as much sewing since I shipped the last of my custom orders on Monday. Instead, I've been finishing up handmade gifts and sending off some Christmas packages. Now that my creative work has slowed down, I realize once again how essential making is to my life.

Sometimes when I am really busy, I wish I could just take a break and stop making, but now that I'm not doing as much, I realize that I can't stop. Creating is sustenance just as necessary as food. Not creating feels like telling myself I'm not hungry and I don't need to eat. I haven't figured out how to seamlessly combine my interests in making objects (both for my shop and other projects like quilts, knitting, books) and creating the homemade foods that come from my kitchen. For me, it is all part of the handmade life that I aspire to and engage in as much as I can.

In this season of consumption, I find myself tempted to buy things until I realize that creating them myself can perfectly satisfy this urge. I sincerely wish to share the creative impulse and possibilities with all of you and in the new year I hope I can do more to inspire you to keep creating.

This final post of my handmade lasagna series has me thinking about all of this creativity and why it is so satisfying. Pasta, cheese, sauce and vegetables are all individually quite nice, but put together in a pan and baked in the oven, the resulting whole is more than the sum of its parts. I believe this to be true when making anything by hand. When I am fully involved in the process, the whole thing becomes even more than just a bite of food, it is nourishing in many ways. I can't really articulate why the act of making and creating is so important, I wish I could explain it better. If you have any thoughts or ideas about handmade and homemade, please share them in the comments.

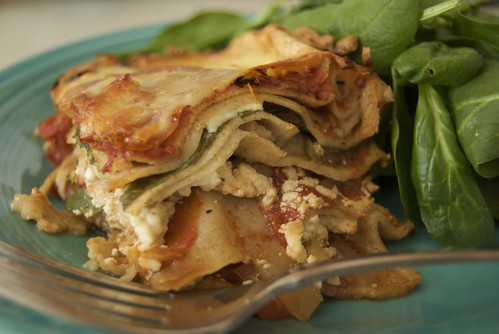
Lasagna from Scratch

Lasagna from Scratch

If I had homegrown veggies, I would, of course use them, but I bought a selection from the store. I like to put plenty of green among the layers of red and white, but you can use any vegetables that appeal to you. I don't usually make the mozzarella cheese which covers the top of the lasagna, but I hope to share a mozzarella recipe with you soon.

Approximately 2 batches homemade sauce (depending on how much sauce you want to add, I found that one batch was not enough)
1 batch homemade pasta 
1 quart ricotta (my homemade version)
1 1/2 cups zucchini, cut into quarters lengthwise and then slices into little triangles
1 1/2 cups sliced mushrooms
2 cups baby spinach leaves
2 cups shredded mozzarella cheese

Preheat the oven to 350'. In a 9x13 inch glass baking dish, pour 1/2 cup of  sauce and spread it over the bottom of the pan. Add a layer of noodles, to cover the bottom of the dish. They don't need to overlap, but they should be almost touching so that the bottom of the dish is completely covered. Evenly distribute the zucchini over the noodles. Spread 1/3 of the ricotta over the noodles. Cover the zucchini and ricotta with sauce. Then, add another layer of noodles, with mushrooms, ricotta and sauce on top. Next, another layer of noodles, spinach, ricotta and sauce. Add the final layer of noodles and pour the rest of the sauce (or as much as you would like) over the whole pan. Top with the mozzarella. The layers will be very close to the top of the baking dish. Everything should settle as it bakes.

Cover the pan with a layer of foil and bake for about 45 minutes. If serving right away, let it cool for about 15 minutes. Lasagna is wonderfully flavorful when reheated so you can bake it ahead of time and then put it back in the oven to heat before serving. 

Makes plenty for 6-8 people

December 16, 2010

Homemade Tomato Sauce

Homemade Tomato Sauce

So, you've got some ricotta and a bunch of pasta. You could make baked ziti, ravioli, tortellini, stuffed shells, manicotti.... Whatever variation of hearty Italian meal you choose, you will surely need some tomato sauce to pour on top of it, or between the layers of pasta and cheese. Chunky, smooth, deep dark red, or quickly put together, whether it is from a jar or your grandmother's recipe, I think everyone has their own favorite sauce.

If you do have a favorite, why do you think its the best?

I wanted to share my recipe to go along with the ricotta and pasta I recently shared. Tomorrow we'll put it all together into a very homemade lasagna.

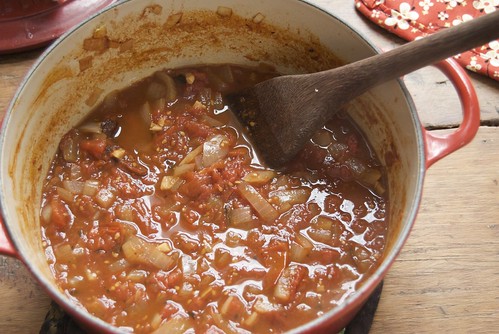
Homemade Pasta Sauce
This recipe makes plenty of sauce for 3-4 servings of pasta. I found that for a full pan of lasagna I wanted to double this recipe. 

Olive oil
1 large yellow onion, diced
2 cloves garlic, minced
3 cups crushed tomatoes (I used 2 cups of crushed tomatoes and one cup of slow roasted tomatoes
1/2 teaspoon dried basil
Salt and Pepper to taste


Place a heavy bottomed pot (at least 2-3 quart size) over medium heat. When the pot is heated, add a tablespoon or so of olive oil and the onions. Let the onions cook, stirring occasionally, until lightly browned (about 10 minutes). Stir in the garlic and let cook a couple minutes more. Pour in the tomatoes, stir to combine with the onions and garlic. Bring it all to a simmer and reduce heat to keep simmering for about 30 minutes, or to the desired thickness. Add basil, salt and pepper to taste. If you prefer a smooth sauce, you can puree it using and immersion or regular blender.

December 13, 2010

Homemade Pasta

pasta

I know this is a busy time of year and maybe not the season to take on another project. But then again, it is a time for special meals and expanded tables full of loved ones. Often we think of rich or extravagant ingredients during this season of celebrating abundance but sometimes just taking the time to make something from scratch can be the touch that takes a meal from every day to special.  Amidst all the hustling and bustling, it can be a blessing to slow down and make something by hand.

homemade pasta rolled

Homemade pasta is delightful in that it can be the focus of a weeknight meal or star in a more involved production such as ravioli or lasagna. I'm not sure why I highlight pasta for special occasions -- I am just remembering a snowy cold New Year's Eve two years ago when I organized a house full of guests in a grand ravioli production. Everyone had a lot of fun, ending in a delicious meal. The first Christmas Ray and I spent together was the occasion of my first lasagna from scratch and I've helped my mom put together many lasagnas for her annual Christmas parties.

I guess my association with homemade pasta tends toward the fancy and festive, but I am most happy to share this recipe because it makes for a hearty and wholesome meal anytime. It is certainly not as quick as throwing some dried pasta in boiling water, but the extra time is worth it for the flavor and texture of freshly made pasta. I like it tossed with pesto, covered in sauce, layered in lasagna, or stuffed for ravioli. I make my pasta with half whole wheat, half white flour. You can use all white flour, if you prefer, but I think the wheat adds greater flavor and texture.

I'll share my sauce recipe later in the week.

homemade pasta

Fresh Pasta 

2 cups flour (or one cup all purpose flour and one cup whole wheat flour)
2 large eggs
1 tablespoon olive oil or water (or more as needed to make a pliable dough)
1/4 teaspoon salt 

Place the flour and salt in the bowl of a food processor or in a mixing bowl. Add the eggs one at a time and mix to combine. Gradually, add the olive oil. If you are mixing in a food processor, when the ingredients are fully incorporated gather them into a ball of dough and knead a couple of times. In the mixing bowl, knead the dough to incorporate as much of the flour as possible. In either case, if the dough is dry and not holding together well, add a tiny bit more water until you can form a smooth and slightly pliable ball of dough. Cover, and let rest for 15 minutes.

Divide the dough into five equal pieces. Use your hands to press the dough into a thin disk. If you are rolling by hand, roll it as thin as you can and then fold it over on top of itself. Continue to roll and fold until the dough is smooth. Then, roll the dough out as thin as you wish (the thickness of a penny or thinner is ideal). Once you have reached the desired thickness, you can cut the sheet of dough into smaller strips or squares for cooking. If you want to use it for lasagna, you can cut it into strips about 4 inches wide and as long as the pan you will be using. Repeat this with the rest of the dough.

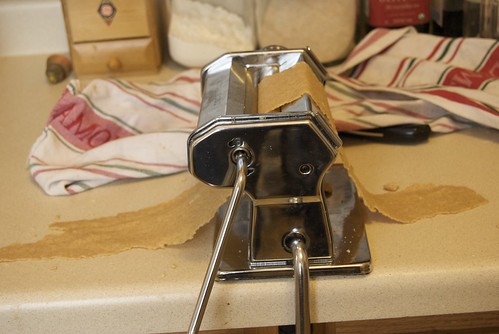
If you are using a machine to roll out your dough, press it as thin as possible with your hands. Starting with the widest setting, roll the dough through. It may crumble at first, but keep rolling it through and putting it back together until the dough is smooth. Then move to the next smaller setting. Roll the dough through, fold it in half and roll it through again. Once it is totally smooth, you can decrease the settings and roll it only once. I usually go to setting 6 or 7 (the smallest setting on mine is 9). Repeat this with each piece of dough.

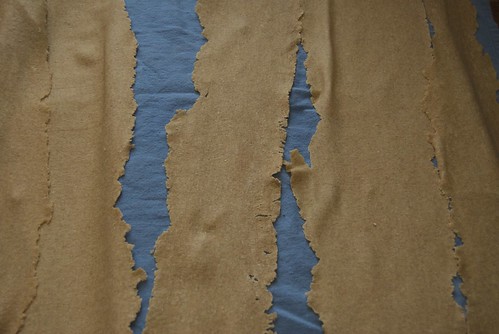
Before you cut your dough into the desired shapes and lengths, lay it carefully on a clean dishtowel or drape it over a dishtowel on the back of a chair. The pasta sheets can stick to each other if they are damp and overlapping. They can also easily dry out, so I separate them slightly and cover them with a damp dishcloth.

Cooking the Pasta:
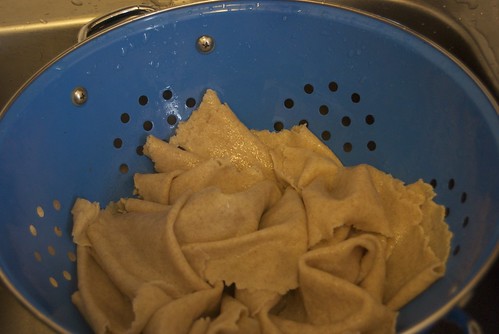
Bring a large pot of water to a rolling boil. You will want a pot large enough so the pasta is not crowded and sticking to each other (for this recipe I used a seven quart pot which left plenty of room). Add a few teaspoons of salt to the water to flavor the pasta. Gently place the pasta in the boiling water and carefully stir it to keep the noodles from sticking to the pot or to each other. Fresh pasta cooks very quickly -- it is best to pull a piece out and taste it (run it under cold water so you don't burn your mouth) after a couple of minutes. When the pasta is done, you can drain it into a colander or scoop it out with a strainer or slotted pasta spoon. If you are not eating it right away (like noodles for lasagna) run cold water over the pasta in the colander to keep it from continuing to cook or sticking. If you are eating it right away, you can scoop it onto plates or add it directly to the sauce. 


Yields enough pasta for a 9x13 inch pan of lasagna or 4 large servings of pasta.

September 9, 2010

Falafel, as promised.

Falafel

I know it is only the second week of September, but it really feels like fall here. Some trees are showing more than just hints of red and yellow and I've mostly been keeping the windows closed in our apartment. I would have taken a couple more weeks of summer, but now that my mind has switched to autumn mode, I can't complain. One of the best things about this time of year, late summer or early fall, is that there is so much good fresh local food available and with temperatures that allow oven and stove use, there is lots of cooking to be done.

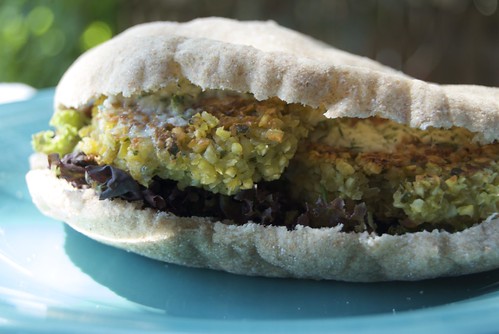
Recently I made falafel (to go inside my homemade pita bread). I often think of falafel as more of a winter food (maybe because in the summer I do less bread baking) but I realized that late summer is the ideal time to eat it. Falafel goes so well with fresh veggies which are decidedly less fresh and flavorful in the cold months. I was so happy to eat it with lettuce and tomatoes from the farmer's market. I even had fresh cucumbers and dill to make a simple tzaziki sauce to put on top.

Falafel is really easy to make, it just takes time to soak the beans. It is often deep fried, but I make little patties and pan fry them in olive oil. Its full of protein, good flavor, and goes so well with garden or market fresh veggies.

Falafel
Adapted from How to Cook Everything Vegetarian by Mark Bittman
The chick peas (garbanzo beans) need to be soaked for at least 6-8 hours before you make this recipe.

1 3/4 cups dried chickpeas
2 cloves garlic, peeled and crushed
1 small onion, quartered
1 tablespoon ground cumin
A pinch of cayenne, or to taste
1 cup chopped fresh cilantro (or parsely if you don't like cilantro)
1 teaspoon salt
1/2 teaspoon freshly ground pepper (or to taste)
1 tablespoon lemon juice
Oil for frying (I use olive oil)

Put the chickpeas in a bowl and cover with water by 2 or 3 inches. Let soak for at least 6 hours or up to 24 (check occasionally to make sure they are still covered with water and have not absorbed it all).

Drain the chickpeas and put them in the food processor with all the other ingredients except the oil. Pulse until the mixture is very finely chopped but not quite smooth. Taste and adjust seasonings. 

Heat a deep skillet over medium-high heat. Add enough oil to coat the bottom of the pan. Form the chickpea mixture into little patties, about 1 inch thick and 2 1/2 inches across. Place patties into the hot pan, as many as will fit without touching. Cook for 2 or 3 minutes until browned, then flip and cook on the other side. Continue cooking patties until all the chickpea mixture is used. Serve 2-3 patties on pita bread with fresh greens, chopped tomatoes, fresh salsa, cucumbers or tzatziki (see recipe below). If you have left overs, the falafel will keep, covered, in the fridge for 3 or 4 days.

Serves 6 

Tzaziki Sauce

1 cup plain yogurt
1 cup chopped cucumbers
1 tablespoon chopped fresh dill
1 tablespoon lemon juice
1 tablespoon olive oil

Puree all ingredients in a blender or food processor until smooth.