Showing posts with label breakfast. Show all posts

April 21, 2016

Blueberry Oat Scones


How do you like your scones? I like mine sturdy, craggy, and a little bit chewy. They don't need eggs or cream, sugary glaze or extra adornment. I have, of course, found many great bakery made scones, but I love them best when I can mix them up on a morning's whim. That's exactly what I did today. 

Perhaps it is misguided of me to think that something freshly baked, sweetening the air as it rises and browns, could make the day more special. But, giving just a few extra minutes to pop them in the oven on a regular morning is a nice way to stray from the ordinary. My mornings don't usually reach a level of hectic. Considering it can take hours to convince, cajole and encourage Amos to pick out clothes and get dressed, I can get a few other things done.  If, for you, time is ever precious, these are ideal for a weekend or day off, too.


Blueberry Oat Scones
This is based on a recipe from the bakery where I used to work. There are many many variations and additions you could try (dried fruit or nuts instead of berries, buttermilk instead of regular milk etc). I used frozen wild blueberries but when the season comes these would be great with fresh berries, too. 

2 cups all purpose flour
1/2 cup rolled oats
1/3 cup sugar plus more for sprinkling
3/4 teaspoon salt
1 tablespoon baking powder
4 ounces (1 stick) unsalted butter
3/4 cup blueberries
3/4 cup milk or buttermilk plus more for glazing

Preheat the oven to 375'  Combine flour, oats, 1/3 cup sugar, salt and baking powder in a medium bowl. Cut the butter into small pieces, toss with flour mixture and use your finger tips to break up the butter and work it into the flour. Continue working until the butter and flour make small crumbs with a few larger chunks of butter. Add the blueberries and toss with a fork to distribute. Pour in the 3/4 cup of milk and toss again with a fork to evenly wet the flour. Knead in the bowl, folding over the dough several times. 

Line a baking sheet with parchment paper. Lift up the mass of dough and dump any dry flour from the bottom of the bowl into the middle of the baking sheet. Place the mass of dough on top. Pat into a circle about 7 inches wide and an inch thick. If your hands are sticking, rinse them in cold water and, with wet hands, press the dough so it comes together and is mostly smooth on top. 

Use a knife to cut the circle into 6 even pieces and separate them onto the baking sheet. Brush the top of each scone with milk and sprinkle them with sugar. Bake for 20-25 minutes or until they are a nice golden brown on top (this will insure that they are not underbaked on the inside). Let cool for 10 minutes before eating.

May 6, 2013

English Muffins

english muffins

When I think about my frequent compulsion and delight in make food from scratch, I always return to my interest in connection and transformation. I like taking an active role in knowing not only where my food comes from but being deeply involved in making it. And this making is a transformative process. I often think that, to some, I might appear a little crazy as I try to make more and more food in my own kitchen when it is so easily available in store bought form. This makes me think that I have to sell the idea, to convince you and others, by saying how it's actually really easy or it will save you money or it just tastes better. I'd love for you to try making more food from scratch, especially if you've never done it or if you do it a lot and want to try something new, but I'm actually not very good at a sales pitch.

english muffins dough

Although I almost never buy them, English muffins are a wonderful breakfast treat. I've tried making them a few times in the past several years but they never seemed as good as the nook and cranny full ones I could buy. As much as I love the satisfaction of pulling it out of my own oven, sharing something I made by hand, there are times when homemade might fall short. Especially if you live with someone who nearly always prefers the grocery store versions that he grew up with, it might not matter that something homemade is healthier or more flavorful.

english muffins

In the past month, I've tried a couple of different English muffin recipes and come to realize that there is another layer to the satisfaction of homemade. Instead of believing that just making it myself is enough, I realize that often it is worth it to pursue the best I can make. This may happen over years or over trying a few recipes, or stumbling right away on something so good. And that's another beauty to making it yourself: you can try it again and again. After the plates are emptied or the first batch gets eaten you have a blank slate to try another version, change the flavors, or find a new recipe that might get you closer to the results you want.

I am far from being a perfectionist but I'm realizing that I want to keep honing my skills. The goal is not to just try making English muffins because I've never done it but to enjoy really good English muffins if that's what I want to eat.

english muffins


Homemade English Muffins
Adapted mostly from this recipe but also inspired by this one.
English muffins are often cooked on a skillet on top of the stove, but it can be easy to burn the outside while the inside stays uncooked. This recipe gives them a quick trip in the oven where they should be perfectly cooked. At first I avoided this recipe because of the extra potato step but it really helps the muffins get the perfect texture. Although this recipe seems long, there is not a lot of hands on time so don't let that keep you from great homemade English muffins.

1 medium yukon gold potato
1 1/3 cups water (11 ounces) at room temperature
8 ounces all purpose flour
8 ounces whole wheat flour
1 tablespoon honey
2 1/2 teaspoons salt
1 1/4 teaspoon yeast (instant or active dry yeast -- both will work fine)
6 tablespoons water at room temperature

oil for the bowl and your hands
flour to keep the dough from sticking when shaping
coarse cornmeal for dusting the baking pans

Peel the potato, cut it into small pieces and boil in a pot for about 10 minutes. When the pieces of potato are soft, drain the water and mash the potato. You should have about 1/2 cup mashed potato. Let cool completely.

Once the potato is cool, place it in the bowl of a stand mixer with a dough hook attachment. Add the 1 1/3 cups water, all purpose flour, whole wheat flour, honey, salt and yeast. Mix on low speed for about 10 minutes, until the dough is smooth and sticky. Turn off the mixer and let it rest for about 5 minutes. 

Start the mixer on low again. Let it mix for a minute or so and then begin adding the additional water, 2 tablespoons at a time. After each addition, mix until the water is evenly incorporated, scraping the dough from the hook and sides of the bowl as necessary. Once you have added all 6 tablespoons, continue mixing until the dough is even and smooth. It will be quite wet and stretchy.

Oil a bowl and scrape the dough into it. Cover it will a clean tea towel and leave in a warm place to rise. After 30 minutes, it is time to turn the dough. Oil your hands to keep them from sticking. Uncover the bowl and reach your hand to the dough across from you picking up the dough on the far side of the bowl and folding it over to the side closest to you. Turn the bowl a quarter turn, pick up the dough on the far side of the bowl and fold it over again. Repeat this two more times until you have gone all the way around the bowl. Cover and leave the dough for another 30 minutes. Turn the dough again in the same way. Cover and let rest for one more hour. By now it should have increased in size and become inflated and bubbly.

Now, you can cover the dough so it is airtight and refrigerate it over night or continue making the English muffins. For the next step, generously flour your work surface. Line two baking sheets with parchment paper and dust them with coarse cornmeal.  Oil or flour your hands since the dough is very sticky. Remove the dough from the bowl and divide it in half. Set half the dough aside. Divide the other half of the dough into 6 equal pieces. Take one piece at a time and roll it between your hands to shape it into a round disk. Place it on the baking sheet. Repeat this with all six pieces of dough, placing them evenly apart on the baking sheet. Divide the second half of the dough into 6 pieces and do the same. Cover the baking sheets with tea towels and leave them to rise until they have doubled in size. This will take about 1 - 1 1/2 hours if the dough was not refrigerated and 2 - 2 1/2 hours if it was. 

About 30 minutes before you are ready to bake, preheat the oven to 425 degrees F. Bake the muffins for 8 minutes. Remove the baking sheets from the oven, flip over each muffin and bake for 8 more minutes. Let the English muffins cool on a wire rack. Slice in half and toast or serve as you like. You can freeze the English muffins or keep them refrigerated in an airtight container for up to a week.


February 26, 2013

Breakfast Crumble

breakfast crumble :: road to the farm

With all the uncertainties that each day brings, it is good to have some things you can count on. The growing early morning sunrise, creeping from pink and blue to daylight. Breakfast. My mornings are not defined by uncertainty, but I am never sure what I will have for my first meal of the day. I'm not the person who eats the same breakfast every day without fail. I rotate, randomly, between oatmeal and eggs or occasionally something that requires mixing a batter. 

Recently none of the usuals appealed. I wanted something with fruit and grains but not oatmeal or muffins or waffles. I started to imagine the morning at a house deep in a snowy forest of hemlock, pine and hardwood. Next to the stacks of firewood on the front porch there are cross country skis and whether you are about to leave or have just come back from a ski you will want something warm and hearty. Rustic, maybe baked in a cast iron skillet. Satisfying but not fancy. I don't usually tell myself stories about breakfast but there I was in my cozy but not rustic kitchen, the growing daylight strongly hinting at spring, daydreaming about deepest winter.

Spring is definitely not here, but the season is starting to change and as usual I feel it slipping away before I have lived it to its fullest (I must remember not to squander spring when it does arrive). Anyway, back to breakfast. I made a crumbley topping full of nuts and seeds, oats, some flours and cinnamon with maple syrup for sweetness. I filled the bottom of a small skillet with berries and the few remaining cherries from last summer. If snow is falling, watch the flakes gently fall while the whole thing bakes in the oven. If the air is warm enough, open the window and let it cool in the spring breeze.

Breakfast Crumble
I used frozen berries and cherries for this crumble. Apples would also be really good. If you are using fresh fruit the cooking time will be a little bit shorter.

1/2 cup almonds, chopped
1/2 cup sunflower seeds
1 cup rolled oats
1 cup flour (I used 1/2 cup whole wheat and 1/2 cup buckwheat)
1/2 teaspoon cinnamon
1/4 teaspoon salt
2 ounces (4 tablespoons) unsalted butter
1 egg
1/4 cup maple syrup
4 cups fruit (fresh or frozen)
1/4 cup flour
2 tablespoons sugar (optional, depending on how sweet you want the fruit to be)

Preheat the oven to 350'. Combine the almonds, sunflower seeds, oats, 1 cup flour, cinnamon, and salt in a bowl. Cut the butter into small pieces and rub it into the dry ingredients, as if making a pie or biscuit dough. When the butter has been evenly distributed into small pieces, whisk together the egg and maple syrup. Pour this into the dry ingredients and stir to make a crumbly evenly moistened dough. Toss the fruit with the 1/4 cup flour and sugar (if using) and pour into an 8-inch cast iron skillet or oven safe dish of a similar size. Sprinkle the crumble on top evenly over the fruit. Bake for 30-45 minutes until the topping is golden brown and the fruit is bubbly.


January 18, 2013

Almond Buckwheat Waffles

almond and buckwheat waffles - the road to the farm 

The thing I love about waffles or pancakes for breakfast is that it only takes a few extra minutes to make them but it makes the start of the day a little more special. On the weekend, or a day that isn't busy, you can stir them together at a leisurely pace. Or if you have obligations or places to go, the smell of batter cooking on a hot pan is a nice way to pause in the morning.

I put these together from my go to waffle recipe (from Sunlight Cafe by Mollie Katzen) because I wanted a wholesome, warm breakfast that's a little out of the ordinary. Almond meal and buckwheat flour both have lots of protein and make for crisp, light waffles. I can't resist smothering them with yogurt and berries and a touch of maple syrup.

Almond Meal Buckwheat Flour Waffles
It might seem like these have a lot of butter, but it is essential to the crisp outside and soft inside of the waffle and it gives them a really good flavor. For my berry topping, I just heat frozen berries until they thaw into a juicy compote. If you have left over waffles you can freeze or refrigerate them in an airtight container for another breakfast.

1 cup almond meal
1/2 cup buckwheat flour
1 teaspoon baking powder
1/4 teaspoon baking soda
1/2 teaspoon salt
3 eggs
1 cup buttermilk or plain yogurt
1 teaspoon vanilla
6 tablespoons melted unsalted butter
1/2 cup finely chopped almonds, optional

Mix the almond meal, buckwheat flour, baking powder, baking soda and salt in a medium bowl. Beat the eggs together until frothy. Stir in the buttermilk or yogurt into the eggs until smooth and add the vanilla. Pour the liquid ingredients, along with the melted butter into the dry ingredients. Stir to combine, but it doesn't have to be completely smooth. Mix in the almonds, if using. 

Pour one half cup of batter onto the hot waffle iron and cook according to the manufacturers instructions. Repeat cooking process until all of the batter is used. Makes about 6 waffles.

December 5, 2012

Sunday Breakfast

help yourself

Over the weekend, my friend Emily came to visit. We had a few relaxing days to catch up and enjoy each others' company. On Saturday night while we were eating dinner, we started talking about what we might make for breakfast the next morning. Often, when I am unsure of what to cook or eat for a meal I like to ask people what they would want to eat if they could have anything, practical or not. Ray wanted home fries with salsa and cheese. Emily wanted eggs benedict. We decided to make home fries, black beans, poached eggs (scrambled eggs for me) and hollandaise sauce along with bacon, fruit, hot chocolate, and orange juice.

home fries

making hollandaise


It is not often enough that our kitchen is full of people making and sharing food. The kitchen is just the right size when one person is cooking, the limited counter space can accommodate two people if they don't mind rubbing elbows and dancing around each other. With three of us and the need for lots of burners on the stove it was a little crazy but worked out just fine. We boiled, whisked, fried, turned eggs and butter into a thick creamy sauce and learned how to rescue it when the sauce broke.

breakfast

breakfast

The kitchen was hot and steamy when we sat down to a table laden with food and drinks. We enjoyed every bite and it didn't take long before we were all too full to eat any more. I love it when a great, memorable meal comes together somewhat spontaneously. There are few things more satisfying than cooking and sharing good food together. It brings a glow to the table and makes the food taste even better.

Home Fries
This recipe is mostly a guideline and I haven't listed quantities because you can make this recipe in any amount. You can use any kind of potatoes you want and a mix of varieties works fine, too. I find that butter (or clarified butter) gives the potatoes the best flavor and crisp outside but you can also use your choice of oil. I like the potatoes to taste a bit garlicky, but that is optional, too. Finally, veggie home fries are really good, too, if you want to add chopped broccoli, peppers, carrots, spinach or whatever else you fancy.

potatoes
butter
salt and pepper
garlic (optional)
veggies, salsa, grated cheddar or pepper jack cheese (optional)

Rinse or scrub the potatoes clean, as needed. Cut the potatoes into bite size or slightly larger pieces, the size that you want your home fries to be. Place the potatoes in a pot and cover with water, add a generous pinch of salt. Bring the pot to a boil and reduce the heat to keep the water boiling, but not boiling over. When the potato pieces can be easily pierced with a fork, remove from the heat and drain out the water. Heat a cast iron skillet or other shallow pan over medium high heat. Melt enough butter to coat the bottom of the pan. Add the potatoes to the pan and let them cook until crisp, stirring occasionally so that all the sides have a chance to crisp and brown. Mince a clove (or the amount you desire) of garlic. Once the potatoes are mostly brown and crispy, add the garlic, salt and pepper and optional veggies. Cook, stirring every so often, until the potatoes are very crispy and the optional veggies are also cooked through. If you are using salsa, stir in enough to barely coat the potatoes (or add more if you want). While the potatoes are still hot, but before serving, top with grated cheese and allow it to melt for a few minutes. The home fries are best eaten warm but can be reheated and eaten later if you have some left.

April 18, 2012

Blueberry Muffins

DSC_0018

Do you ever have those mornings where you had planned to accomplish four things before 8 am and and when the time comes, your bed is too warm and wonderful? Then, of course, when I do get up I wish I had been up for an hour already and gotten some of those things out of the way. Oh well. I'm glad that right now almost all of my deadlines and projects are self imposed so if I let things slide a little, I can get caught up later.

One thing I have no trouble making time for in the morning is a batch of muffins. On the days when my morning needs a little extra love, I stir together flours and melt butter and in almost no time at all muffins are baking in the oven. I already have three muffin recipes on this blog so there isn't much more I can say about muffins. My favorites, which I haven't shared here yet, are bursting with blueberries. My muffins are usually small and a little homely, but what they lack in looks, they make up for in flavor. They are easily portable and great for sharing which keeps me from eating all of them in one sitting.

DSC_0022

Blueberry Muffins
I've tried many many muffin recipes and I've discovered that one of my favorites uses plain yogurt for the liquid. It makes a slightly crisp exterior and a lovely texture, but you could also use milk or buttermilk instead. I let the blueberries provide most of the sweetness, but you can add more maple syrup to yours if you want. I love using spelt flour for muffins, but again feel free to use the flours you like. This recipe was inspired by Melissa Clark's Maple Blueberry Tea Cake in Cook This Now.

1 1/4 cups whole spelt flour
1/4 corn meal
1 1/2 teaspoons baking powder
1/4 teaspoon baking soda
1/2 teaspoon salt
1/2 cup plain yogurt
1/2 cup maple syrup
1 egg
6 tablespoons (3 ounces) unsalted butter, melted.
1 cup blueberries (frozen or fresh)

Preheat the oven to 400' and butter 8 muffin cups (or fill them with paper liners). Whisk together the flour, corn meal, baking powder, baking soda, and salt. In a two cup measuring cup, measure the yogurt and maple syrup. Add the egg and beat briefly to combine. Pour the liquid ingredients and the melted butter into the dry ingredients. Stir just to combine. Add the blueberries and stir to distribute them throughout the batter. Fill each muffin cup 3/4 of the way full. Bake for about 20 minutes or until a skewer inserted in the middle comes out clean. Let cool for a few minutes before eating.

April 16, 2012

Homemade Yogurt with Fruit in Jars

yogurt

In my adventures with making food from scratch, I am always trying to find the things that I can make that Ray and I will both enjoy. I might have mentioned it before, but our tastes and eating habits don't always intersect. On a recent trip to the grocery store together I was inspired to try a variation on my weekly batch of yogurt that would be an easy way for him to grab something healthy on the way to work.

I usually make plain, whole milk yogurt and eat it for breakfast and snacks often, with maple syrup, fruit, or jam added for flavor and sweetness. This homemade yogurt can be spooned into a jar for eating away from our kitchen, but I wanted to try making fruit on the bottom yogurt cups that would be as convenient as the store bought version seems.

If you haven't tried it before, homemade yogurt is a way of accomplishing transformation with relatively little work. I've written about making yogurt before and it is one of my favorite homemade ritual processes. Making the yogurt into half pint jars primed with jam isn't much different than scooping yogurt into a jar, but once they are made you can easily grab a jar for breakfast, lunch or a snack.

I love the process, the connection, and the tastes that come from making instead of buying, but I am  especially happy when other people can appreciate the results, too.

DSC_0050 

Fruit on the Bottom Yogurt Jars
I usually start with a half-gallon of milk from a local farm. If you're using more milk, add more yogurt starter. If you don't want to put all of your yogurt into small jars, divide it accordingly among the jars you wish to use (I used half-pints, but maybe pint jars would be a better portion for you). For the fruit, jam works best because it is thick and won't make the yogurt watery. You could also use fresh or frozen fruit simmered with a little bit of sugar but unless it is very thick it will make the yogurt thinner when stirred. More yogurt info here. 

1 half gallon milk
Jam or fruit 
1/4 cup plain yogurt

Pour the milk into a heavy-bottomed pot over medium-high heat. Heat the milk to 180' F, stirring occasionally to keep from scalding. If you do not have a thermometer, when the milk reaches 180' it will be very steamy, hot, and bubbly but not boiling (if it does boil, don't worry). When the milk is hot enough, remove from heat. Let it cool until it reaches 120' F (very warm, but not hot).

While the milk is cooling, wash 8 half-pint jars and lids. Spoon a layer of jam into each jar. About 1/8 of a cup is a good start, but add as much or as little as you like to flavor your yogurt. When the milk has cooled to 120' F, whisk in the yogurt until it is smooth and evenly distributed. Ladle the milk into each jar, taking care not to disturb the jam/fruit too much. Cover each jar with a lid and place them next to each other in a warm spot. Cover the jars with 5-8 tea towels to keep them warm for about 6 hours. After 6 hours, the yogurt should be mostly solidified. Move into the refrigerator and use within a week.

February 29, 2012

Whole Wheat Sourdough Waffles

DSC_0123
DSC_0116

Sourdough is ideal for keeping a  chewy, hearty loaf of bread on hand, but crisp, light waffles also begin with sourdough. The starter imparts none of its sour flavor, but gives all of its leavening power to make the waffles light and fluffy and delightfully crisp on the outside. If I didn't like the bread so much, I would still be tempted to keep the starter around just to make these waffles. We don't eat them often, but they are one of my favorite breakfast treats.

As with anything involving wild yeast, it takes a few hours of planning ahead and a few minutes of work to have your perfect breakfast. Mix the starter, flour, and buttermilk the night before. The yeast works its magic, the flour soaks over night (which can reduce phytic acid and make it easier to digest) and in the morning you add eggs, butter, milk and baking soda. The batter rises rapidly and sizzles dramatically when it hits the griddle.

I like waffles plain, fresh off the griddle. I really like them with maple syrup. I love them covered with berries, and a scoop of yogurt or a dab of mascarpone butter. No matter how you like to eat these, you really can't go wrong.

DSC_0121
DSC_0133
DSC_0142
Whole Wheat Sourdough Waffles
Adapted from the King Arthur Flour Whole Grain Baking Book

2 tablespoons active sourdough starter
1 cup buttermilk (or 1 cup milk with a teaspoon of vinegar)
1 1/2 cups (6 ounces) whole wheat flour

Stir together the starter, buttermilk and flour until smooth. Cover and let sit for at least hours or overnight.

2 eggs
1/2 cup (4 ounces) milk
1/4 cup (2 ounces) melted butter
2 tablespoons sugar (optional and not really necessary)
1 teaspoon baking soda
1/2 teaspoon salt

When you are ready to make the waffles, beat the eggs and milk together until they are frothy. Stir the egg and milk with the melted butter into the starter mixture. Add the sugar (if using), baking soda, and salt and stir gently until the batter is smooth. Bake the waffles in your waffle iron as usual.
Makes 5-6 large waffles.

Mascarpone Butter
Creamy, with a hint of salt, this butter is perfect with acidic berries on top of waffles, pancakes or french toast. Simply mix 1 part butter and 2 parts mascarpone cheese in a food processor until it thickens to the consistency of whipped butter. Add salt to taste. Use liberally and keep refrigerated.


November 30, 2011

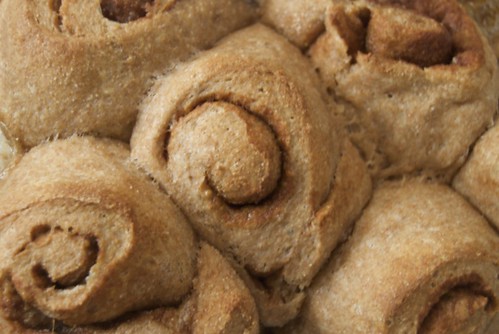
Pumpkin Spice Rolls

DSC_0047

November tastes of cinnamon and spices, hearty roots baked creamy, soup full of leeks. In my mind, November is the color of fallen oak leaves while December is the deep green of a hemlock bough. The autumnal spiced cakes and breads, the rustic pies of November will soon give way to chocolate and peppermint, delicately crunchy cookies and the flavors of Christmas. I still have six butternut, one spaghetti and a few acorn squash in my cupboard and I'll be eating squash well into next year. But in December, my focus turns away from fall recipes to make room for the season of sparkly lights, hot cocoa, and plates of cookies.

DSC_0046

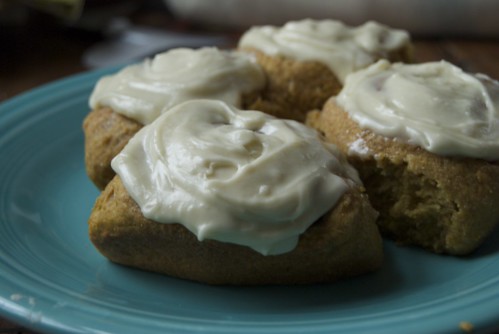
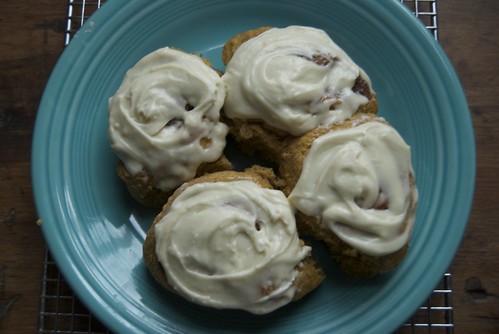
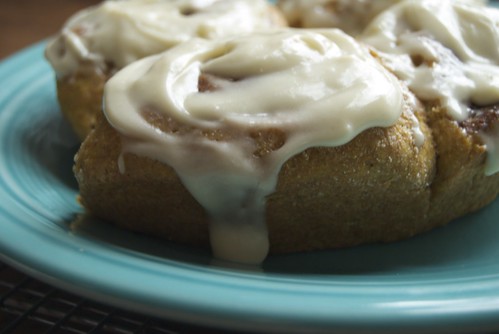
If I'm to hold true to these seasonal prejudices, then today is not too late to share one more squash flavored recipe. While I get caught up in recipes and meals that are seasonally appropriate, I really like the idea of recipes that show up once or twice a year for a certain, special occasion. In our household, which consists of me and Ray, we don't yet have many traditions but I wouldn't mind making these pumpkin spice rolls into one. They could easily be part of any old breakfast, but I want them to be a special treat.

I dreamed up this combination after I made a pumpkin cake to take to our friends' house. I made too much cream cheese frosting and had left over baked squash as well. I haven't iced a cinnamon roll since I was just tall enough to reach the toaster oven and pull out the Pillsbury version, but somehow I decided that was how the icing should be used. Not for those perfectly round rolls that popped out of the can with their plastic cup of icing, but for rolls filled with pumpkin and flavored with pumpkin spice.

DSC_0056


Pumpkin Spice Rolls
I adapted this recipe to make these rolls. The dough has pumpkin in it and instead of cinnamon, I made a blend of pumpkin pie spices to fill the roll. You do not have to make this recipe all at once. I have included various stages when you can refrigerate the dough and use it later.

1/4 cup lukewarm water
2 teaspoons yeast
3 tablespoons sugar
1 1/4 teaspoons salt
1 cup pumpkin or squash puree
1/4 cup plain yogurt
1 egg
3 tablespoons unsalted butter, melted
1 3/4 cups (7 ounces) whole wheat flour
1 1/4 cup (5 ounces) white flour

2 tablespoons butter, at room temperature
3 tablespoons sugar
1/2 teaspoon cinnamon
1/2 teaspoon ground ginger
1/4 teaspoon nutmeg
1/4 teaspoon allspice
1/8 teaspoon cloves

Place the water and yeast in a medium bowl and let stand for a few minutes to dissolve. Whisk in the sugar, salt, pumpkin, yogurt, egg and melted butter. Add the flour, 1/2 a cup at a time, using your hands to knead it when it is to thick to stir. Knead the dough until it is smooth and all the flour is incorporated. It will be sticky and somewhat soft.  Let the dough rise, covered, in the bowl for about an hour. At this point you can cover the bowl so it is airtight and leave it in the fridge for up to 4 days.

When you are ready to assemble the rolls, butter the bottom of a 9-inch round pan. Spread the dough out on a lightly floured surface. Doing this on parchment, plastic wrap or a silpat will make it much easier to roll the dough up. The dough should be spread or rolled into a rectangle about  9 by 12 inches. Spread the softened butter over the surface of the dough. Mix the sugar and spices together and sprinkle that evenly over the buttered surface. Begin rolling up the dough at the long edge, using the parchment (or whatever you have) underneath to help roll the dough into a long rolled up log. Pinch the open end of the roll to the rest of the log. Carefully cut the log into 7-10 equal slices and place each slice spiral up in the round pan. Cover and let rise for 1 hour.

Now you can cover the rolls and refrigerate them overnight, or continue baking.

Preheat the oven to 350. Bake the rolls for 25-30 minutes or until they are lightly browned on the edges. They will feel solid on top, but slightly soft underneath and a fork poked in them will come out clean. Let them cool in the pan for about 15 minutes, then remove and frost, if desired.

Cream Cheese Frosting
3 tablespoons unsalted butter, at room temperature4 ounces cream cheese, at room temperature 1 teaspoon vanilla extract 1 1/2 cups confectioners' sugar1 to 2 tablespoons milk, if needed, to make the frosting spreadable 

Combine the butter, cream cheese and vanilla in a medium bowl and beat them together until they are light and fluffy.  Add the sugar gradually, beating well. Add the milk a little at a time until the frosting is spreadable. 

November 8, 2011

Apple Fritters

applefritters


I mentioned last week that fall flavors might be lacking here, but I've made up for that in my kitchen and I'll be making up for that here, too. I'm loving the combinations, colors, and contrasts of sweet squash with apple and ginger and bright green roasted broccoli. The heartier starchy vegetables alongside a crunchy slaw and a little salad with the last of our greens. The way the crunch of an apple can be cooked into something so soft. We might get snow tomorrow so I am content to spend more time inside with the many warm flavors there are to explore.

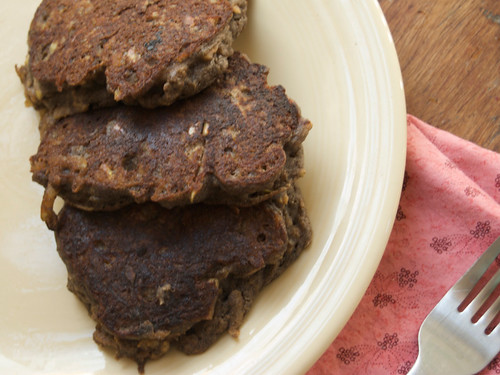
These fritters were inspired by a recipe for leek fritters in Plenty that I made a couple of weeks ago. I though they might be good with sweet fruit and spices. They are light and fluffy but have a slightly crispy outside. I used buckwheat flour for a change which I think pairs well with the apple and cinnamon. They are perfect topped with plain yogurt and a bit of maple syrup if you wish.

Apple Fritters
I like the way coconut oil gives the fritters a slightly crispy outside, but you could also cook them in butter.

3-4 small apples (for about 2 cups of grated apple)
1/2 teaspoon cinnamon
1/2 teaspoon powdered ginger
1/4 teaspoon nutmeg
3/4 cup buckwheat flour
1 teaspoon baking powder
1/2 teaspoon baking soda
1 egg white
1 egg
4 tablespoons butter, melted
1/2 cup buttermilk
Coconut oil for cooking

Grate the apples with the peels on. Place the grated apple and any juice in a bowl and mix with the cinnamon, ginger, and nutmeg. Stir the flour, baking powder, and baking soda together in a separate small bowl. Whisk the egg white until it has stiff peaks. Gently stir the egg white into the grated apple and spices. Whisk together the egg and the buttermilk and combine with the flour. Pour this batter and the melted butter into the apples and stir to blend completely.

Heat a skillet to medium and add a tablespoon of coconut oil. When the oil has melted, scoop a quarter cup of batter into the skillet. Cook for about two minutes and then flip. The top should be golden brown. Cook on the other side for two to three minutes or until the fritter is cooked through. Makes about 6 fritters.

February 21, 2011

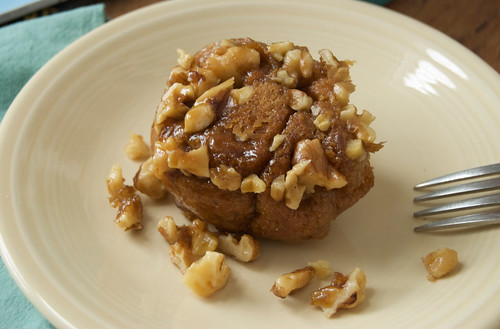
Whole Wheat Maple Walnut Sticky Rolls for a Lazy Sunday

maplewalnutstickyroll

Last week the air smelled of spring. I walked on the sunny side of the street, wearing only a sweater and a scarf for warmth. It was such a welcome break from temperatures frozen around zero degrees. Of course, in February, I don't expect that to last.

In the past 24 hours we have gotten at least a foot of snow, but I'm not complaining.

Sometimes I just need a break and while I wasn't planning to go anywhere or do anything on Sunday, the snow helped me feel cozy and just where I wanted to be. This is the time of the year when everyone grows sick of winter and snow, but I don't mind a little more hibernation.

I often imagine winter as the time when I will lay low, catch up on reading and the pile of other projects that I haven't worked on in the summer or fall. In reality, I am as busy as ever in winter. I don't get as much time to knit, bake, and be cozy doing very little as I would like.

To remedy this, I sometimes plan for a day to do nothing. As you know, if you are busy most of the time and don't have regular evenings and weekends off, a day with no set plans or projects to accomplish is a huge luxury. Sometimes these days off are filled with serendipitous wanderings and small adventures, but on this snowy Sunday I hardly left the house. I had magazines to read, a movie to watch and that's about it.

Occasionally I thought, Oh, I should really work on... But no, not happening today.

Though I intended to do very little, I make a batch of sticky rolls that paired perfectly with the lazy, snowy Sunday that I was trying to achieve. They are sweet, soft and decadent, but the whole wheat flour keeps them down to earth.

Sticky rolls seem like something that would be too labor intensive and take too long for a relaxed Sunday morning. Actually they fit in very well. I mixed the dough the night before, took it out of the fridge in the morning and cuddled back into bed for an hour or so. I got up again to roll out the dough and then let it rise. If you are feeling ambitious you could take a walk while the dough expands, maybe invite some friends over since this recipe makes plenty to share. Once the oven is ready it doesn't take long for them to bake. Let them cool a little while you make tea and cut up fruit (or continue relaxing in whatever way you please) and then you have breakfast for a lazy, cozy Sunday.

DSC_0175


Whole Wheat Maple Walnut Sticky Rolls
This recipe is adapted from Molly Katzen's Sunlight Kitchen. I use all whole wheat flour which makes for a softly textured roll with plenty of flavor. I recommend making the dough the night before so you have less to do in the morning. Also, letting the flour "soak" in the dough overnight makes it easier to digest. I've tried this with both maple sugar and brown sugar, they both work fine. You can substitute pecans instead of walnuts.

For the Dough:
1/4 cup lukewarm water
1 1/4 teaspoons yeast
3 tablespoons sugar
1 1/4 teaspoons salt
1/2 cup plain yogurt
1 large egg
3 tablespoons unsalted butter, melted
2 1/3 cups whole wheat flour

For the Filling:
2 tablespoons unsalted butter, softened
1 teaspoon cinnamon
2 teaspoons maple sugar

For the Stickyness:
8 tablespoons unsalted butter
1/2 cup maple sugar or brown sugar
3/4 cup maple syrup
3/4 cup walnuts, coarsely chopped

Place the warm water in a medium sized bowl, sprinkle in the yeast and let stand for about 5 minutes. Measure the yogurt into a 2 cup measure add the egg and beat to combine. Mix in the sugar and salt. Pour the contents of the measuring cup as well as the melted butter in the yeast mixture. Add2 cups of the flour, one cup at a time. Add additional flour as needed to create a smooth and soft but sticky dough. Let rise for one hour, OR refrigerate for up to 4 days until you are ready to use it.

If the dough has been refrigerated, let it sit at room temperature for about an hour. Grease two eight inch round cake pans or a baking tray and set aside. Using parchment or another non-stick surface (since the dough is so sticky you might want to spray your surface with non stick spray or grease it with butter) prepare the dough. Stretch it and spread it into approximately 10 by 16 inch rectangle. Spread the softened butter on the dough. It doesn't have to cover every single surface of the dough, but it should be evenly distributed. Mix the cinnamon and sugar together and sprinkle evenly on the buttered surface of the dough. Starting with one of the long ends, roll up the dough into a tight spiral and pinch the end to seal it. Let it rest while you make the stickyness.

Melt the butter in a sauce pan over low heat. Add the sugar and stir until is melted into the butter. Once the sugar is liquid, add the maple syrup and stir just until the mixture is uniformly combined. Remove from heat and pour into the pan or pans. Sprinkle the walnuts on top of the syrup. Gently cut the rolled dough into about 16 equal pieces and place them, spiral up, into the pans of syrup. You can lean them against each other, or keep them an inch or two apart. Cover with a clean dishtowel and let rise for about an hour. 

Before the hour is up, preheat the oven to 350'. Bake the sticky rolls for about 20 minutes, until they become golden brown on top and completely baked inside. Remove from the oven and place them sticky side up on a serving plate. If there is extra syrup, spoon it on top of the rolls. Let the rolls cool for at least 20 minutes before eating so you don't burn your mouth. They taste best within a few hours of baking.

November 4, 2010

Alive and Ever Changing

Pumpkin Pecan Pancakes

In my last post, I talked a bit about my kitchen and the simple, every day things that happen there. I'm developing a new relationship with this space where I cook, eat, clean, and create. I've been realizing lately that, for me, a kitchen is a work in progress. At least a couple of times a day, I create a meal there: sometimes simple and quick, sometimes more involved. As much as I like to have a clean and organized kitchen, it seems like there are always dishes being created, containers emptied, and pots and bowls filled. Its not that I don't feel like cleaning or washing up, I just find that almost as soon as I get the counter spotless and the floor swept, I embark on a new project or meal.

Generally I dislike messy or cluttered spaces and I really do love a clean counter, empty sink, and dishes put away. There is always a project or two going on in the kitchen, though, so I've started to view this as something that is alive and ever changing. Just like the jar of sourdough starter on the counter and the gingered carrots fermenting on the shelf, it is a living space. As I clean up my work, I try to keep in mind that creation, not perfection, is the goal.

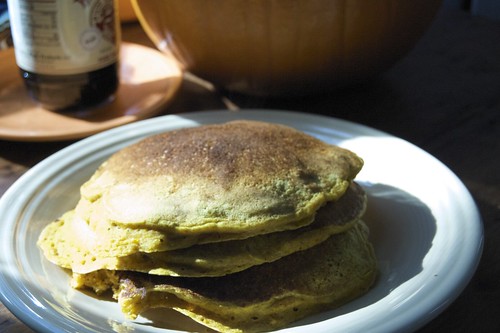
I like having a space where I can quickly pull together a warm and hearty breakfast without any fuss. On Sunday morning, I made these pancakes and though you might be sick of squash, clearly, I am not. I had to share the recipe since they made for the perfect breakfast on an autumn morning.


Pumpkin Pecan Pancakes
I like to substitute spelt flour in pancakes and muffins since it works just as well as wheat flour for these recipes. If you don't have it (or wheat germ or flax seed meal) you can just use wheat flour. As always, pumpkin somehow sounds better and more delicious, but squash works just as well whether from a can or baked in your oven.

1 cup whole spelt flour
1/2 cup wheat germ or flax seed meal
1 1/2 teaspoon baking powder
1/4 teaspoon baking soda
1/2 teaspoon salt
1/2 teaspoon cinnamon
1/4 teaspoon nutmeg
1/4 teaspoon ground ginger
1 cup mashed pumpkin or  winter squash
1 cup butter milk*
2 eggs
2 tablespoons unsalted butter, melted
1/2 cup chopped pecans


Whisk together flour, wheat germ, baking powder, baking soda, salt and spices. Mix together pumpkin, buttermilk, and eggs until smooth and fully combined.  Pour wet ingredients and melted butter into the flour mixure. Add pecans and stir until just combined (a few lumps are okay). Heat a large skillet over medium heat and add a bit of butter (or nonstick spray) to the pan. Pour in 1/3-1/2 cup batter (depending on how large you want to make the pancakes). When the small bubbles appear on top of the pancake and stay that way, flip the pancake and cook for a minute or two on the other side. Serve hot with your favorite pancake toppings. Makes 6-8 pancakes (depending on their size)

* or one cup milk with a tablespoon of vinegar stirred in.

September 26, 2010

Fuel for the Day

 DSC_0215

Once a week, or sometimes less, I drive Ray to work (he usually bikes and our car hangs out in its spot behind our apartment) and on the way we stop at a coffee shop and get some breakfast. Its a nice little part of the morning together. Other times our routines are out of sink and we eat our cereal or yogurt and granola separately at the kitchen table. The mornings here have been surprisingly dark lately as autumn settles in. As the day wears on, the sun comes up higher and warms the air, the grass, and my back under a wool sweater. On these cool fall mornings, its nice to have something warm in my belly to get the day started.

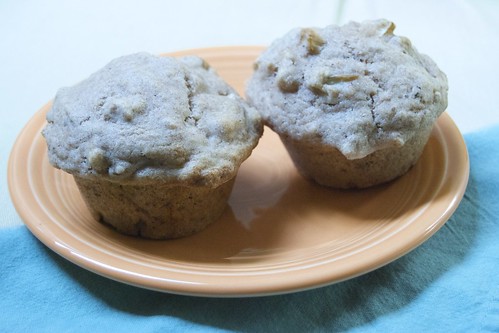
Last week I made some ginger pear walnut muffins with those pears I found on my run. I love muffins as an easy breakfast any day of the week and I try to make them full of fruit and nuts so they provide good fuel for the day. These turned out to be the perfect combination of sweet soft fruit, crunchy nuts, and spices. There's nothing like a freshly baked muffin to perfect a cool fall morning.

 DSC_0204

Ginger Pear Walnut Muffins 
I like muffins that have as much fruit as muffin, but you can adjust the amount of added fruit, nuts, ginger, and maple syrup to your taste.


1 1/2 cups white flour
1 cup whole wheat flour
1 teaspoon cinnamon
1/2 teaspoon nutmeg
1 1/2 teaspoons baking powder
1/4 teaspoon baking soda
1/2 teaspoon salt
1 cup butter milk
1 tablespoon grated fresh ginger
1 egg
2-4 tablespoons maple syrup
4 tablespoons melted butter
1-2 cups pears, cored and diced into 1/4-1/2 inch pieces
1/2- 1 cup chopped toasted walnuts


Preheat the oven to 400 degrees. In a medium bowl combine flours, cinnamon, nutmeg, baking powder, baking soda and salt. Measure out the buttermilk and add the ginger, egg, and maple syrup. Beat gently together. Pour the buttermilk mixture and melted butter into the flour, add the fruit and nuts and stir to combine, its okay if there are lumps. Spoon into prepared muffin tin and bake for about 20 minutes, or until a toothpick comes out clean. Let cool for 15 minutes before eating.

March 14, 2010

Whole Grain Pancakes

DSC_0736

It seems like everyone is talking about spring and noticing the signs.  I've seen trees covered in little buds getting ready for leaves to burst out, when the time comes.  The season is beginning to change, but the wind today made me wish I hadn't left the house without a scarf and it nearly knocked me over as I rounded a corner.  I think spring is a season for impatience.  Everyone wants sun, soft breezes and green grass, but we mostly get mud.  This is the time of year to think about growth, new life and digging in soil.  I, of course, am getting ready for big changes but as I go through old letters and wrap up dishes the season seems more autumnal and contemplative than the loud leaping of spring. 

As I navigate my way around packed boxes and others waiting to be filled, I have been obsessively trying to use up as much of the food in my pantry and freezer as possible.  The past couple of weeks have been a great game of how to creatively use up all of the odds and ends.  This morning, in what was probably the last meal at our dear apartment, I went back to the old standby of my favorite pancakes.
DSC_0735

I have made a lot of pancakes over the last several years.  I usually make them in the big cast iron skillet that Ray bought when we were first dating and which I use for sauteeing, stir-frying, and cooking at least half of our meals.  A hot breakfast, given a little more time than normal, can be a special treat even on a work day morning.  I suspect you, also, have made many pancakes, but I realize that a lot of people don't know just how easy it is to mix up flours and pour in milk and eggs all of which will soon be transformed into tender, sweet, steaming hot cakes.  While a pancake mix would provide the same pleasurable hot cake experience, I love the flexibility and possibilities of making them from scratch.
DSC_0739

I use a mix of mostly whole-grain flours which varies each time I stir them together depending on what is in the cupboard.  I love to add fruit to my pancakes, usually blueberries that I picked and froze over the summer.  Frozen fruit is really easy to add, but sliced apples or bananas work really well, too.  In my experience, pancake batter is really forgiving and its the kind of thing you can toss together while half asleep and, if you want, not wake up til you take the first bite.

P.S.  I am sorry for the lack of Slow posts, the past few weeks have been a really busy time.  We will be traveling for all of April and most of May, but they will be back after that!

Whole Grain Pancakes
adapted from Sunlight Cafe by Mollie Katzen
I usually use whole wheat pastry flour as the base, but if I am out, I like to use a mixture of 2 parts whole wheat flour and 1 part white flour.  Along with the wheat flour, I add another type of whole grain flour or meal: flax seed meal, wheat germ, oats*, corn meal -- experiment with the grains and proportions and see which you like best.  Use any fruit you like, just make sure it is in small enough pieces to evenly distribute on the pancakes.  Frozen fruit does not need to thaw before adding.

1 cup whole wheat pastry flour
1/2 cup other whole grain flour or meal (lately I have loved the texture and flavor of flax seed meal)
1 1/2 teaspoons of baking powder
1/8 teaspoon baking soda
1/2 teaspoon salt
1/2 teaspoon cinnamon
1 1/3 cups buttermilk (see below for a substitution for this)
2 large eggs
2 tablespoons melted butter
Fruit, optional
Place a large skillet over medium heat.  In a medium bowl, mix together flours, baking powder, baking soda, salt and cinnamon.  Measure out buttermilk in a two cup measure.  Add eggs and beat with a fork to combine.  Pour milk and eggs as well as the melted butter into the dry ingredients.  Stir to combine, its okay if there are a few lumps.  When the skillet is heated, add butter or non-stick spray to grease the pan.  Pour in 1/4 to 1/3 cup of batter.  Sprinkle fruit on the batter, if using. When small bubbles form and stay on the top of the pancake, flip it.  Let it cook for another couple of minutes.  Keep each pancake warm in the oven until all are made, or eat them as soon as they come off the griddle.  They go especially well with real maple syrup, yogurt or more fruit.  If you don't use all the batter at once, keep it in an airtight container in the fridge for two or three days (just stir it up when you are ready to use it).  
Makes about 5 five-inch pancakes.


If you don't have buttermilk (I rarely do) simply stir in 1 tablespoon of vinegar into the milk and let stand for a few minutes.
*If you are using oats, let them soak in the milk for 15 minutes before mixing everything together.

March 1, 2010

Treasures

I stumbled upon this blog, Zero Waste Home, as I began gathering boxes, cleaning out and packing up the large and sometimes disorganized closets of my apartment.  I truly do aspire to have zero waste and I am really interested to read about someone else who is pretty much there.  In permaculture, everything that might seem to be wasted can and should be used for some other purpose.  A simple example of how this works is composting, where inedible food scraps are turned into a valuable resource for growing more food.  Along with making sure that potential waste is recycled into something useful, Bea continually advocates refusing things you don't need so that they don't become something that you have to recycle and reuse or worse: another piece of trash.

I tend to wait before purchasing things that I think I want, which is a good way to keep from accumulating lots of things that I really don't want or need.  But when I start packing my apartment, it makes me scrutinize all the things that normally sit quietly on the shelves and walls.  Do I really need this?  Moving and packing makes me think about what I have, what I use, what I save and why I save it.  While they may weigh me down a bit, most of my books will be packed and hauled to our next place as well as everything we use in the kitchen.  In fact, most of the things we have in our apartment are carefully chosen and kept because they are useful, interesting or carry a significance or sentimental value.

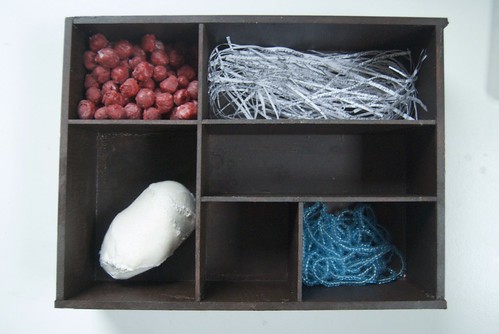
Then, as I fill cardboard boxes, I wonder how valuable sentiment is.  I have a stack of little treasure boxes that I have moved with me several times.  Each one holds small mementos from different experiences I have had: photographs I took and printed myself in Italy, rocks from the shores of Lake Champlain, a pile of postcards I made in college and another pile of postcards I have collected over many years.  I don't look at these things often and I wonder if I really need to carry them from place to place as I do with journals I have kept since high school.  Will I be thrilled to read through them years from now and remember different small moments of my past?  Or will I realize that there really isn't much of interest in those scribbled pages and wish that I hadn't clung to something so insignificant?  Lately I have been posing the question:  What is one thing you wish you hadn't gotten rid of (even if you recycled it!) and what is one thing you wish you could stop holding onto?

As someone who is fueled by creating and making things, I wonder when to let go.  I enjoy making things that have a purpose, but I have also done plenty of making for the sake of creative exploration.  I made this box a few years ago as an exploration of memory and, perhaps, sentimentality.  But what am I to do with it now?
DSC_0674

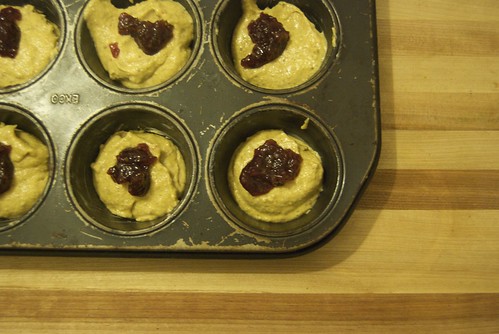
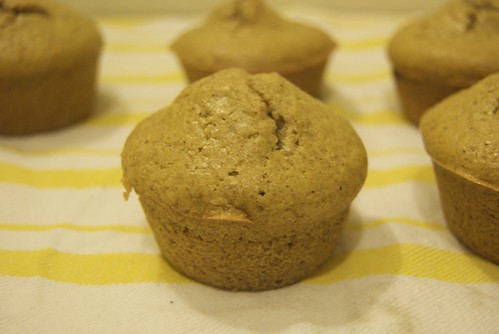
I will continue to ponder these thoughts as I pack up.  Meanwhile, I will leave you with a recipe for a muffin, filled with buried treasure, that won't be around for long, even if you wish you could keep them.  They are a variation on this simple cake which has a wonderful texture and flavor, delightfully covered with jam and whipped cream.  I encourage you to try the cake, but the muffins are also a nice treat.  They are slightly less sweet and I used a raspberry jam with no added sugar, so you don't have to eat cake for breakfast if you don't want to.  Buried Treasure

Walnut Jam Muffins
Walnut Jam Muffins
Adapted from Smitten Kitchen.  Feel free to use whatever kind of jam you like.  
Makes 12 small-ish muffins

2 cups walnuts, toasted at 350 for 10 minutes and cooled.
3/4 cup sugar
1 1/2 sticks unsalted butter, cut into smaller peices
6 large eggs
1 teaspoon vanilla
3/4 cup flour
3/4 teaspoon baking powder
3/4 teaspoon salt
1/4 cup jam (I used raspberry)
Preheat the oven to 350 degrees.  Prepare the muffin tin (you can use paper muffin cups or grease the tin with butter).  In the bowl of a food processor, pulse the walnuts and sugar until evenly mixed and finely chopped.  Add the butter chunks and process until combined, then add eggs and vanilla and mix until smooth.  Measure out the flour, baking powder, and salt and whisk to combine.  Add the flour mixture to the food processor and pulse until just combined.  Spoon the batter into the muffin tins, filling them just half way.  Place one teaspoon of jam in the center of each cup of batter.  Spoon the rest of the batter on top of each teaspoon of jam, filling the cups until they are level with the top of each cup (make sure to portion the batter so there in enough for all of the muffins).  Bake for 20-25 minutes or until the muffins spring back when gently poked with your finger.  Let cool and enjoy!

February 8, 2010

The Magic of Making

 Croissants
 Lately, I have had a list of baking projects on my mind.  A warm kitchen helps in getting through the cold winter months just as much as a hat, scarf, and mittens, if not more than those woolens.  Truthfully, though, this list doesn't disappear when the snow melts.  Even when its too hot to turn on the oven, I have at least one or two recipes I want to try.  I made this the other night and have been thinking about these and those, but I can't eat cake and cookies everyday (right?).  So I keep some on the list and try others.
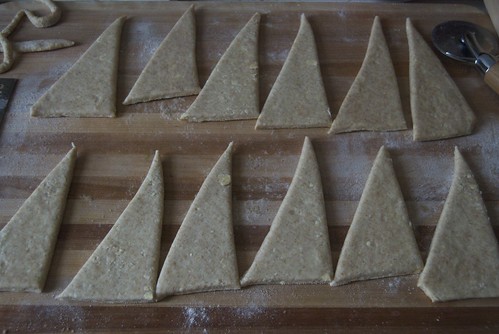
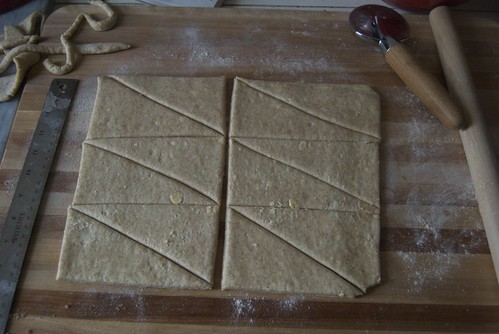
Cutting dough for croissants
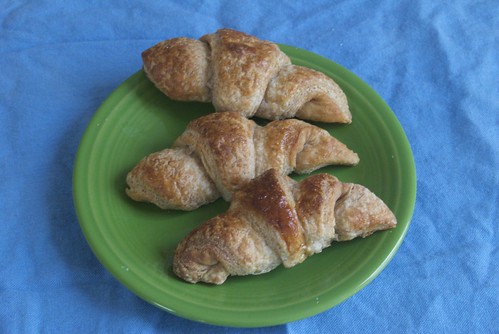
I've been thinking about making croissants since I saw the recipe in the King Arthur Flour Whole Grain Baking Book.  We have a first Sunday of the month brunch potluck so for this occasion, croissants moved to the top of my-long-list-of-things-I-want-to-bake.  I am glad that I took the opportunity to make them because the process was fun, not too difficult and turned out amazingly well.  That is: fun, if you like playing with dough, and not too difficult if you have some time to make the dough the day before you want to eat them.
 Dough for Croissants
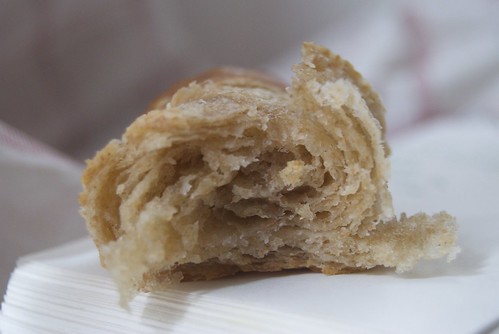
As for how they turned out, I was nervous.  I carefully completed each step and left the dough to rest and rise a bit overnight.  As I was going to bed, I started to wonder if the dough I had made could possibly result in the layers of flaky pastry I hoped for in a croissant.  I worried that I had not rolled, folded and turned the dough enough to make a real croissant.  It took me a while to fall asleep, but my worrying was unnecessary.  When I pulled them out of the oven, they were golden brown and crusty on the outside and soft and flaky on the inside.
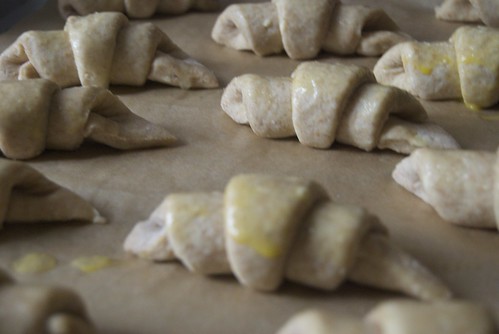
Croissants risen
Some might say that making pastries at home is a ludicrous pursuit considering that it is easy to find good ones in a bakery.  I, on the other hand, am slightly obsessed with making things from scratch.  As I've mentioned before, I will trade convenience for creativity without a second thought.  I heartily believe in the magic of making something that seems like you couldn't possibly create it with your own hands.  Surprisingly, baking takes some faith.  After my doubts with making puff pastry dough, I have been reassured that the combination of flour, butter, yeast and other disparate ingredients will rarely disappoint and often surpass my expectations.
Croissant
Whole Wheat Croissants
Adapted from the King Arthur Flour Whole Grain Baking Book.
I like to use whole grains as much as possible and I love the flavor of these croissants -- just a little heartier since they are made with whole wheat flour.  This is a basic yeasted puff pastry dough and it can be used for other pastries applications like pain au chocolat or other filled croissants.  It takes some time to make, but most of that time is for the dough to rest and chill, the active time is much shorter.   The instructions look long, but I gave as much detail as possible to make sure you know what you are doing!  I recommend measuring ingredients by weight, for greater accuracy, but I have also included the cup measurements.
Makes 24 small croissants, or you can freeze half the dough and use it another time.
Dough
10 ounces (2 1/2 cups) whole wheat flour
12 3/4 ounces (3 cups) unbleached white flour
7/8 ounce sugar (2 tablespoons) sugar
1/2 ounce (2 tablespoons) nonfat dry milk
2 teaspoons salt
1 1/2 teaspoons yeast
1 egg
13 ounces (1 1/2 cups plus 2 tablespoons) water

Butter
16 ounces (2 cups/4 sticks) unsalted butter
1 1/8 ounces (1/3 cup) whole wheat flour

1 egg beaten with 1 tablespoon water, to glaze

For the dough: Combine flours, sugar, nonfat dry milk, salt and yeast in the bowl of a mixer using the paddle attachment. Beat together the egg and water and add to the dry ingredients with the mixer on low speed.  Alternatively mix dry ingredients by hand and mix in the wet ingredients.  Knead the dough gently on a floured surface to make sure the moisture is distributed and the dough is smooth.  Carefully pat the dough into a 9-inch square (feel free to get out your ruler for this whole process) and wrap loosely in plastic.  Refrigerate for one hour.

Meanwhile, mix the butter and flour until smooth and well blended.  Adding flour to the butter keeps the butter stabilized so it doesn't leak out of the dough when rolled.  Lightly flour a piece of parchment or plastic and pat the butter into an 8-inch square.  Cover and refrigerate for at least 30 minutes.

When the time is up, remove the dough from the fridge and place on a lightly floured surface.  Gently roll the dough into a 12-inch square.  Place the unwrapped butter square on the dough at a 45-degree angle so that the corners of the butter square face the middle of each side of the dough square.  Pull the flaps of the dough over the edges of the butter so they meet in the middle.  Press each flap to remove any air bubbles and then seal the edges of the dough together, using water if necessary.  

Dust the top of the dough with a bit of flour (the less added flour, the better, just add enough so it won't stick) and turn it over.  Gently tap it with a rolling pin into a rectangle and roll it out into a larger triangle 20 by 10 inches.  As you roll, take care to make sure the dough doesn't get stuck to the surface it is on.  When the dough is the right size, fold it in thirds, like a letter (fold the right third in, then the left third in). Then, turn the folded dough ninety degrees to the right.  This is the first turn (there are 4 total).  

If the dough springs back when you try to roll it, it isn't relaxed enough and should be refrigerated for about 20 minutes before doing the next turn.  If it is relaxed, roll the dough out to 20 by 10 inches again, fold in the sides and turn it 90 degrees.  Again, make sure the dough is relaxed (refrigerate if needed) and roll it out, fold it and turn it.  For this dough you will make 4 turns.  

At this point you can freeze half of the dough, tightly wrapped in plastic for up to one month.  Take the part you are not freezing and wrap it loosely in plastic.  It should be refrigerated for at least 2 hours, but preferably overnight.  

Making the Croissants:
Place the dough (if you did not freeze any, then start with half of the dough and repeat these instructions with the other half) on a lightly floured surface and roll it into a 19 by 13 inch rectangle.  Trim and discard the edges of the dough so the sides are all even.  Cut the dough in thirds lengthwise and in half through the middle.  You will now have six 4 by 9 inch rectangles.  Cut each rectangle in half, diagonally so you have 12 triangles. Arrange them with the short end of the triangle closest to you.  Cut a 1/2 inch notch into the center of the short end of each.  Roll each triangle, starting with the notched end and going toward the tip. Make sure the tip is tucked under the bottom of the croissant.  Bring the ends toward each other to form the crescent. 

Place each croissant on a baking sheet lined with parchment.  Cover and chill for at least 30 minutes so the butter won't run out of the layers too quickly when baking.  

Meanwhile preheat the oven to 425 degrees.  When ready to bake:  Take the croissants out of the refrigerator, brush with the beaten egg mixture.  Bake for 15 minutes, reduce heat to 350 degrees and bake for 10 to 15 minutes more.  They should be golden brown all over.  Remove from the oven and let cool completely on a rack.

September 8, 2009

Muffin Morning


I was going to start by saying, I love muffins. But it seemed a bit too obvious and perhaps overzealous and I began to think, do I? love muffins? I certainly like them a lot. They are a mainstay of my kitchen -- easy to mix up at the last minute, satisfying and warm for the morning. I tend to load them up with fruit and whole grains for a delicious, but also healthy breakfast bread. I've also noticed that people who don't do much baking are very impressed when greeted with freshly baked muffins in the morning.

But, I'm not sure if muffins can really be an object of love. Perhaps more of a gentle affection for something so reliable, sturdy, and dependable. Not that muffins can't be surprising or decadent (like these!), I guess I have just been making muffins for years and while I enjoy them in every way, they are more of a great old friend than a true love.

Nonetheless, I am very happy to have this friend and its many manifestations. Muffins make a great breakfast or a good snack for later, but again, I am stating the obvious. I will cut to the recipe, which is a new one I tried recently. I normally load my muffins up with fruit, but lacking that one day, I made these full of nuts and seeds and whole grains. They are truly sturdy and delicious and will keep you company without complaining or asking too much. In fact, they won't ask anything at all, just maybe a spread of butter or jam if you like that sort of thing.

Toasted Oatmeal-Oat Bran Muffins
Adapted from Mollie Katzen's Sunlight Cafe.

1 cup rolled oats
1/3 cup oat bran
1/3 cup minced walnuts, pecans or almonds
1/4 cup sunflower seeds
6 tablespoons light brown sugar
1 or 2 tablespoons granulated sugar (optional)
1 1/2 cups unbleached all purpose flower
3/4 teaspoons salt
1 1/2 teaspoons baking powder
1/8 teaspoon baking soda
1 cup buttermilk
2 large eggs
1 tablespoon vanilla extract
4 tablespoons unsalted butter, melted
1/4 cup raisins and 1/3 cup dried cranberries (optional)

Heat a medium-sized skillet (cast iron works well) over medium low. If your skillet is not season or has a tendency to stick, use a little non-stick spray. Add the oats, oat bran, nuts and seeds and toast them, stirring frequently, until they are light brown and smell nicely toasted. Its best to do this slowly and paying lots of attention so they don't burn. Add the brown sugar and granulated sugar (if using) at the very end so that it melts slightly. You can toast the nuts ahead of time and store them in an airtight container in the refrigerator.

Preheat the oven to 400 degrees and grease 8 or 9 muffin cups. Combine the rest of the dry ingredients and add the toasted nut mixture. Stir until well combined.

Measure the buttermilk into a bowl, add the eggs and vanilla and beat gently with a fork or whisk until smooth. Slowly pour this mixture, along with the melted butter and optional dried fruit, into the dry ingredients. Stir, making sure that all the dry ingredients are scraped up from the bottom, until all the dry ingredients are moistened. Do not over mix, a few lumps are okay.

Spoon the batter into the greased muffin cups, I usually fill them up to the top to get a good sized muffin, but you can make them less full if you want the muffins to be smaller. Bake for 20-25 minutes or until golden brown on top and a toothpick inserted into the center comes out clean. Remove the pan from the oven and the muffins from the pan and let cool on a rack for about 30 minutes before eating (if you can wait that long!).

March 1, 2009

Brunch Luck

I am a pretty devoted breakfast eater. The hour and quantity of when and what I eat very quite a bit depending on the day, but I generally eat something before I leave the house or get too far into my day. I don't usually think too much about what I will eat -- usually whatever is on hand that will fill me up nutritiously and keep me going for a few hours. If I have a free morning or some extra time I will frequently bake something for breakfast and snacks.

Though I don't give it much thought everyday, lately I have been cataloging the endless possibilities that can be breakfast. Truly there are unlimited possibilities for every meal of the day and more, but I don't think any other meal has so many options that are so unfailingly delicious and unrelentingly tempting. I've been thinking about this more and more since we started a monthly brunch pot luck at our apartment. First there are the morning classics (with variations only limited by the imagination) which aren't surprises but they never fail to please, especially when homemade. Pancakes! Waffles! French toast! Scrambled eggs, home fries, maybe fruit and yogurt. I don't hear any complaints, just the sound of forks scraping plates. And this is only a tiny tip of the vast iceburg filled with breakfast. Muffins, scones, cinnamon rolls and all the varieties they come in; egg dishes, cereals and cooked grains, breakfast puddings, breads, savory breakfasts I have yet to try...
Anyway, if I had time to make a big breakfast every day, I could probably eat something different every day of the year and not be dissappointed (I also probably wouldn't have to eat lunch or dinner). Lately, though, most of my breakfast planning and making has happened for brunch-luck. This usually involved mulling over all of the possibilities that immediately come to mind, buying a few ingredients and then, just as often as not, changing my mind about what I will make. The whole thing involves a lot of whim.

This was only our second monthly brunch-luck, but I think morning is an ideal time for a potluck. While I really enjoy having people over for dinner, it is always more of an event with more preparations and higher expectations. A brunch-luck on the other hand takes minimal planning -- whim is actually a central element to the whole thing. Since its a regular date, people can show up one month and not the next. We miss them, but we're consoled by the meal at hand. Our friends can come over sleepy and hang out for the morning. Its low key and, like I said before, the possibilities are endless.
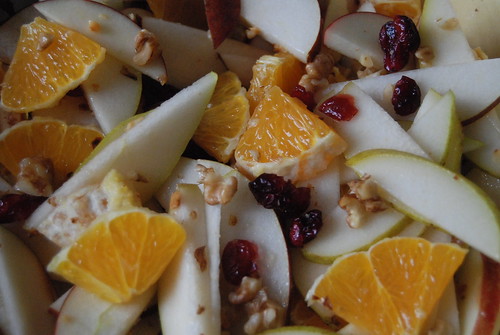
fruit salad!
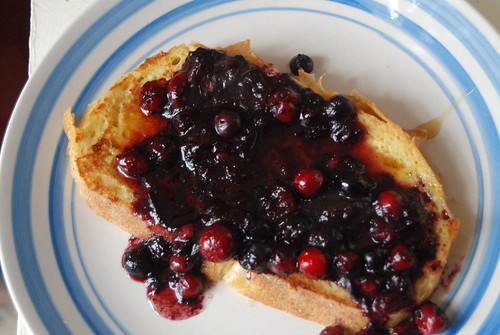
This month I ended up featuring cranberries. I made a simple fruit salad with pears, apples, oranges, toasted walnuts and dried cranberries lightly tossed in lemon juice. A few days before I made a variation of these scones which I froze and popped a few in the oven on Sunday morning. I experimented with cooking grains for a breakfast cereal which still needs some work. I simmered frozen cranberries and blueberries in a bit water and a couple tablespoons of sugar until they thickened into the perfect sauce to put on top of the cereal and Ray's french toast. It turned everyone's teeth an alarming shade of blue, but no one seemed to mind.
Mmm...french toast