Showing posts with label pantry staples. Show all posts

March 16, 2011

Icing on the Cake

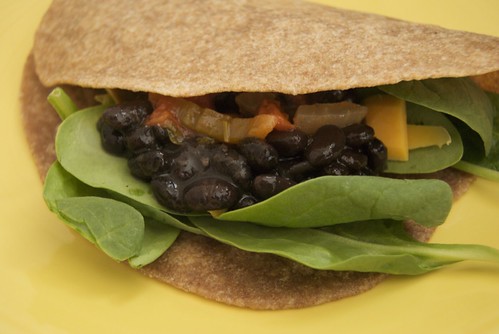
tortilla and black beans

Black beans are a staple in our kitchen. I cook up a batch nearly every week. They're not fancy food, nothing glamorous or particularly photogenic about them. But they taste so good and never disappoint. Often I'll serve them on top of brown rice, garnished with grated cheese, salsa and veggies. I think I love them best, though, with a batch of home made flour tortillas.

Tortillas are high on my list of things that I could easily buy but they are so much better made from scratch. I tell myself I am saving money since we already have flour, water, salt and oil. I'm just making silly excuses. Tortillas are usually inexpensive to buy, but the homemade version are a simple luxury. When we have black beans for dinner these warm floury disks are the icing on the cake, if beans can be called cake and homemade tortillas can be called icing.

I know that most people these days are looking for ways to save time and buying a bag of tortillas and can of beans will make a good meal in fewer minutes than cooking it all from scratch. On the other hand the minutes of kneading, rolling and cooking might give you the time you wouldn't other wise have to day dream, talk, catch up on the day's news, listen to music or a podcast.
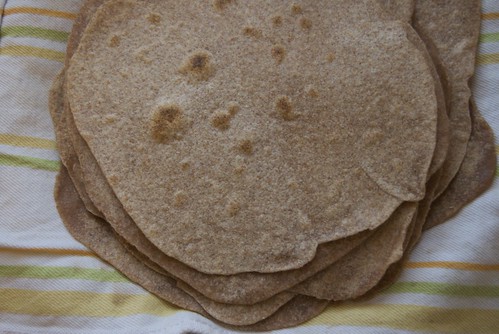
whole wheat tortillas


Black Beans and Whole Wheat Tortillas
Making beans and tortillas this way takes extra time but most of that is not doing active work, just letting things cook or rest. Sometime this fall, from a few different sources, I discovered my new favorite method of cooking beans. It requires a bit of planning ahead but no need for hours of soaking the dry beans. I'll list the ingredients and then explain.

1 cup dry black beans
1 medium onion
2 cloves garlic
1/2 teaspoon cumin
1/2 teaspoon salt
Water
1/2 cup chopped cilantro

Turn the oven to 350 degrees. In a dutch oven or other oven proof pot and lid, place the dry beans. Dice the onion, mince the garlic and toss them into the pot. Add the cumin and salt. Add water to the pot until the beans are covered by at least an inch. Cover the pot and put it in the oven. After about 30 minutes, open the oven, take the lid off and make sure the beans are simmering away, make sure the water has not evaporated and add more water if it has. Check after another 30 minutes to see if they are ready -- they should hold their shape but give no resistance when you bite into one. If you are planning on serving them soon, remove the pot from the oven.  If you are cooking them ahead of time, you can turn off the oven when the beans are done and leave them there for a few hours. When you are ready to eat, you can reheat them on the stove.

If the beans are soupier than you want them to be, simmer them on the stove to evaporate some of the water. I love the flavor of the beans just like this, but once they have cooked you could add corn, peppers, chilies, tomatoes. Just make sure you don't add anything acidic (like tomatoes, vinegar or lime juice) before they are fully cooked as acid will keep them from cooking. A few minutes before you are ready to serve them, stir in the cilantro. Yields about 4 cups of beans.

I like to set up a little buffet with beans, fresh greens, avocado, salsa, grated cheese and sometimes rice to go in the tortillas.
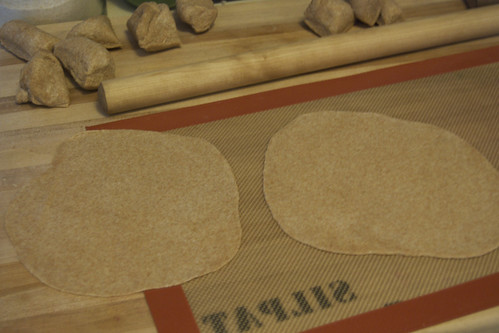
rollingout tortillas

Whole Wheat Tortillas
You can make these entirely with whole wheat or with a mix of white and wheat flour. Adding white flour will make them a softer and more flexible. Once the tortillas cool the might become a little bit stiff, just gently reheat them so they can be easily folded.

3 cups (14 ounces) whole wheat flour or 2 cups whole wheat and 1 cup white flour
1/2 teaspoon salt
1/4 cup (2 ounces) olive oil
about 3/4 cup very warm water

In a medium bowl, mix the flour and the salt. Add the oil and stir to distribute in the flour. Add the water, a little at time. Mix the water into the flour to create a smooth, elastic dough. Add more water if you need to, but the dough should hold together well and be slightly stiff but easily kneadable. Cover the dough and let rest on the counter for at least 30 minutes or up to 4 hours.

Divide the dough into 12 pieces, as evenly as possible. Place a cast iron skillet (at least 12 inches in diameter) over medium-high heat. Take a piece of dough and use your hands to shape it into a small disk, about an inch thick. On a floured surface (or on parchment or other non-stick surface), begin rolling the dough with a rolling pin. Turn it frequently to keep the tortilla fairly round (the shape does not affect the taste!). Roll it until it is about 1/8th of an inch thick and 7-10 inches in diameter. 

When the pan is hot, place the rolled out tortilla flat on the pan (do not grease or oil the pan). When it begins to bubble and puff up a little bit, flip it over. You will see it puff up a bit on the other side, too. Cook the tortilla until the bubbles are just beginning to brown, if you cook it too long it won't fold and bend easily. While one tortilla is cooking, you can roll out the next one. If you get ahead on rolling, don't stack the uncooked tortillas because they will stick together. After each tortilla is cooked, stack in in a clean tea towel on a plate. They are best served warm, but will keep in an airtight container for a few days.

February 9, 2011

On My To Do List

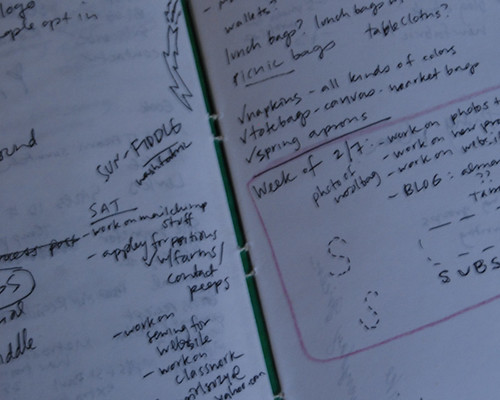
Are you a list maker? How do you stay organized and on top of things? I often make piles to keep things neat. A stack of things is less distracting than having papers and books strewn across my desk. I also make lots of lists. I like having a reminder of everything that I hope to accomplish in the short term. I used to write my To Do lists on scraps of paper. More recently I've created a dedicated notebook for to do lists, thoughts, ideas and information that I need to jot down somewhere.

DSC_0127

I used to make the mistake of keeping these lists and important dates or events in my head. Although they usually stayed up there, I felt like I had to constantly remind myself of what I needed to do. I would become very overwhelmed. So I started writing it down. I love having a space to keep my ideas. It gets messy as I scribble down thoughts and rewrite my lists but when I need a clear space to think and work, I close the book. When I know there are things I need to get done, I open to my most recent draft of To Do and attempt to cross off and item or two.

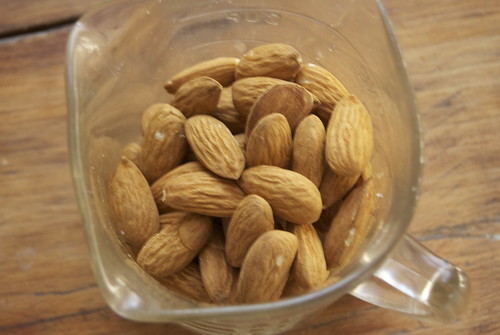
almonds


One thing that was on my mental list for a couple of months until I finally penned it down was making nut butters. Despite my penchant for making food from scratch I hadn't really thought about making peanut or almond butter until I saw recipes here and there. It took some time for me to get around to making almond butter, but it turns out to be really simple. A few handfuls of nuts, cracked and whirred in the food processor yields a creamy spread that is perfect on toast, apples or bananas, in a sandwich or straight from the spoon.

Although I have crossed make almond butter off my list, I am sure that I will keep making it regularly. I might have to add homemade Nutella to my next to do list.

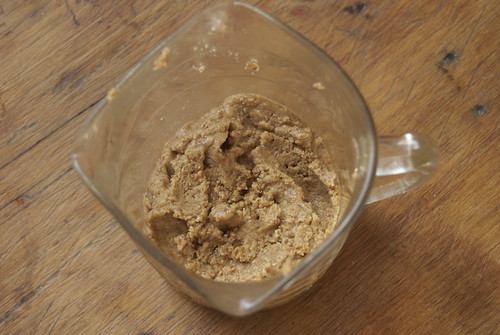
almond butter


Almond Butter
I have used both raw and roasted almonds for this nut butter, but the roasting really brings out the flavor of the almonds and I think it is much better that way.

2 cups almonds
1/2 teaspoon salt, optional

Almond oil, or other neutral oil, optional

Spread the almonds on a baking sheet and roast at 350 for about 15 minutes, checking frequently to make sure that they are roasting but not burning. The skin will get darker and the meat of the almond will turn golden brown. Let cool.

Place the almonds and salt (if using) in the bowl of a food processor. It will be quite loud at first, but turn on the food processor for a minute or so. After a minute, scrape down the sides with a spatula and process for another minute. Scrape the sides again. Continue doing this for several minutes (stopping to scrape the sides regularly) until the almonds become a smooth paste. If you want a smoother, softer almond butter, you can add the oil, a teaspoon at a time, and process the paste to blend. 

2 cups of almonds yields about 3/4 of a cup of almond butter.

January 27, 2011

Making Stock

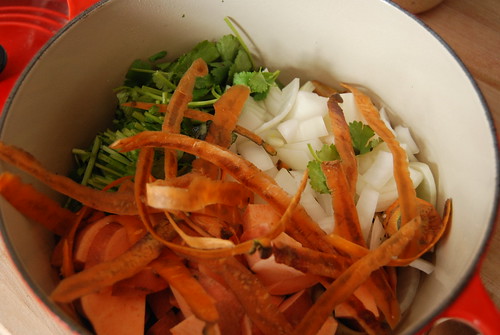
veggiesforbroth


In case you are wondering, this is not a photo of my compost bin. Unfortunately, I must admit, that I do not currently have a place to compost my food scraps. I left my worms with my friend Jen in Maine and have yet to replace them. This summer I hope to have a good composting system in place, but, until then, I don't want  my food scraps to totally go to waste. Instead of tossing them I make veggie stock.

Making veggie stock is a good way to use up the scraps from preparing other meals and to make soups and other dishes even better. I never buy the sodium rich stock that you find at the store and if I don't have any stock on hand when I am making soup, then I usually just use water to make the broth.* Veggie stock is so easy to make and doesn't require hours of cooking like meat stocks do.

I'll go over the basic ideas that I use before I put the steps into a recipe: I make stock when I have enough ingredients since I prefer to use scraps rather than buying vegetables to make into stock. Of course you don't want to use spoiled vegetables or anything that you wouldn't want to eat, but it is fine to use peels from vegetables like carrots and potatoes. When I am making meals, I try to remember to save the scraps and peels. I keep them in a container in the fridge until I have enough to make a stock with. You can also make a stock while you are preparing vegetables for the soup by using the scraps, peels and trimmings as you go.

Certain vegetables are always good to include in stocks. Onions, carrots, celery, garlic, leeks (their trimmings are the perfect thing to save for stock making), and herbs. The skin and seeds from squash can be used in a stock which will be part of a squash soup. You can also add cooked beans and lentils that you have leftover from other meals. I recently added apple peels to a stock since I had a bunch of them. This made the stock a little bit sweet so I might use it for a soup or a curry where sweetness is part of the flavor. Rinds from cheese like parmesan can be used to add a great flavor to stocks.

All this discussion of peels reminds me that it is best to use organic produce when making stock. Peels of many vegetables may be sprayed with pesticides which you don't want to add to your food. Other things you don't want to add are very strong flavored veggies or herbs, unless you want that flavor in your soup. Beets will turn a stock red, which would be perfect for beet soup, but not ideal for other recipes. It took me a while to start making stock regularly because in my mind it would be complicated and easy to ruin. Once I started making it, I discovered it is simply a good way to reuse what you've got to make something from scratch.

Vegetable Stock 
Much of what I have learned about stock making comes from How to Cook Everything Vegetarian by Deborah Madison, but this recipe is the process that I use regularly.

Obviously you can use stock for soups. You can also use it for liquid in other recipes such as curries, or risottos. When it comes to making the stock don't worry too much about the ingredients. Use what you have and experiment until you find what works best for you.

What you need: 
A tablespoon of olive oil
An onion or two, diced (you could also use scallions or leeks if you have those instead)
Several cups of veggie scraps, peels and peicesCooked beans or lentils if you have them
Any other scraps, like cheese rinds or seeds that you want to add
Herbs, such as parsley (I use the stems which I don't use in other recipes), bay leaves, thyme or whatever is appropriate for a particular soup Water
Salt 

In a large pot, heat the oil over high heat. Add the onion and let cook for a few minutes. Then add the rest of the vegetables, scraps and herbs. Cook, stirring occasionally, for 5 to 10 minutes. Ideally you want the vegetables to be brightly colored, even caramelized a bit here and there. This will add more flavor to the stock. Once the vegetables are deeply colored, add enough water to cover them well. For every quart of water you pour in, add a teaspoon of salt. Bring to a boil and then let simmer for about 30 minutes. Strain out the vegetables and store in a jar in the fridge or freezer, or use right away.

*In case you were wondering, as I was, what the difference between stock and broth is, it seems that stock is made from vegetables (and bones if you like that sort of thing) and then used as the broth in a soup. Broth can also include pieces of vegetables and meat, but it is okay to use the two terms interchangeably.

September 14, 2010

Homemade Mustard

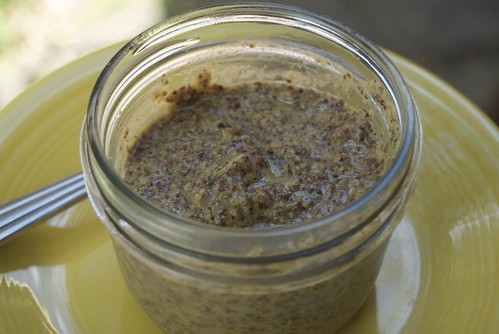
mustard

In my quest to make things from scratch, I have realized that there are so many things that at first seem unscratchable. It's so easy to go to the grocery store and bringing home boxes, cartons and jars of food that sometimes it seems like that is the only way to get them. But with just a little time and effort pretty much everything can be made from raw ingredients in our own kitchens. I know not everyone has the time or wants to make the effort, but for some reason I can't help myself. I often wonder what drives me to do this. I think it's the thrill of knowing that I can make it myself and don't need to rely on someone else to do it for me, its because it tastes better and doesn't contain strange ingredients, and its an inexplicable curiosity. This last one is what led me to try making mustard.

I am not a condiment person and I use mustard infrequently. Other than to fuel my obsession interest in making it myself, I am not exactly sure what inspired me to try making a condiment that is rarely used in my kitchen. Maybe it was when I needed a tablespoon or two for my balsamic vinaigrette dressing and we didn't have any. Maybe it was because I stumbled upon a recipe in the Ball Complete Book of Canning. Whatever the reason, I now have plenty of mustard and after making it myself, I am thinking about new and exciting uses for it like this recipe and grilled sandwiches with brie, apple, and spinach.

Not only is it satisfying to make something yourself, it also means that you know exactly what is in it. This mustard is simple to make and if you can find a store that has bulk spices, the ingredients are inexpensive and they yield an ample amount of mustard (well, I guess that depends how much mustard you consume, but it makes about four half pint jars -- some of mine will be given as gifts). If you have never canned before, this is an easy project to start with. Unless you grow your own mustard seeds, the ingredients can easily be found year round, so if you are swamped with preserving the fall harvest, this could be a project for the cold months when nothing is growing nearby.

For me, there is something so rewarding about making things myself and I love the creative process. I know I'm not the only one who feels this way. Do you like making things from scratch? What is your favorite thing to make instead of buy?

Brown Beer Mustard
Adapted from The Ball Complete Book of Home Preserving
Once you get the basics, there are so many variations of mustard you can make. I chose this recipe because it was pretty basic. The beer adds some flavor but it is not overpowering, and of course all the alcohol cooks out. Darker beers with produce a stronger flavor and color.
I used 8-ounce jars and filled four of them with this recipe.

1 pint of beer
1 cup brown mustard seeds
1 cup water
1/2 cup white vinegar
1/2 cup lightly packed brown sugar
1/4 cup dry mustard
1 tablespoon onion powder

In a medium saucepan, combine beer and brown mustard seeds. Bring to a boil then remove from heat, cover and let stand for about 2 hours, until the seeds have absorbed most of the liquid.

In a blender or food processor, puree marinated seeds and remaining liquid until blended and most of the seeds are well chopped (it should still be slightly grainy).

Transfer mixture to a stainless steel saucepan and whisk in remaining ingredients. Bring to a boil over high heat, stirring constantly. Reduce heat to medium and boil gently, stirring frequently until volume is reduced by one third (about 15 minutes).

Prepare canning pot, jars and lids. For canning basics go here. Process the jars in boiling water for 10 minutes. The mustard will keep in the cupboard for up to one year. If you prefer not to can it, you can refrigerate it for several months.

August 16, 2010

Oh, Pesto!

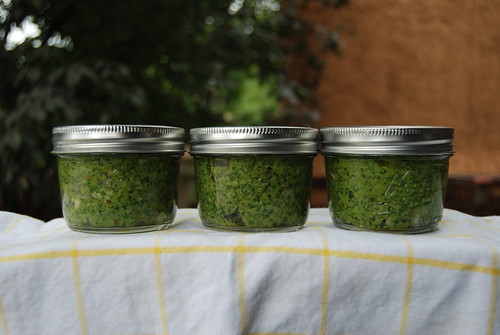
Pesto

This is the season when my obsession with food preservation begins. Usually, by mid-August, I have strawberries and blueberries in the freezer, maybe some jam or preserves canned and I am thinking about finding piles of tomatoes to make into salsa and sauce. Since we've been in transition and are just now settling down I haven't stored any of the brilliant colors and intense flavors or summer for the colder, blander months.

Until today.  As you can see above, I took a pile of deep green, fragrant leaves and forced them to mix, blend, and become one with ingredients that would complement them perfectly.  Any protest at having to give up their individuality was drowned out by the sound of the food processor and if they didn't want to combine with pungent parmesan, toasty nuts, and smooth olive oil, they clearly did not know what was good for them.  I've made, eaten, and frozen lots of batches of pesto but to my taste buds this one had the perfect ratio of basil, garlic, salt and oil.

We'll eat some on fresh pasta with ripe tomatoes.  I'll probably spread some on bread for a snack.  I've packed the pesto in wonderful little wide-mouth half pint jars.  Each jar is exactly the right size for a batch and they will be perfect for keeping pesto in the freezer until the time that fresh basil is scarce.  It's my treasure trove of garlicky green gold.


I am sure that I don't need to say much more about pesto.  It's one of summer's many small delights. Enjoy!

Perfect Pesto
4 cups of gently packed basil leaves
4-5 cloves garlic, roughly chopped
1/3 cup grated Parmesan cheese
1/3 cup toasted nuts (pine nuts, almonds, walnuts or none at all)
1 tablespoon lemon juice
I/3 cup olive oil
salt and pepper to taste


Place basil, garlic, Parmesan, and lemon juice in a food processor and whir until it makes a uniform paste, but you can still identify individual ingredients.  With the food processor on, gradually pour in the oil until it is smooth and pureed to your liking. Season to taste.  Store in an airtight container in the fridge for several weeks or the freezer for several months. 

February 5, 2010

Take it slow: Make Hummus

Garbanzos
Every couple of weeks I find myself spending the day in the kitchen.  Of course I am there at other times too, making dinner, breakfast, washing dishes -- its not that I ignore the kitchen the rest of the time.  I just find that every so often I am inspired to make several things and I usually do them all at the same time.  Not always the best way to go, but when I have the time to do it, I have to take the opportunity.  Last Sunday was one of these days when I was working on a few different recipes and trying to make some of staple foods that I make almost every week to keep our kitchen stocked with good food.

It makes me think of how, back in the days of cooking by the hearth, women used to spend one day of the week doing all the baking, another doing the washing, etc.  Most of what I know about that probably comes from reading the Little House books and visiting Old Sturbridge Village when I was young.  I do know that in these modern times, we have choices.  There are stores with aisles and aisles of food that could sustain us and we would never have to think about turning on the oven or dirtying a dish.  But that, of course, is not the choice I make.

Most of the time, I want to be connected to my food as deeply as possible. I'm not sure why as cooking and eating is a constant cycle and things that are edible are also usually perishable.  It must be this life cycle and the need to be a creative part of it that fuels my desire to be connected with what I eat.  There are many ways to do this and I look forward to the day that I can also grow the ingredients for the food I prepare.  For now, though, I find small ways to take part in the life of eating.

I make hummus nearly every week.  Mostly I make it because Ray really likes it for lunch and its something I can make instead of buy that he will enjoy.  It is a great staple food to have in the fridge for snacks or meals.  If you don't make a lot of things from scratch, this is a good place to start and its a small, really simple way to shift from buying to making.  In a culture that is full of the ready made and an obsession with instant gratification, its empowering to know that you can create something yourself, rather than having to pay for it.  I believe it is important for everyone to make this shift in some way, whether by knitting, quilting, playing a board game instead of going to the mall, or, well, you could try making hummus!
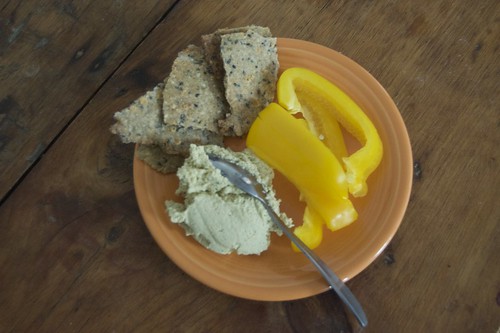
Hummus Plate
Hummus
I make this in a food processor but I am sure you could make it by mashing the chickpeas and stirring everything together, it just might not be as smooth.  If you are doing it by hand, make sure to finely chop the garlic and cilantro and then experiment with mixing it to a consistency that you like.  You can use canned chickpeas, but I usually use dried ones which I soak in water overnight and then cook in their soaking water.  I bring them to a boil and then simmer for a couple of hours until they are soft.  You can also let them boil for about five minutes, turn of the heat and leave them covered while you are at work, they should be almost totally cooked when you get home.

2-cups cooked chickpeas (see above), with some of the cooking liquid (if you are using canned chickpeas you can use water as the liquid, if needed
1/2 cup tahini, or to taste
1/4 cup olive oil
2 cloves garlic, peeled, or more to your taste
Juice of 1 lemon, or to taste
Salt and pepper
1/4 teaspoon ground cumin, paprika or other spices to your taste
1/4 cup chopped parsley or cilantro

As you can see, all ingredient amounts can be changed or modified according to your taste.  You can also add fresh spinach, roasted red peppers, roasted garlic or other ingredients and flavors.  But to make this basic recipe:  Put all of the ingredients in the food processor.  Process for a minute or two.  Taste and adjust flavors as desired.  For a looser consistency add the cooking liquid.  For a very smooth consistency, continue to process for 2 or 3 more minutes.  Serve with bread, crackers, veggies or whatever you would like.  Store refrigerated in an airtight container for up to a week.