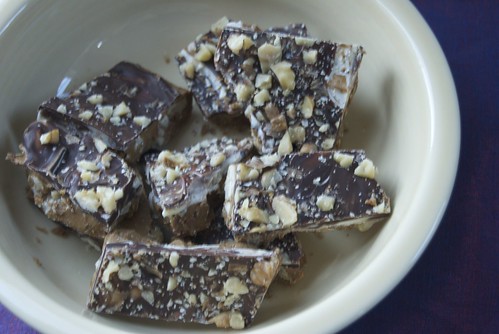
Showing posts with label desserts and sweets. Show all posts

November 15, 2011

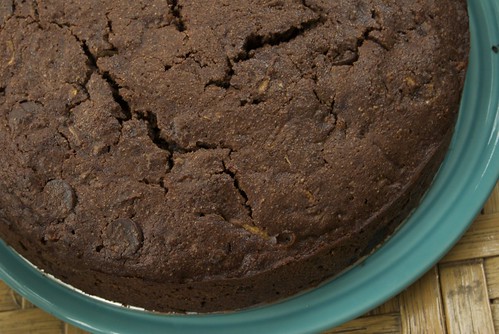
Chocolate Beet Cake

DSC_0014


DSC_0021


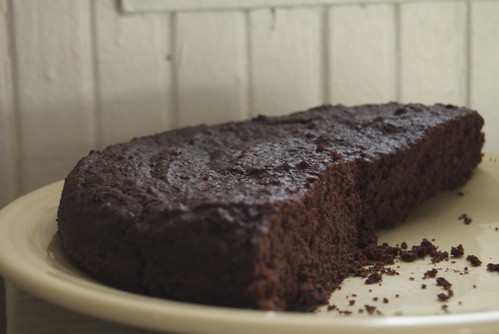
I've been thinking about a chocolate beet cake for at least several weeks. The first, and only time, I tried such a cake was the first time I celebrated Ray's birthday with him. I took him to a wonderful restaurant in Portland called Caiola's (if have a chance, you should go!). It was our first fancy dinner together. I remember the food quite clearly because of the amazing flavors we tried that night. For a starter, we had a parmesan cake with figs that we still reminisce about from time to time. I don't remember what Ray had for dessert, but I had to try the chocolate beet cake. The server described it as a moist chocolate cake, which sounded good, but I ordered it because of the beets.
DSC_0091

If you've read even a few of my posts you know that vegetables are important to me. I eat them as often as I can and they find their way into my sewing, too. Ray, on the other hand, could take them or leave them and usually he would prefer to leave them. It's sort of awkward since I love to grow, cook with, and write about vegetables all the time, but he puts up with my cooking and sometimes even enjoys it.
DSC_0098

I realize that I have a habit of putting vegetables into cakes. It's not that I can't get enough and have to eat them with my sweets, too, I just find these cakes intriguing and delicious. A chocolate cake doesn't need an added vegetable, but I just had to try one with beets. We don't think twice about adding squash to a cake or muffin, but this other sweet, durable, homely but lovely vegetable doesn't make it into desserts very often. I'm sure the beet will never replace the pumpkin as the official vegetable of Thanksgiving, but it deserves a chance to be part of dessert.
DSC_0104


Chocolate Beet Cake
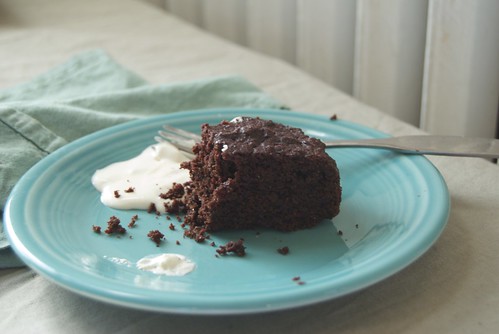
The cake has a subtle red color from the beets and is moist and very chocolatey. I adapted a chocolate cake recipe from the King Arthur Flour Whole Grain Baking Book and on the day of baking saw that David Lebovitz had posted this recipe which I took a few hints from as well. In my ideal world I would have made goat cheese ice cream to go with it, but instead I whisked up some creme fraiche whipped cream which complemented it very well.

2-3 medium sized beets, leaves and stems removed
4 ounces bittersweet chocolate
3 ounces (6 tablespoons) unsalted butter
5 ounces (1 1/4 cups) whole wheat pastry flour
1.5 ounces (1/2 cup) unsweetened cocoa powder
1 teaspoon baking powder
1/4 teaspoon salt
3 eggs
7 ounces (one cup) sugar

Butter a nine inch round pan and dust it with cocoa powder to cover the buttered surface.

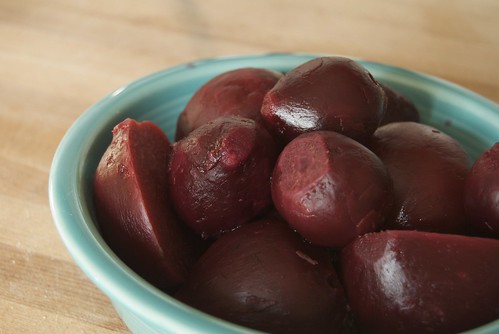
Scrub the beets clean and place them in a pot with enough water to cover them. Heat them on high until the water boils then simmer until they can be easily pierced with a fork (or you can roast them in to oven). When they are cooked, place them in a bowl of cold water until they are cool enough to touch and slip off the skins. Puree them in a food processor until they are in tiny pieces but not quite smooth and measure out 1 cup of beet puree.

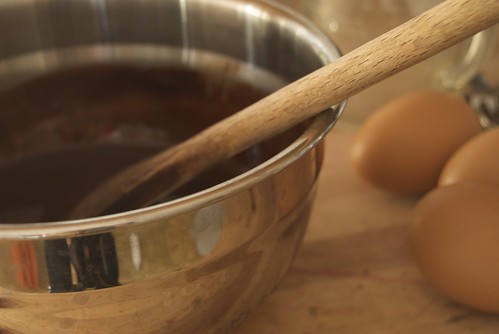
Break the chocolate into small pieces and melt it in a double boiler or in a heat proof bowl over a pot of simmering water. When the chocolate is nearly melted, cut the butter into small pieces and stir it into the chocolate until both are totally melted. Let cool for a few minutes.

Sift together the flour, cocoa powder, baking soda and salt. Separate the eggs and stir the yolks and beet puree into the melted chocolate and butter. Beat the whites until the are stiff and beat in the sugar. Add the melted chocolate mixture to the egg whites and stir gently to combine. Fold in the sifted dry ingredients.

Pour into the prepared pan and bake for 30-35 minutes at 350'. Let cool and serve with creme fraiche whipped cream if you would like.

Creme Fraiche Whipped Cream
1/3 cup heavy cream
1/3 cup creme fraiche
1 tablespoon maple syrup

Whip the cream until it is nearly stiff. Stir in the creme fraiche and maple syrup. Spoon on top of, or beside, a piece of the cake.

November 1, 2011

Sweet or Savory

DSC_0018

Do you like your winter squash sweet or savory? I find myself debating the best way to use all the squash in my cupboards. Soup, with risotto, on pizza , roasted or in a cake, a pie, cookies, muffins, and pancakes. Butternuts, buttercups, and pie pumpkins (the small sweet ones, not the big ones we carve for Halloween) could used either way, though I think the acorns, carnivals and delicatas are better for dinner than dessert. Fortunately I have enough squash to try many recipes.

It's already the first of November and we've barely had any fall flavors here. First I was too busy with summer, though I brought you apples and the apple sauce a couple of weeks ago. Come to think of it, I did make a ginger pear cake and we've been eating plenty of roasted broccoli, brussels sprouts and potatoes with garlic. But some things have been seriously lacking: the spices that are so irresistible when the temperature drops and the leaves fall, too. The burnt sienna hue of sprinkled cinnamon (yes, I get my colors from crayola), the spicy scent of ginger, the familiar warmth of nutmeg, the dark hint of cloves. Combined, these make something like pumpkin pie spice and, I suspect, are responsible for a lot of what we think of as pumpkin flavor. These spices are lovely, but even better with some of that squash. I love the way the orange flesh compliments the spices and the vegetable taste contrasts subtly with all the sweetness.

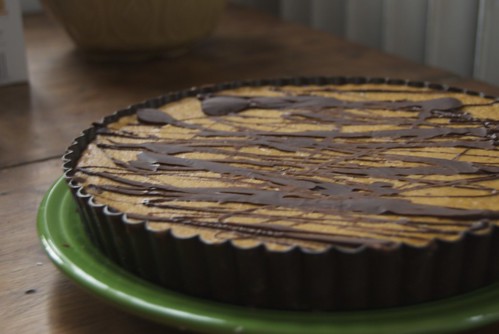
We had some friends over for a cozy autumn dinner this weekend and I wanted to serve something pumpkin for dessert. I didn't want to do the traditional pie, I don't have room in the freezer to make pumpkin ice cream and I was looking for something I could easily make gluten free. I don't think I've ever made a Martha Stewart recipe in my life, but when I googled pumpkin desserts her website appeared and opened up a vast array of autumn dessert recipes which all looked perfectly delicious. I settled on one that combined chocolate and pumpkin with complementary spices. I think I'll use the filling recipe for future pies. I didn't get to take a photo of the tart after slicing, it disappeared too quickly.

Pumpkin Chocolate Tart
Adapted from Martha Stewart

This tart is really not hard to make and can be made a day or two before you plan to serve it. For the crust, you can use all purpose white flour, whole wheat pastry flour or an all purpose gluten free flour mix. If you are using wheat flour you will need to treat the dough more gently so it doesn't become tough.

You can use canned pumpkin, but baking a pie pumpkin or a butternut squash is quite easy. Just cut the squash in half the long way and scoop out the seeds (roast them, too). Bake the squash for about 45 minutes at 350 until it is soft enough to stab easily with a fork. Once the squash has cooled, scoop the flesh out of the skin, discard the skin and use the squash.  

One more note: this recipe is for a 10-inch tart. I only have an eight inch tart pan. I baked the extra filling in a separate dish and it was very tasty. The eight inch tart is big enough to serve up to eight people.

For the Crust:
1 cup flour (all purpose, whole wheat pastry or an all purpose gluten free blend)
1/4 cup powdered sugar
1/4 cup unsweetened cocoa
1/2 teaspoon salt
1/2 teaspoon ground cinnamon
1/4 teaspoon ground cloves
4 ounces (1 cup/ 1/2 stick) unsalted butter
1 large egg
4 ounces semi-sweet chocolate

Measure the dry ingredients into a bowl. Cut the butter into small pieces and drop it into the dry ingredients. Use an electric mixer on slow speed to mix the butter into the dry ingredients until it resembles coarse crumbs or small peas. Add the egg and mix until the ingredients come together to form a ball of dough. Gently press the dough into the tart pan to form the crust. Chill for 30 minutes.

Preheat the oven to 350. Before baking the tart shell, prick the bottom with a fork. Bake for about 15 minutes. While the tart is baking, chop the chocolate into small pieces. When the shell is firm, remove it from the oven and spread the chopped chocolate onto the hot tart shell. If the chocolate doesn't melt quickly, place the tart shell back into the oven for less than a minute. When the chocolate is melted, spread it over the baked shell. Let the shell cool while you make the filling.

For the filling:
15 ounces pureed pumpkin or squash
3/4 cup brown sugar
8 ounces creme fraiche (so easy to make at home)
3 eggs
1 teaspoon ground cinnamon
1 teaspoon ground ginger
1/4 teaspoon ground nutmeg
1/4 teaspoon salt
1/8 teaspoon ground cloves
2 ounces semi sweet chocolate

Place pumpkin, sugar, creme fraiche, eggs, spices and salt in a bowl and whisk to combine. For an extra smooth and lovely filling, pour the mixture into a fine mesh sieve and gently stir it until only the very pulpy parts of the pumpkin are left in the sieve. Pour the filling into the mostly-cooled tart shell and bake for about 40 minutes or until the filling is set. Let the tart cool for at least 30 minutes.

Melt the chocolate and drizzle it on top of the tart in whatever pattern or abstract design you like. Refrigerate to firm the filling and chocolate on top. This will keep, tightly wrapped for a day or two before serving.

September 9, 2011

The Taste of a Fresh Summer Peach

DSC_0045

I am enamored with fruits and vegetables. Hanging heavy from tree branches or bushes, ripening from green to red in the warm sun, piled in a bowl, chopped on a cutting board, or tucked away in a jar. This is before they even get to my plate.

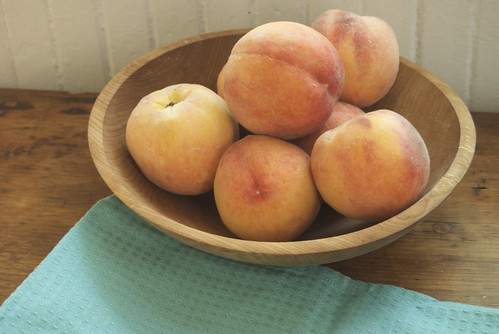
Peaches, though -- peaches! Piled into a wooden bowl, ripening in the morning sunlight. Golden flesh covered in a softly blushing fuzzy skin. They are sweet and juicy and decadent like the long lasting, utilitarian apple could never be. I am happy to eat these peaches, even though they are a gorgeous still life which I don't want to disturb.

Luckily I have more. I received a box of 25 organic Colorado peaches last week. The farm where I work offers shares of other delicacies besides the vegetables we grow, so every other week I take home my fruit share in a box. The fruit is collected from organic farms all over the country. Often it is a selection of mixed fruit, but sometimes we get just one thing: blueberries, cherries, or, last week, peaches.

When you have fruit that is nearly perfect, it is a luxury to enjoy it in abundance. The peaches need no adornment, and I've eaten many just as they are. It is almost silly to tamper with them, but I couldn't resist adding a little cream and crust to these lovely fruits.

DSC_0010

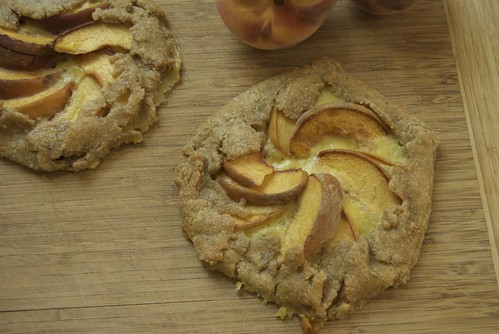
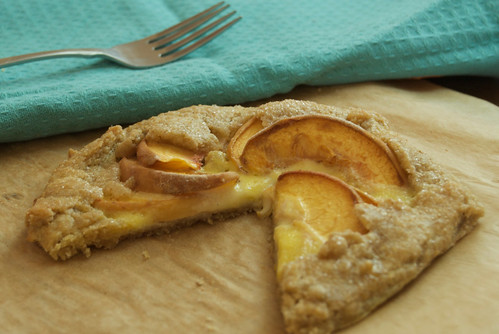
I baked these rustic, individual tarts with my favorite gallette dough and a hint of mascarpone.The crust is buttery, tender and flaky. I was inspired by this recipe to make mascarpone cheese and pair it with the peaches. The cheese is an easy way to transform cream into something even better. I was glad to learn another easy fresh cheese, which will come in handy this winter. While these tartlets are not an option year round, I will certainly be making mascarpone again, even when I can only remember the taste of a fresh summer peach.

peach and mascarpone tart


Rustic Peach Tartlets
The crust is a gallete dough adapted from Deborah Madison.

For the crust:
2 cups (8 ounces) whole wheat pastry flour
1/2 teaspoon salt
1 tablespoon sugar
10 tablespoons (5 ounces)  cold, unsalted butter
1/3 to 1/2 cup ice water

Mix the flour, salt and sugar in a bowl. Cut the butter into small pieces and drop them into the flour. Using your hands, a fork, or a pastry blender cut the butter into smaller pieces and mix it with the flour until the whole thing resembles a coarse meal, with some pieces of butter pea-size or occasionally larger. Sprinkle the ice water on top, a tablespoon at a time, and toss the mixture to combine. When you can bring the dough together without loose flour, press it into a ball. Cover and refrigerate for 15 minutes.

For the filling:
1 cup mascarpone cheese (follow Ashley's recipe to make your own, it's fun and easy!)
2 eggs, separated
1 teaspoon vanilla
2 tablespoons sugar, plus more for sprinkling
3-4 ripe peaches

Preheat the oven to 350'

Mix the mascarpone, egg yolks (save the whites for brushing on the crust), vanilla and 2 tablespoons of sugar together until smooth.

Divide the dough into 6 equal pieces. Put 5 of the pieces back in the fridge. Take one piece, flatten it into a round disk and on a lightly floured non-stick surface (I use a silpat, but parchment works well, too) roll the dough until it is about 6-inches in diameter and roughly round. Slice one peach in half, and slice each half into thin wedges, about 8 per half. Spoon two tablespoons of the mascarpone filling onto the center of the rolled out dough. Arrange the peach slices so they overlap with each other and form a circle in the center of the dough (depending on the size of the peach, you'll use about half a peach per tart-let). There should be 1/2 inch to an inch of dough beyond the edge of the fruit. 

Fold the edges of the dough over the peaches to create the edge of the tart. The folded sides will overlap. Gently press the dough together where it overlaps to contain the peaches and filling. Dip a pastry brush in the egg whites and coat the top of the crust. Sprinkle about a teaspoon of sugar over the dough and peaches. Repeat this process for the rest of the dough. Bake for 30-35 minutes or until the crust is golden brown.

Makes six individual sized rustic tarts.

August 25, 2011

More than Enough to Go Around

DSC_0016


This is not a light and airy cake. You won't need to tip toe past the oven for fear it will fall while baking. A slice of it on your plate is not delicate and spongy, but that doesn't mean it should be passed by. What do you expect from a cake made with such a sturdy, practical and slightly clunky vegetable as the zucchini? True, there are plenty of perfect small squash with delicate, smooth skin. Whether or not they are the envy of their overgrown siblings, I'm not sure, but I certainly prefer the more utilitarian zucchinis. The ones that can be grilled, shredded, frozen and baked into cakes because there is more than enough to go around. A big, slightly awkward squash means that I should bake a chocolate zucchini cake soon.

I make it once every summer, but not much more often. I found the original recipe from a housemate's copy of the Horn of the Moon Cookbook, but I've carried around my adapted version, jotted on a pink piece of paper for several years now. The slip of paper was tucked into the pages of another cookbook and I lost it for a while, but it fluttered out sometime this spring.

This chocolate zucchini cake is dense, full of chocolate, and moist from the shredded squash. It is a sturdy cake, for carrying  to a picnic, a camping trip or dividing into slices for filling lunch boxes. You can also cut it with the tender care that should not be reserved only for cakes of the light and airy sort. Place this slice, slightly warm, on a plate next to a cool smooth scoop of vanilla ice cream.

I won't even try to tell you that the zucchini makes it healthy, but I love that this is a seasonal chocolate cake that celebrates abundance!

Chocolate Zucchini Cake
I know the original recipe came from the Horn of the Moon Cookbook (or maybe its sequel, Beyond the Moon), but this is my adapted version. I baked it in a 9-inch springform pan -- it is a fairly large cake so use a pan of the equivalent size or two smaller pans if you want to make a rich, dense layer cake.


3 cups whole wheat pastry flur
1 tablespoon baking powder
1 teaspoon salt
1/2 teaspoon cinnamon
3/4 cup cocoa powder
3/4 cup butter 
1 cup honey
4 eggs
1/4 cup milk
2 teaspoons vanilla
2 1/2 cups shredded zucchini or summer squash
1 cup chocolate chips (optional)


Sift together flour, baking powder, salt, cinnamon, and cocoa. In a separate bowl beat the butter until light and fluffy. Add the honey and beat to combine. Add the eggs and vanilla and beat until smooth. Slowly stir in half the dry ingredients. Pour in the milk and continue to stir slowly. After the milk is mixed in, add the rest of the dry ingredients. Stir in the zucchini and chocolate chips (if you are using them.) Pour into buttered and floured pan and bake at 350' for one hour or until the middle of the cake feels solid and springs back when gently pressed. Allow the cake to cool in the pan for 15 minutes, then remove it to cool until ready to eat. Serve warm or at room temperature.

July 21, 2011

Imperfect, but Joyful

DSC_0370

Here's the thing: I love food. I love creating with food and making something out of scattered ingredients. I love taking inventory of what I have on hand and creating a delicious dinner. I love harvesting new onions and the smell of the soil mixed with their onion scent, mud dripping onto my shirt as I carry them out of the field. Picking basil while its heady scent fills the air, crunching into a cucumber seconds after it has been picked, and transforming milk into tart yogurt.

I love making and sharing food here. This creative process for me is very imperfect, but joyful. Challenging but nourishing in so many ways.  Honestly, though I'm not sure what shape it will take, I've realized more and more that growing and creating food is what I hope to make my life's work.

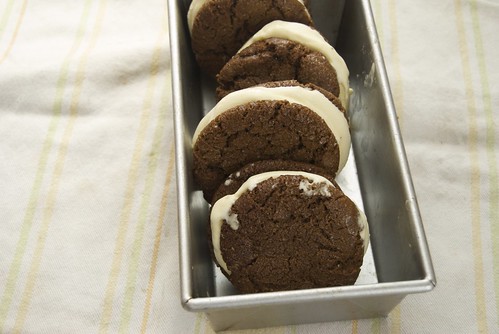
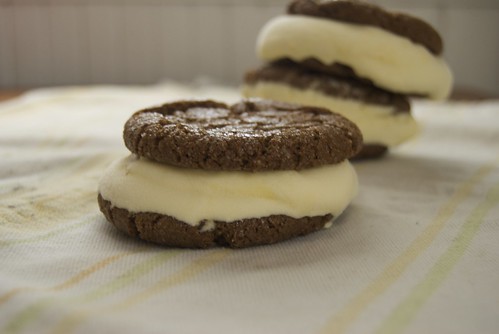
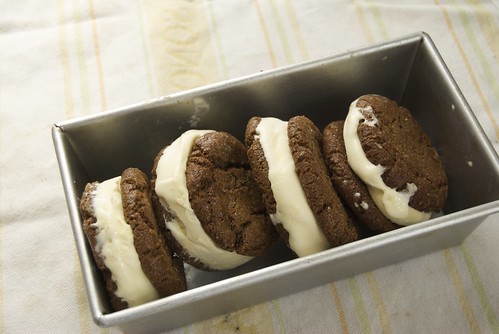
You'll notice that my offering today is a little lopsided. The cardamom ginger ice cream was soft and spreadable when I sandwiched it between two ginger molasses cookies (also it was at least 90 outside and probably 80 in the kitchen, not to mention the humidity). They didn't freeze into the dreamy perfect ice cream sandwiches that I imagined when I thought of making them. They did make for just the right treat on another very hot evening, complete with sticky fingers and dripping ice cream here and there.

DSC_0351

Sometimes, I wish I was a perfectionist. When it comes to creating I am never as focused on the perfect result as on the process, messy though it can be. I could hand you an ice cream sandwich and, most likely, you would appreciate the cool sweet gingery cream tucked between the chewy cookie layers. We would enjoy the summer evening and not even notice if it was lopsided or dripping a bit. When it comes to creating something edible, how it tastes is crucial but to taste it on this screen looks matter even more. I can always throw myself into creating without thinking twice, but my skills at executing (and photographing) the best of what I have made often fall short.

I have a strong desire to learn more about cooking and writing and photography (and sewing and farming) which I will work to fulfill. Still, for me, it is always about the process. This seems to take a meandering path, a winding road that doesn't go directly from one point to another and I can't always see what is around the next bend.

For now, we have cardamom ginger ice cream sandwich cookies. I had some frozen ginger molasses cookie dough that needed to be baked and decided that they should be paired with ice cream. I love ginger and a hint of cardamom, so I thought that would be the right match for the cookies. The recipe takes a bit of time, but a few of these in the freezer will make a heatwave a little more bearable.

DSC_0368


Ginger Ice Cream Sandwich Cookies
This ginger molasses cookie is perfect for making these ice cream sandwiches (but you can use your favorite recipe, too). The ice cream does not need the cookies, it is great on its own (the cookies are too) but they both go well together. Although I love the simple smooth cardamom ginger ice cream, it would also be really good with some chopped crystallized ginger stirred in (maybe 1/4 cup?).

There are several steps in the process of making the ice cream and the cookies, but you can make and freeze the cookies one day and make the ice cream another day. I like to refrigerate my ice cream bases overnight so they freeze well in my ice cream mixer. Once you have mixed the ice cream, freeze it for a couple of hours but take it out and spread it on the cookies before it gets too hard. Freeze the ice cream sandwiches until the ice cream is solid and then enjoy!

Cardamom Ginger Ice Cream
I adapted this recipe from David Lebovitz's vanilla ice cream recipe.

1 cup whole milk
1 pinch salt
3/4 cup sugar 
3 cardamom pods
1-2 inch piece of ginger root
2 cups heavy cream
5 egg yolks

Heat the milk, sugar, and salt in a sauce pan. Grate the ginger root and add it and the cardamom pods to the milk. When the mixture is hot but not close to boiling, remove from heat, cover, and let infuse for one hour (if you are leaving it for longer than an hour, keep cold in the fridge). After the cardamom and ginger have infused the milk, strain out the cardamom pods and grated ginger.

Place a 2 quart bowl into a larger bowl that is filled with water and ice. Place a strainer on top of the bowl and pour in the cream. Whisk the egg yolks together. Rewarm the milk and pour a small amount into the egg yolks, whisking the yolks constantly. Add a little bit more of the milk and continue whisking the yolks. Pour the egg yolks into the saucepan of infused milk and cook over low heat, stirring constantly and making sure to scrape the bottom of the pan to keep the eggs from over cooking. When the mixture thickens, remove it from the heat and pour it through the strainer into the bowl of cream. Stir to combine and refrigerate it until you are ready to mix the ice cream according to the instructions on your ice cream maker.

July 5, 2011

Blueberries for Pie Day

DSC_0246

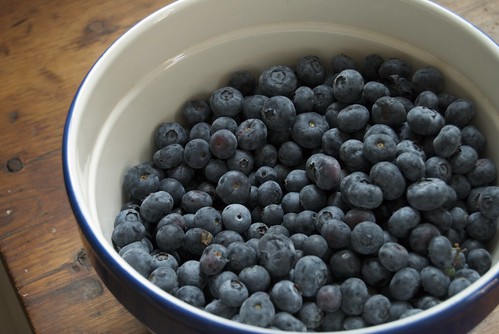
Blueberries are summer. Tart but sweet juices bursting from their blue skins, a slight crunch of seeds. Wild blueberries are best. So tiny, they should be eaten by the handful. It takes more of them to make a pie, but it is worth it. One of the fields adjacent to my Dad's old new england farmhouse is full of their the low to the ground bushes. When I was young we would check the field for berries in July until there were enough to start filling containers. Sometimes they would end up in a batch of summer morning muffins, picked and tucked into batter before I came downstairs for breakfast.

DSC_0260

At least once during the blueberry season, my Dad would declare that it was time to make a pie. It took a lot of picking to get enough. On trips out the the field, we would pick a cup full here, a bowl full there until, after a few days, there were enough berries to fill a shell of rolled out dough. Still warm from the oven, the pie was a treat, but it was even better after a night in the fridge. A cold slice of blueberry pie for breakfast was part of the ritual, too.

DSC_0265


When I think of blueberries and summer, I also think of mornings in a rented lake house in western Maine. The smell of pine and a soft carpet of pine needles surrounding the house, making it easy to go barefoot. In the mornings I peer out the window, hoping to see the sun up to warm the lake and the dock where I will spend most of the day reading and dipping in the water. Sooner or later various family members gather in the kitchen for breakfast. When we first started vacationing there, it was my Mom, my step father and us five girls. Now there are husbands and children, too. Since we are always there in July, we make sure there are always pints and quarts of blueberries around. Brought from local farm stands, we eat them in pancakes, with yogurt or cereal, and by the handful.

At least once while we are there, we go for a hike before breakfast. Up a short trail through the woods frequented by mosquitos and patches of sun splashing through the trees. On the top of the very little mountain we scramble down the rock face to enjoy the view. There are scattered blueberry bushes clinging to what little soil they can find. Selfishly, we grab the few tiny fruits they make and greedily pop them in our mouths. 

DSC_0271

I'm not in Maine this summer. I have blueberries, though. They are the round, cultivated variety nearly the size of grapes with only a hint of tartness in their blueberry flavor. Still, they capture that summer flavor. We've been eating them in pancakes and muffins and in honor of summer and a pie party and thinking of my family far away enjoying wild blueberries and weeks at the lake I baked them into a pie.

I've often hoped for perfection when making pies, but I after making this pie, I realized that there is no need for a pie to be perfect. With butter, flour, sugar, fruit and some spices it is hard to go wrong. I know the crust can be frustrating and intimidating. My King Arthur Flour Cookbooks have long and detailed instructions for attaining crust perfection, but even if you have to scrape it off the counter, patch holes, or do a single crust instead of two, just fill it with fruit, bake and enjoy.

DSC_0278


Blueberry Pie
A few notes: I increased the original crust recipe (adapted from King Arthur Flour Whole Grain Baking) because my crusts always come out too small. Fortunately I had plenty of crust. You can use all whole wheat flour, just make sure you chill the dough overnight. For the filling, I add a little flour to thicken it slightly, but I don't cornstarch or any other thickeners. The filling will be juicy with berries. I made this vanilla ice cream to go with it.

Crust - makes enough for a 9 inch double crust pie (or maybe more than enough if your better at crust than I am)
2 cups (7 ounces) unbleached white flour
1 cup (5 ounces) whole wheat flour
1 tablespoon cane sugar
1/2 teaspoon salt
15 tablespoons (7.5 ounces) cold unsalted butter
4 tablespoons (2 ounces) orange juice
4 tablespoons (2 ounces) ice water (or more as needed)


Mix the flours, sugar and salt together in a medium bowl. Cut the butter into small pieces and blend into the flour with knives, a fork, a pastry cutter or your fingers. Break up the butter and combine it with the flour until most of the butter is combined with the flour but there are some large pieces, too. It will be unevenly crumbly, resembling a coarse meal with larger chunks. Sprinkle in the orange juice and gently toss the dough to distribute the liquid evenly. Add the water a tablespoon at a time until the dough is wet enough to come together in a ball. Press the dough together to get any remaining flour. Divide the dough in half, wrap each half in parchment paper and refrigerate for at least 30 minutes or up to 3 days (ideally overnight!).


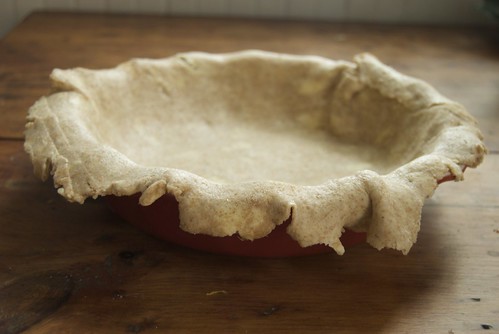
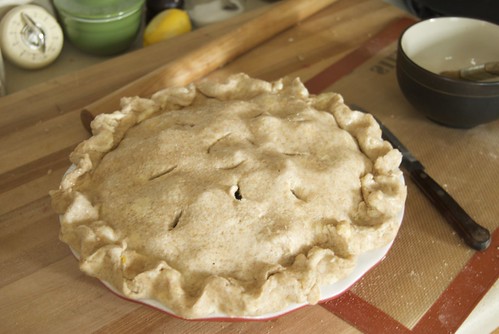
When you are ready to make the pie, roll out one half of the dough. I usually roll my dough on parchment or a silpat to keep it from sticking. I flip it over often and dust it with a bit of flour. Try to keep the dough fairly circular and roll it until it is a couple inches larger all around than your 9-inch pie pan. If the dough is stuck to the parchment when you are done rolling, just flip the dough stuck tot the parchment over onto the pie plate and center the circle of dough on the plate before you peel off the parchment. Add the filling. Roll out the second crust and place it on top of the filling. Tuck both layers of dough on top of the edge of the pie plate. If there is a lot more dough than you need around the edges, you can trim it, but leave enough to make a pretty edge around the plate. Press the two layers of dough together and form a nice edge with your fingers or a fork. Cut slits in the top of the pie to let out the steam. 


Blue Berry Filling
8 cups Blueberries
zest and juice of one lemon
2 tablespoons flour
1 cup cane sugar
1/2 teaspoon nutmeg
3 tablespoons butter


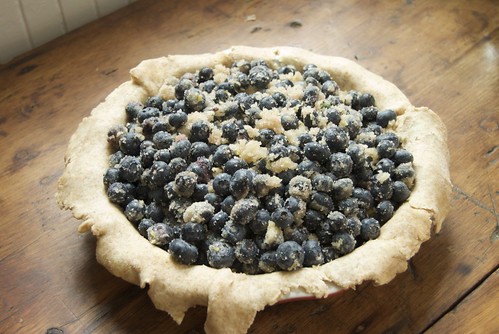
Mix the blueberries, lemon zest and juice, flour, sugar and nutmeg in a bowl. Stir gently so the blueberries don't get crushed and so that the sugar, flour, zest, juice and nutmeg are evenly distributed. Pour the filling into the prepared pie crust and place dots of the butter on top. Cover with the top crust and follow instructions above


Baking: Preheat the oven to 450' Bake the pie for 15 minutes, turn the oven down to 350' and bake for 15 more minutes. Let the pie cool for an hour or two before eating.

June 30, 2011

Strawberry Shortcake

DSC_0237


I'm sorry if strawberry shortcake is totally cliche, but it's one of the rituals of summer that I couldn't let slip by. When strawberries are in season they are dazzling jewels to be scooped up in handfuls. Never mind the red stains, we eat as many as we can. Strawberry shortcake is a must make dessert when the berries are in season, even if it seems old fashioned, perhaps a bit out of style. I have never claimed to be trendy, I wear what I like until it's worn through. I really only pull strawberry shortcake out of the closet once a year, so I think it will be making appearances for years to come.

I've never been a fan very biscuit-y shortcake. Years ago, I found a recipe for something that is sweeter, more like a scone. I had been indifferent to strawberry shortcake, but this recipe, from an old Simple Meals magazine (by the publishers of long gone Organic Style), changed that to, Yes Please! Soft but sturdy and a little sweet, this little cake is just the right thing to top with ripe red berries and whipped cream.

I know the dazzling red berries have distracted you and you've forgotten that last week I brought you a recipe for a cake topped with berries and cream. With berries only in season for a short time, can you complain?

No complaints here.

Strawberry Shortcake

For the Berries:
4 cups strawberries, rinsed, stems removed and sliced into thin rounds
4 tablespoons sugar (or more to taste)
1 tablespoon balsamic vinegar (optional)

Combine the berries with the sugar and balsamic vinegar in a bowl. Let sit for at least 30 minutes or until the berries are very juicy.

For the cream: 
2 cups heavy cream
3-4 tablespoons sugar


Whip the cream until it forms slightly stiff peaks. Mix in the sugar, adding more to taste if necessary.


For the cake:
3 cups whole wheat pastry flour
1 1/2 tablespoons baking powder
1 teaspoon salt
1/3 cup sugar
1/4 pound unsalted butter (1 stick)
1 1/2 cups buttermilk


Combine the flour, baking powder, salt and sugar. Cut the butter into small pieces. Mix with the flour and cut into smaller pieces using two knives, a pastry cutter or your fingers until the butter and flour form large crumbs. Pour in the buttermilk and gently mix until the butter and flour come together into a mass of dough. Chill the dough for 30 minutes. Preheat the oven to 375'. Remove the dough from the refrigerator. Shape it into a circle about 1 inch thick. Cut the dough into 8 even pieces. Place each piece on a baking sheet lined with parchment. Bake for 30-35 minutes until they are golden brown. Let cool completely before serving topped with strawberries and whipped cream. Serves 8.

June 23, 2011

Care in the Form of a Cake

DSC_0265


I don't bake cakes very often, but lately I've had a hankering for one. I was contemplating a big chocolate cake covered in chocolate ganache, but I was baking on the first day of summer and wishing for something a little lighter. I made a batch of very satisfying stuffed shells and with this filling main dish, I didn't want to go overboard. There are only two of us to eat whatever I make, so I appreciate baking something that we don't have to immediately ship off to our coworkers to keep us from eating "just one more piece."

Maybe that sounds a little stingy. I love sharing food, especially baked goods, but this time I wanted to keep it simple. I didn't have to search for long. There was a carton of buttermilk in the fridge, threatening to expire if it couldn't be part of a cake. I just needed a few other ingredients, no more than a bit of measuring, a quick mix and it was in the oven. Although I baked it on a cool, rainy day, I imagine this as the cake you might go to on a warm summer day when you have an abundance of berries to smother it in but not much time or energy for baking.

I love chocolate and certainly don't mind a rich dessert, but I don't need more than this one layer of cake paired with fruit and a bit of whipped cream to feel at home. Like our cloth dinner napkins, the clean but worn dishtowels folded in the drawer, and those empty glass jars gleaming on the pantry shelf this is an everyday sort of comfort. It's really nothing fancy, but adding this treat at the end of the meal was like a bit of extra love and care in the form of a cake.

DSC_0292


Vanilla Buttermilk Cake
I adapted this recipe from the one on epicurious which originated from Gourmet. That recipe has you drop raspberries into the batter, for a raspberry buttermilk cake. I'm sure that would work well, but since I didn't have berries, I decided this cake would takes its fruit in the form of preserves spooned on top. I used a jar of blueberry lime sauce I brought home from the food swap, but any berry or rhubarb preserve would work well, spooned onto individual slices and topped with barely sweetened whipped cream. I used a 9-inch springform pan, because it was easy to get the cake out of it, but you could use a cake pan, too.


1/2 cup whole wheat flour
1/2 cup unbleached white flour
1/2 teaspoon baking powder
1/2 teaspoon baking soda
1/4 teaspoon salt
2 ounces (1/2 stick) butter, softened
2/3 cup sugar, plus 1 tablespoon
1 teaspoon pure vanilla extract
1 egg
1/2 cup buttermilk


Preheat the oven to 400'. Butter and flour a 9-inch round cake pan. Whisk together flours, baking powder, baking soda and salt in a small bowl. In a separate bowl, beat the butter and 2/3 cup sugar together until they are light and fluffy. Add the vanilla and egg and beat until smooth and completely combined. On a low speed, alternate adding half the flour and half the buttermilk until the batter is smooth. Don't beat it more than that. Pour into the prepared pan and sprinkle lightly with the remaining sugar. Bake for 20-25 minutes or until the cake is golden on top and the middle is springy to the touch. Let cool for 10 minutes. Remove from the pan and let cool completely. Serve each slice topped with berries, berry sauce or preserves.

March 23, 2011

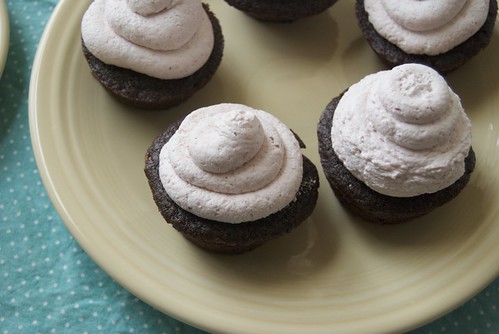
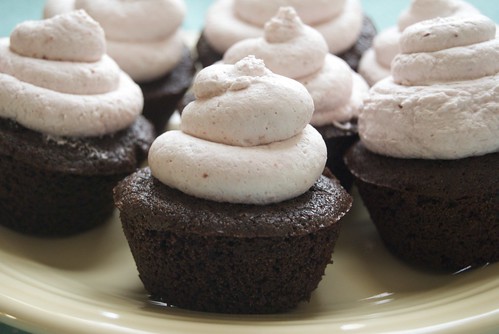
Dark Chocolate Cupcakes with Raspberry Whipped Cream Frosting

chocolatecupcakeswithraspberrycream

I hope the cupcake aprons got you inspired to do some baking. For me, it wasn't enough to sew cupcakes, I needed to bake some, too. I tied on my apron, gathered ingredients and mixed up a batch.  Cupcakes remind me of my elementary school where on your birthday you would bring in a treat for the class. After every child had a cupcake at their desk, the birthday girl (or boy) would pick a friend and walk around the school bringing any extra cupcakes to teachers from years past. I have no idea if this was normal for elementary school or just an odd tradition at the school I went to.

I know that cupcakes became very trendy a couple years ago and although bakeries may have moved on to donuts or pie as the next big I still think of them as a fun occasional treat. They're not just for birthdays any more. Cupcakes are a light hearted, informal dessert that can be dressed up fancy or just simple and fun. Made with dark chocolate cake and a light but rich and creamy frosting these cupcakes bring a little decadence to any occasion. This recipe is perfect for sharing with a group of friends, but there is no obligation to give one to your teachers or every single person in your class, though I am sure they would enjoy them if you did.

chocolatecupcakes

Dark Chocolate Cupcakes with Raspberry Whipped Cream Frosting
These cupcakes are best eaten within 24 hours of frosting since the topping is whipped cream and quite perishable. The cake recipe is adapted from the King Arthur Flour Whole Grain Baking Book. 

3 ounces (6 tablespoons) unsalted butter
3 3/4 ounces (1/2 cup) brown sugar
2 1/2 ounces (1/3 cup) granulated sugar 
1/4 teaspoon salt
2 eggs
1 teaspoon vanilla extract
4 3/4 ounces (1 1/4 cup) whole wheat pastry flour
2 ounces (2/3 cup) unsweetened natural cocoa powder 
3/4 teaspoon baking soda
4 ounces (1/2 cup) plain yogurt
3 ounces (just under 1/2 cup) water

Preheat the oven to 350'. Lightly grease and flour 12 muffin cups (one muffin tin). With a stand mixer or beaters, mix the butter and sugars until they are fluffy and light, scraping the sides and bottom of the bowl to make sure it is all mixed. Add the eggs one at time, beating until each one is thoroughly incorporated. Mix in the vanilla.

Whisk together the flour, cocoa and baking powder. Add half of the flour mixture and mix until combined. Add the yogurt and water and mix until smooth. Add the rest of the flour mixture and mix until evenly moistened. Scrap the bottom and sides of the bowl as needed.

Spoon the batter into the prepared tin, filling each cup about 2/3 full. Bake for 20-25 minutes or until a toothpick inserted in the center comes out clean. Let cool in the pan for 10 minutes and then remove from the muffin tins and let cook on a rack.

For the Frosting:
1 cup heavy cream

1/3-1/2 cup seedless raspberry jam

Whip the cream until stiff. Stir in the raspberry jam until it is thoroughly combined with the cream.
More jam will give the cream a stronger raspberry flavor and be a bit sweeter. Start out with a smaller amount and keep adding until you like the taste.

When the cupcakes are completely cool, spoon, spread, or pipe with a pastry bag the raspberry frosting onto the cupcakes. Enjoy as soon as possible.

March 21, 2011

Sweet New Aprons for Baking


I've been inspired by fun baking projects to cook up a new batch of aprons. Perfect for making messes in the kitchen and serving pretty and tasty treats. I made a couple of half cupcake aprons as well as a full one. They are sturdy and add a good layer of protection against flour and sugar that might go flying when you start to mix.

I know not everyone is a messy baker like me. Perhaps you'd just like to show your unique style while you share your delicious baked goods. I'll post the cupcake recipe on Wednesday.


If you're looking for something a little less sweet, I'll be adding more veggie aprons to the shop this week, too.

February 1, 2011

A Birthday Treat

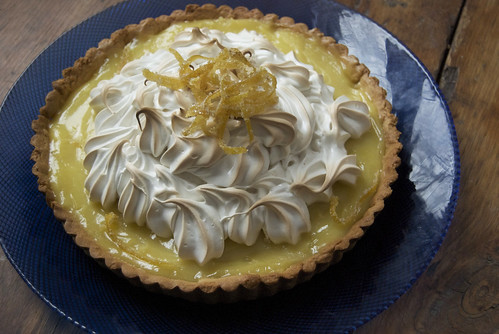
lemon tart

Today is the 2nd birthday of this blog! For the celebration, I brought a treat to show you and a recipe to share. The lemon tart above is the result of a little side project I started in January. Last year for Valentine's Day, Ray bought me the French Culinary Institute Pastry Book. He knew I wanted to learn more about baking so he brought home this beautiful, though heavy and vast, book. Sometime in November he asked me if I was every going to use it and I realized that it was time for me to start baking and learning. I decided to make a recipe from it each week this year.

Although I tend to prefer baking with whole grains and less sugar, I figured I would try my hand at the classic French pastries and see what I could learn. Eventually, maybe, I'll be able to adapt some of the recipes and techniques to my baking style. In the mean time I am in the tart chapter of the book. Spending a few hours each week on a new baking project is a treat in itself but I certainly don't mind the chance to indulge in a rich and delicious dessert. So far, we've been eating a couple of pieces of the tart of the week and then sending the rest to Ray's coworkers. We also started going to the rock gym this month, so I hope we will survive this weekly indulgence in better shape than before.

Thank you for joining me here and for celebrating with me! I wish I could pass you a piece of this tart, but instead I will share the recipe for the sweet and citrus-y lemon curd filling. It is a decadent spread with a complex lemon flavor that takes advantage of the citrus available this time of year. Although I don't live anywhere near a citrus tree, there are lots of lemons, oranges, grapefruits and other thick skinned, soft, acidic fruits available at the grocery store.

A few thoughts about this blog on its birthday: As a two year old, I think my blog has come a long way but I think it is just starting to walk confidently instead of crawling or taking baby steps. Of course, this blog and I still have a long way to go. There is so much more to learn about writing and photography and how best to share recipes and projects. I am in the process of redesigning this site (while I also create a site for Seedling Design) so I hope it will be better and nicer to look at once I make those changes.

The more time I have spent writing here, the more strongly I have wanted to focus on sharing ideas for homemade and handmade. I spend a lot of time making things and I really hope to inspire you to create, too. As I continue on, I would love to hear what you think and what you would like to see here in the future. I'll keep making and writing, but I hope you'll feel free to share feedback and ideas or just take a minute to say hello!

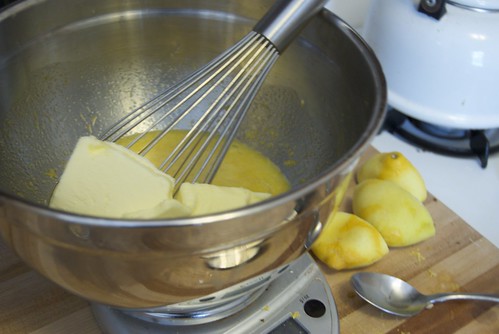
making lemon curd


Lemon Curd
Adapted from the French Culinary Institute's Fundamental Techniques of Classic Pastry Arts
Aside from filling a tart shell with this curd, you could also use it as a filling for cakes and sandwich cookies or as spread on pancakes, crepes, or scones. It will keep, refrigerated in an airtight container for a week.

3 large eggs, at room temperature
5 1/3 ounces sugar
3 ounces (6 tablespoons) plus one teaspoon fresh lemon juice
Grated zest of 3 lemons
6 1/3 ounces (1 stick plus 4 1/4 tablespoons) unsalted butter, at room temperature

To start, you will need a heatproof bowl and a saucepan large enough to hold the bowl. Fill the saucepan with water so that the bowl can rest on the pan without touching the water. Bring the water to a simmer. Place the eggs, sugar, lemon juice and zest in the heatproof bowl and whisk to combine. Add the butter and place on the saucepan, over the simmering water. Whisk to melt the butter and continue whisking to ensure even cooking. The heat should be evenly distributed on the bottom of the bowl so that nothing will burn and the eggs won't cook too quickly. Continue whisking for about seven minutes until the mixture becomes quite thick and light.

Remove from the heat and pour the curd through a fine mesh sieve into a clean bowl to remove the pieces of zest. Store in an airtight container in the refrigerator.

December 14, 2010

Share the Warmth of Hot Cocoa

Hot Cocoa

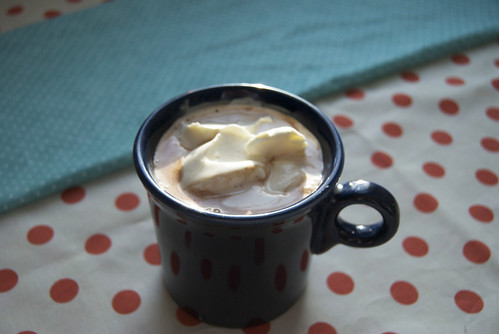
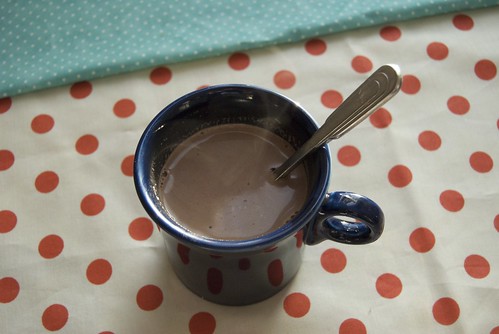
Sometimes a cup of hot cocoa is just the thing. A treat alongside a cookie, a cup shared with a friend, something to wrap cold hands around and be warmed inside and out. It has been so cold here and very snowy and I've been indulging in hot chocolate often.

As a child, during winter vacations I would spend hours ice skating on a nearby pond and drinking Swiss Miss by the thermos-ful. Now I like something just a little more grown up: more chocolatey, less sweet, with enough cinnamon to add flavor and a hint of cayenne for extra warmth and spice.

Hot Cocoa Mix

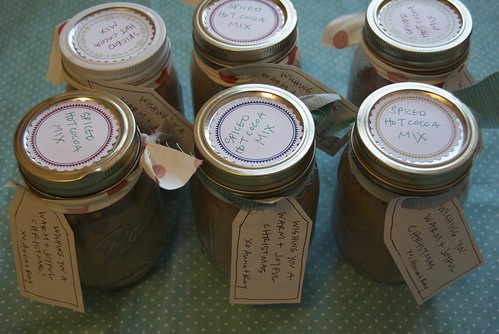
I made several batches of my hot cocoa mix to fill pint sized mason jars. I think they'll make great gifts for a holiday season that is all about warmth, light and joy in the middle of a cold dark time of year. If I can't sit down to a cup of hot chocolate with a friend, I can at least send my warm wishes and the ingredients to make one. Although I am keeping things simple this year, I think a unique, handmade mug with a jar of homemade hot cocoa mix would make a wonderful gift.

DSC_0087

Hot Cocoa 
I'm including the recipe that I use for just one cup, as well as the recipe for a whole jar. I have only tried this recipe with cow's milk, but I am sure that it would be just as good with whatever kind of milk you prefer. I used Equal Exchange Organic and Fair Trade Cocoa Powder which has great flavor and comes from farmer cooperatives. You can use whatever kind you like. If you want pure chocolate with nothing else in the way, omit the spices.

One Cup Mix:

4 teaspoons (7 grams) cocoa powder
1 1/2 teaspoons (9 grams) granulated cane sugar
A sprinkle of cinnamon
A small pinch of cayenne powder

Mix all the ingredients together and place in a mug. Add 8 ounces (One cup) of hot milk. Stir to blend. Serve with whipped cream or homemade marshmallows. Enjoy!

Pint Jar Mix:
1 1/4 cups (90 grams) cocoa powder
1/2 cup (108 grams) granulated cane sugar
1/2 teaspoon of cinnamon
A sprinkle of cayenne powder

Place all ingredients in a pint jar. They won't fill the jar all the way to the top. Cover and shake to combine the ingredients. To serve, add one heaping tablespoon of the mix to 8 ounces of hot milk. Serve with whipped cream or homemade marshmallows.

October 18, 2010

Ordinary, But Just Right

DSC_0024

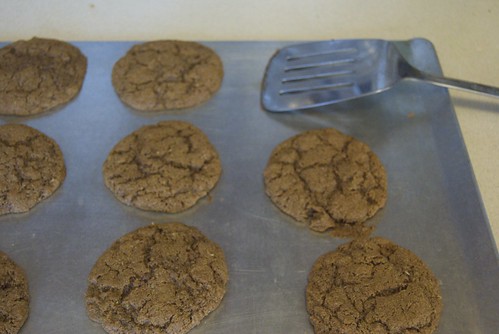
Ginger cookies are perfect for fall. Simple, unassuming, flavorful but not decadent or over the top. They are ready to hop in a lunch box and go to school, to sit beside a bowl of freshly made applesauce for dessert, or to be nibbled as an anytime snack. When done right they are the perfect treat for any season, but this especially is the time of year is for a chewy spicy bite.

I like my ginger cookies quite gingery and, while I enjoy ginger snaps and thin ginger cookies, I especially love chewy ginger molasses cookies. When I see one at a bakery, I just might choose it over chocolate chip. I have tried making them at home several times, but its only been recently that I have finally gotten the recipe right. They take very little time to make and I love the spiciness that fresh ginger gives to these cookies.

DSC_0011

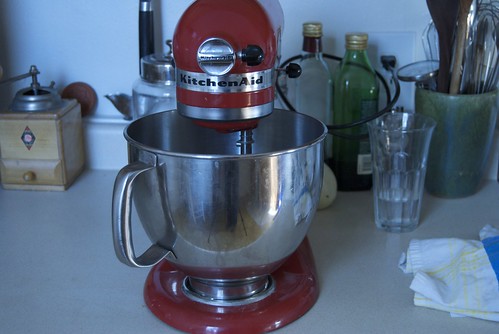
My stand mixer used to live on my kitchen counter, but since we moved it has a place on our pantry shelf. When I brought it out I realized that I missed it a little so I took this picture, clutter and all. Sometimes I really enjoy photos that are not perfectly stylized (which I can't really do anyway) that just capture a part of a room or a day. Kind of like a ginger cookie: ordinary but just right.

Ginger Molasses Cookies
If you don't like the spiciness of fresh ginger, you can use a smaller amount or substitute powdered ginger. I wrote this recipe with measurements mostly by weight. I realize that my measurements on this blog are not consistent because some are by volume and some are by weight.  Measuring by weight is an easy and accurate way to bake, all you need is a basic scale. I have added the measurements by volume, too.


20 ounces (4 cups) flour
1 1/4 teaspoons baking powder
1 1/2 teaspoons baking soda
1 1/2 teaspoons salt
1 teaspoon cinnamon
8 ounces (1 cup/two sticks) unsalted butter
7 ounces (1 cup) sugar
2 ounces (1/4 cup)  molasses
2 eggs
1 tablespoon grated fresh ginger


Preheat oven to 350'. Combine flour, baking powder, baking soda, salt and cinnamon. Cream butter and sugar until soft and fully mixed together. Add molasses and eggs and beat until smooth. Add fresh ginger and dry ingredients and mix until completely incorporated. The dough might be a bit crumbly. Scoop dough into golf ball sized balls and place on a baking sheet. Bake for about 10 minutes. Yeilds about 24 three inch cookies.

October 4, 2010

Visiting and Exploring

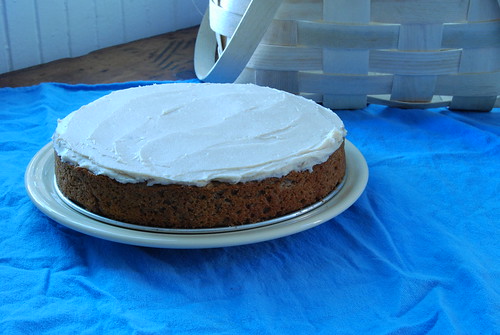
 Apple sauce cake with cinnamon cream cheese frosting.


Last Wednesday, I drove to my friend Emily's house in Milwaukee. The route was about five and a half hours of rolling hills, farm land, brightly colored trees and smooth highway. In Milwaukee, I spent a lovely few days with Emily and her husband Jon. They have a cute little apartment in this city with a river on one side and a great lake on the other. We ate good food, took walks, played scrabble, made this amazing s'mores pie and enjoyed each others company. Oh yeah, and I brought this cake which we enjoyed for dessert the first night I was there.

I'll get back to the cake in a minute, but this little bit of travel has gotten me thinking. Living somewhere new and visiting new places in the United States makes me realize just how big this country is. Going someplace totally different and foreign can be a bit mind-boggling for me. It is amazing but also hard to fathom, sometimes, how we all live so differently on this earth. On the other hand, visiting and exploring places that are familiar in language, architecture, and climate makes me really think about all the places full of people living lives vaguely similar to mine.

You would think that bicycling across the United States would have given me a good sense of how big this country is, but when you are going one day at a time for weeks, it's hard to comprehend that you have ridden from one coast to the other. I find that encountering a new place piques my curiosity and makes me think about all the places I might never see and the people I'll never know, but they are out there, living their lives.

And some of these people out there (you) are reading this blog. Too bad, I can't just cut you a slice of this cake and hand it to you across the table as we get to know each other in person, but I wanted to share it with you anyway. I've been thinking about an applesauce cake for a while, so I was glad to have the opportunity to make it for my visit with friends. Its full of the autumnal flavors I love this time of year, but not too heavy or sugary. You could leave off the frosting and it would make a simple and classic coffee cake. It is reminiscent of this fall cake, clearly I am a total sucker for spices and cream cheese frosting.
Applesauce Cake with Cinnamon Cream Cheese Frosting
Adapted from Gourmet. I used less sugar than the recipe calls for since my applesauce was sweet and I knew the frosting would be, too. 

For the cake
2 cups whole wheat pastry flour 
2 teaspoons baking powder 
1/2 teaspoon baking soda 
1/2 teaspoon salt 
3/4 teaspoon cinnamon 
1/2 teaspoon ground ginger 
1/8 teaspoon ground cloves 
1 stick unsalted butter, softened
1/2 -3/4 cup sugar (depending on the sweetness of your applesauce and your preference of sweetness)
1 teaspoon vanilla  
2 eggs 
1 1/2 cups applesauce 
1 cup chopped walnuts , toasted    

For the Frosting
5 ounces cream cheese
3 tablespoons unsalted butter
1/4 teaspoon vanilla
1 cup confectioners sugar
1/2 teaspoon cinnamon
1 tablespoon milk


Preheat the oven to 350'. Butter an 8-9 inch square pan (or a 9 inch springform pan, which is what I used). Mix flour, baking powder, baking soda, salt, cinnamon, ginger, and cloves in a small bowl until combined. Beat butter and sugar until soft and fully combined, add eggs and vanilla and beat until smooth. Add applesauce, mix until incorporated. Add flour mixture and stir at a slow speed until mixed. Pour into prepared pan and bake for 40 - 45 minutes. After baking, let cake cool fully before icing.

To make the frosting: cream cheese, butter and vanilla on high speed until fluffy. Add confectioners sugar and cinnamon and beat on low speed. Add milk as needed and beat until the frosting is smooth and creamy. Spread frosting over cake and enjoy!

February 12, 2010

Coconut Chocolate Mousse

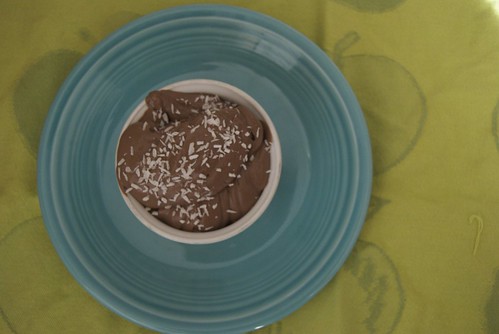
Coconut Chocolate Mousse

It's that awkward time of year: winter is growing old and dingy but will neither clean up its act with a fresh blanket of snow* nor politely make way for spring.  We still have months of cold weather left and are nearing that equally awkward holiday that often seems more about buying things and expectations than just hearts and flowers.  For the most part, I've never really had anything against Valentine's Day.  During my childhood we always made a mailbox for filling with home made cards and my mom often surprised us with hand made pink and red gifts.  These days I don't have any expectations for the day except to see the heart papers all over town and, usually, that it is an excuse to eat chocolate.

Now, I know that chocolate lovers the world over would attest that you never need an excuse to eat chocolate.  I don't really need one either, but I like to make something fitting for the occasion.  This is a very simple recipe which was inspired by the coconut chocolate mousse at one of my favorite restaurants.  I haven't yet reached the more solid consistency of their mousse, but this three-ingredient, vegan, gluten-free recipe is smooth, creamy and satisfyingly full of chocolate.  


Coconut Chocolate Mousse
I am not much of a pudding eater, so for me this is a mousse (by name alone, this is not a technical definition) but the consistency might be right between the two.  To make the recipe vegan or gluten free, make sure that the chocolate you use does not contain any dairy or gluten ingredients.  I think this would also be fantastic with whipped cream on top, but then again, what isn't fantastic with whipped cream on top? If you prefer a more traditional Chocolate Mousse, I made one last year.

14 ounces of coconut milk (one can)
6 ounces of dark chocolate (I used a mixture of 59% and 70% cocoa content), chopped into small peices
1 teaspoon vanilla
1 pinch salt
unsweetened shredded dried coconut, for sprinkling on top

In a heavy-bottomed sauce pan, heat coconut milk over medium heat.  When the milk has started to warm, add the chocolate and stir until fully melted so the mixture has a smooth, uniform consistency.  Stir in vanilla and salt and remove from heat.  Pour into a shallow pan or bowl and refrigerate for 2-3 hours or overnight until it has thickened into a spoonable mousse.  Scoop into small bowls or ramekins and sprinkle with the coconut.  For an even thicker mousse, refrigerate for another hour, or until ready to eat.  Or eat it right away.  Makes 4 small, but richly satisfying, servings.

*It seems that every other place on the east coast has gotten snow but we have been left with nothing but cold.

January 30, 2010

Yogurt Cheesecake

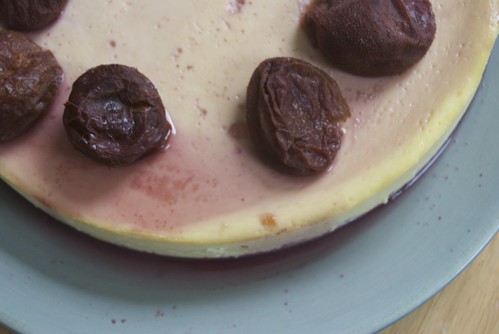
Yogurt Cheesecake with Plums

I've never been much of a cheesecake eater.   When given a selection of desserts, I will most likely choose the chocolate option and enjoy it thoroughly.  I have always found cheesecake to heavy, dense, and basically over rated.  Still, I've often thought it would be interesting to make one.  This thought intensified after I canned whole plums in honey syrup.  I wasn't quite sure what I would do with the sweet, soft orbs but it occurred to me that the plums would be a wonderful topping for cake of some sort.  I'm not sure how I got the idea for a yogurt cheesecake, probably from searching for a suitable cheesecake recipe, but I was intrigued by the idea of something that might be lighter and without the intensity of a regular cheesecake.
I found a variety of recipes with various amounts of eggs and yogurt and different types of cheese.  I settled on a recipe I found in the New York times.  It calls for Greek yogurt which you can make from straining your home made yogurt into something thicker.  I had just returned from holiday travels so I bought Greek yogurt while I made another batch of regular yogurt for us to eat.  The cake was simple to make and tasted rich, without being cloying.  It was a great base for the plums, but would certainly be good with other fruit on top.  Of course, I am no cheesecake expert but I'm sure I'll make this one again.

Yogurt Cheesecake
Adapted from the New York Times. 

1/2 cup sugar, plus some for dusting the pan 
3 cups Greek Yogurt
1 1/2 cups mascarpone
3 tablespoons confectioners sugar
3 large eggs
6 large egg yolks
1 1/2 teaspoons salt
1 1/2 teaspoons vanilla
 Make the cheesecake the day before you will serve it.  Preheat the oven to 350 degrees and put a kettle of water on the stove to boil.  Grease a 10-inch springform pan and sprinkle with sugar, tapping out the excess.  Wrap foil around the outside of the pan -- this will keep the water bath from seeping in.

Beat the sugar, yogurt, mascarpone, and confectioners sugar until smooth.  Beat in the eggs, then the egg yolks, one at a time, scraping down the sides of the bowl after each one.  Mix in the salt and vanilla.  Pour into the prepared pan and place the pan into a 9 by 13 inch pan filled with a few inches of water (about half way up the sides of the springform pan).  Cover the whole thing with foil.  Bake for 20 minutes, rotate the pan and bake for 20 minutes more.  Remove the foil until the cake is puffed and jiggly, but not liquid in the center.  Let the cake cool on the counter and the cover and refrigerate overnight.  Serve chilled with your choice of fruit or other topping.

December 20, 2009

One More

We were supposed to leave early this morning to start our drive south to visit Ray's family for Christmas.  Due to the snow that has blanketed nearly everywhere that we will drive through, we postponed our trip until tomorrow.  Unfortunately we didn't get much snow here but its been a relaxing and cozy day, an unexpected day of vacation -- free to fill with whatever I wanted, or to do nothing at all.  Its been a combination of both things.  I made these yummy nuts for a snack on our long drive tomorrow and I wanted to share one last recipe with you before I leave for a week or so. 

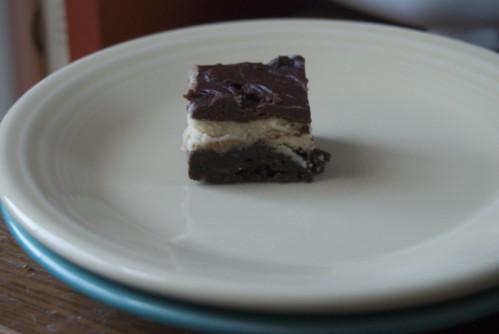
Its quite likely that you have reached your fill of baking and making.  I reached mine sometime on Wednesday before I had made anything for the cookie swap that my co-worker's and I had planned.  After trying to get everything done for Christmas as early as I could, I didn't feel very motivated to bake anything else.  I couldn't give up on the cookie swap, though, and I had an idea of what I wanted to make which came together without too much trouble.  These Chocolate and Mint Brownies do have multiple elements but they are fairly simple and the end result was a dense layer of semi-sweet brownie with a simple mint frosting spread with a layer of chocolate ganache.  The cookie swap yielded a huge variety of cookies (coconut lime, pumpkin curry chocolate chip, chocolate chip pecan, pistachio and cranberry...) and it was a fun way to share holiday festivities together.

I hope you aren't feeling swamped or overwhelmed by your holiday preparations and celebrations.  If your eyes glaze over at the sight of this recipe, come back another time (I'm keeping this other chocolate and mint combo for some future occasion).  Have peaceful and joyful holidays, whether you are baking or not!
The Last one
Chocolate and Mint Brownies for a Cookie Swap
 I adapted this from the Grasshopper Squares I found on Epicurious.  I have no interest in eating a grasshopper, especially not for Christmas and after all my peppermint bark making, I was tired of white chocolate.  Instead of two layers of ganache, I made a layer of mint frosting.  

1 1/2 sticks of unsalted butter
10 1/2 ounces of semi sweet choclate
1 cup of brown sugar
3 eggs
1 1/4 teaspoons vanilla
3/4 cup of flour
1/4 cup plus 2 tablespoons cocoa
3/4 teaspoons of salt

Preheat the oven to 375 degrees.  Butter a 9x13 inch pan and line it with crisscrossed layers of foil, leaving a two inch overhang of foil on all sides -- butter the foil as well.  In a heavy bottom 3-4 quart saucepan, melt the butter and chocolate.  Add the sugar until it is all combined.  Let the mixture cool briefly, then stir in the eggs, vanilla, flour and salt. Spread the batter in the foil lined pan and bake for about 20 minutes, until a fork inserted comes out clean.  Let the brownies cool completely. 

Make the Frosting and Ganache:
1 stick (8 tablespoons) of unsalted butter
1 tablespoon of milk
1/2 teaspoon of peppermint extract
2 cups powdered sugar
10 ounces semisweet chocolate
1/2 cup heavy cream

Beat the butter until soft and creamy, add milk and peppermint extract.  Slowly add the powdered sugar until it is completely combined with the butter, into a smooth frosting (add more milk if needed to achieve the right consistency).

In a heavy bottomed saucepan, over medium heat, melt chocolate with cream until completely combined and smooth.  Let cool completely, stirring occasionally to keep at a spreadable consistency.

When the brownies and ganache are completely cool (I refrigerated both to ensure this), remove the brownies from the pan, by lifting up the foil.  Spread the mint frosting on the brownies in an even layer, spread the ganache on top of the frosting.  Cut the brownies into your desired size (I refrigerated the frosted brownies before cutting them to make sure they layers would stay intact), cutting off jagged edges to make neatly square or rectangular brownies.  

December 18, 2009

Sharing

The small storm of sugar and chocolate that has been hovering in my kitchen is beginning to subside.  I've mailed the Christmas packages that need to be sent and I'm distributing the others.  Although I like to take a relaxed approach to the holidays, I still have had quite a lot going on.  This afternoon I left work and dashed through a few quick errands, then to a very long post office line, then quickly home before I was off again to go caroling.  I reminded myself of a cartoon, with me running around in a bit of a frenzy to get all of that done, with a caption highlighting the irony of the situation, something like, Its the Most Wonderful Time of the Year.

I prefer to keep it a wonderful time and have been finding the small things, such as baking, making and caroling to make this happen.  I also had the pleasure of participating in a Holiday Traditions Exchange which was organized by Meg McElwee at Sew Liberated.  It was like having a temporary pen pal from far away who I had never met.  I know only a few things about Wendy from Alabama, who was my exchange partner, but through this I learned more about her special holiday traditions and received some wonderful holiday treats.

We each sent the other a handmade ornament, a recipe for something that is part of our holiday celebrations and a description of some of the traditions that we carry out every year.  I wrote to Wendy about Chocolate Roll -- a variation of a buche de noel that my mom makes every year for Christmas or New Years or both.  Often we have a Christmas Party filled with friends and family and we make 6 or 7 of these delicious logs of chocolate cake wrapped around whipped cream and flavored with things such as raspberry jam, peppermint, mocha and orange marmalade.  I'm not going to talk to much more about this right now because the real excitement this year spilled out of the package Wendy sent me.  Not only did I love hearing about what her family does at christmas, I adored the little snow man ornament she sent.  To top it all off, Wendy included some of the recipes for the many cookies she gives as gifts to her large extended family.

I can't wait to try the ginger cookie recipe she sent, but I jumped right in with her recipe for Mexican Wedding Cookies.  When I read the simple list of ingredients that would make a nut studded cookie tossed in powdered sugar, I knew this was what I had been looking for.  Although this year I focused on making candy and chocolates as gifts, I know that Mexican Wedding Cookies will certainly be included in any Christmas cookie assortments I make in the future.  They are simple and not too sweet, balancing out the larger quantities of sugar that fill many cookie recipes.   They are easy and quick and, as Wendy has her children involved in the process, very family friendly.   Those that I shared them with loved them, and its really the sharing that I love most about all of this holiday time!
Wendy's Mexican Wedding Cookies
I made these cookies both with white flour and spelt flour.  The spelt version is a little bit crumblier, but quite similar to the white flour -- you could also use a light whole wheat flour, I'm sure (whole wheat pastry, white whole wheat or half white half wheat flour).

2 sticks of butter, softened                                                                                                                         2 cups of flour
2 cups of chopped walnuts
1/2 teaspoon of vanilla
8 tablespoons of powdered sugar
Preheat the oven to 350 degrees.  Mix the butter, flour, walnuts and vanilla with a mixer until ingredients are combined into a crumbly dough.  Shape the dough into walnut-sized balls and place on a cookie sheet.  Bake for 10-12 minutes.  Let cool completely.  Place cooled cookies in a bag, add powdered sugar and shake gently to coat the cookies.  Makes about two dozen cookies.

December 10, 2009

Small Treats

DSC_0485
 
Yesterday we were surrounded by a howling storm that brought rapidly falling snow, pouring rain, slush and lots of wind.  Luckily, I once again found myself inside working on projects.  I am working on making small gifts that will soon be sent and delivered to friends and family.

I love giving gifts and I especially love the excitement of making gifts instead of the obligation to buy something for everyone.  Although I also enjoy purchasing carefully chosen gifts for some of the people I give to, I often find myself saddened by the incredibly commercial aspect of the holiday season and the obligation to buy buy buy.  I know that so many of these purchases are made in the spirit of caring and wanting to give to those you love so I won't go any farther on that tangent.  I just love focusing on home made gifts because, usually, they are as much fun to make as they are to give and (hopefully) to receive.  When I  think back on the gifts I have given over the years, its the ones that I have made that I remember most clearly.  When I was young it meant lots of glitter, string, and random objects, then there were mix tapes, paintings, pillows and sewing projects, knitting and a huge undertaking of a sweater for Ray at our very first Christmas among other things.

In the past couple of years, I've been keeping it a bit simpler.  I've started incorporating different treats of food and sweets and packing them in simple reusable bags.  I think all handmade gifts contain that extra something special that comes from putting time and energy into it.  Sometimes you just don't have the time or energy to knit everyone a scarf or pull off several big projects. I find that when I start making things for Christmas, I get three or four of five more ideas that I want to work on, but time doesn't always allow for this.  I think small treats are a great way for me to share my love and enthusiasm for making things and for the people I am giving to.  I like to give everyone a jar or two of things I can in the summer and then a few homemade sweets.  In the past, I  have included homemade truffles, peppermint bark, and this year I am making espresso walnut toffee and caramelized cashews. 

The espresso walnut toffee came into my life on my wedding day.  We had a pot luck dessert which resulted in tables heavily laden with all sorts of delicious baked goods.  I sampled several, but after I came across the espresso walnut toffee, that was it.  I nibbled on it for the next two days.  We had our guests make cards saying what each dessert was, with their name on them so we would know who made each thing, but they got lost in the clean up which meant that the origin of the espresso walnut toffee remained a mystery.  Well, it turns out that my friend Brita made the toffee from Molly Wizenburg's A Homemade Life, which just so happens to be on my books shelf as well.  The book itself is a wonderful collection of beautiful stories and recipes, I highly recommend it.  I also highly recommend you make this toffee as soon as possible.
DSC_0483

Espresso Walnut Toffee
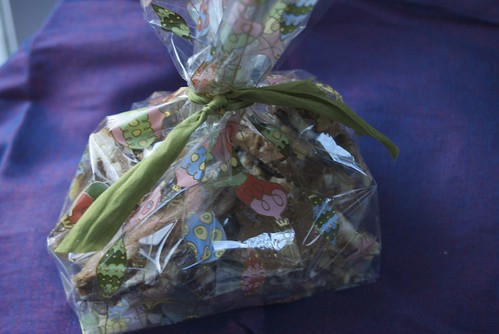
I had never made "candy" before, but it was really simple, just stirring patiently and waiting for the candy thermometer to reach 290 degrees.  As soon as the toffee was fully cooled, I broke it into small-ish pieces and put it into little bags, tied tightly with ribbon.  That will keep it fresh and keep me from eating it all!  Also note: It really does help to have the chocolate very finely chopped (smaller than chips, if that's what you use) and Molly notes that this recipe does not double well.

2 cups walnuts
1 cup sugar
1/3 cup packed light brown sugar
2 teaspoons instant espresso powder
1/2 teaspoon ground cinnamon
1/4 teaspoon salt
1/3 cup water
1 tablespoon unsulphered molasses
4 1/2 ounces bittersweet chocolate, very finely chopped
4 1/2 ounces white chocolate, very finely chopped
2 1/2 sticks unsalted butter

Preheat the oven to 325 degrees
Spread the walnuts on a baking sheet and toast until they are fragrant, 5 to 10 minutes.  Set them aside to cool.  When they are cool, coarsely chop them.  Set aside 1 1/2 cups of the chopped nuts.  Finely chop the remaining 1/2 cup.

Meanwhile, in a medium bowl whisk together sugars, espresso powder, cinnamon and salt.  In a measuring cup whisk together the water and molasses.  Put each type of chopped chocolate in its own bowl.  Grease a rimmed baking sheet with butter or cooking spray.

In a heavy 2-3 quart saucepan, melt the butter over low heat.  Add the sugar mixture as well as the water and molasses.  Stir until the sugar has dissolved.  Attach a candy thermometer to the side of the pan.  Over medium heat, cook the mixture until it reaches 290 degrees.  Stir frequently at first, then stir and constantly scrape the bottom an sides of the pan.  This will take about 20 minutes.

When the mixture reaches 290 degrees, remove from heat and stir in the 1 1/2 cups of coarsely chopped walnuts.  Then pour the mixture onto the prepared baking sheet -- do not scrape the saucepan.  Spread the toffee, by tilting and shaking the baking sheet or using a spatula, until it reaches 1/4 inch thickness.  Sprinkle the chocolates onto the toffee alternating rows of bittersweet and white.  Allow the chocolates to melt for one minute.  Using the back of a spoon, spread the melted chocolates, taking care not to mix them.  Then carefully swirl the chocolates to create a marbled look.  Sprinkle the remaining finely chopped walnuts on top of the chocolate.  Chill in the refrigerator until the toffee is firm, about one hour.  Break into whatever size pieces you like. 
November 22, 2009

I Did Not Delay

Pumpkin Cake

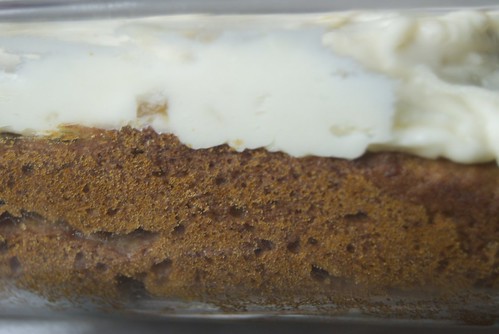
When I saw this recipe, I thought:  I must make this as soon as possible.   How could I ignore a whole grain cake featuring pumpkin and the accompanying spices?  How could I postpone cream cheese frosting studded with tiny spicy pieces of crystallized ginger?  I couldn't.  I had no reason to make this, no occasion and no need to have a whole cake sitting on the counter calling to me to have another delicious piece.  So, I did not delay:  I made it last week and brought it to work where my co-workers quickly devoured before it could make a noise as it sat innocently on the counter.
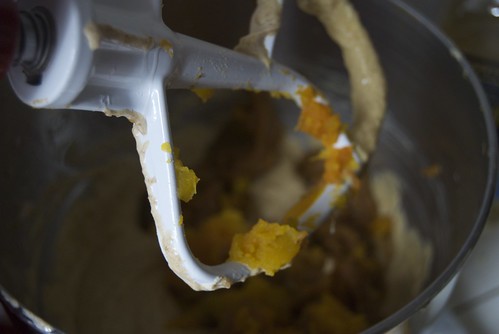
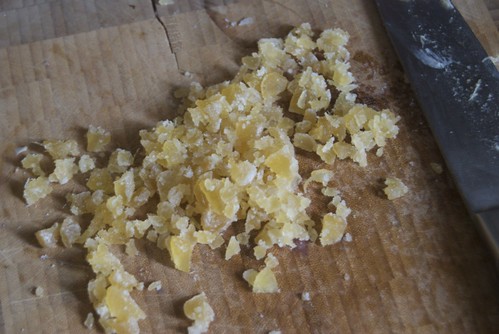
Making pumpkin cake

Now, I know what you are thinking:  "Another recipe with squash?  Thanksgiving is coming right up and we have no time to even think about this."  Its okay, I understand.  I just didn't want to let this slip by, something so simple, satisfying and easily crowd pleasing.  When it comes to Thanksgiving, I wouldn't dream of forgoing pie for dessert (although I have made many squash recipes already this fall, I haven't had pumpkin pie and I am really looking forward to it).  I there's a canned pumpkin shortage, and maybe you were saving that can or the squash from the farm for something else.  I know its almost too late:  after Thanksgiving minds turn to another holiday fast approaching and I start to think of other sweet flavors -- chocolate, mint, ginger in all kinds of sweets.
DSC_0345

I was just thinking, that, maybe, you would come back to this little cake sometime this winter.  Maybe you'll find that one of the squash you have saved from the fall harvest has a soft spot and needs to be used soon.  Maybe you'll want something rich and comforting, yet humble and easy to bake on a cold winter's day.  You could always wait until next fall, but I wouldn't recommend it.  When you do get around to making this recipe, you will not be disappointed.  And if you happen to bring it in to work you're co-workers will be quite pleased, too.
With Ginger Cream Cheese Frosting
Pumpkin Cake with Ginger Cream Cheese Frosting

This recipe comes from the King Arthur Flour Whole Grain Baking book.  It is a fabulous resource for making almost any baked good you could want using whole grains.  They have lots of tips and ideas for making whole grains work really well in everything from breads to scones to cakes and more.  I made this as a sheet cake because it was simple and easy to transport.  I am sure that it would be a stunning two layer cake or be great as cup cakes.  It would be good, too, with out cream cheese, but I am a sucker for cream cheese frosting.

Cake
1 1/2 cups whole wheat flour
1 cup whole barley flour
1 teaspoon baking powder
1 teaspoon baking soda
3/4 teaspoon salt
1 teaspoon ground cinnamon
1 teaspoon ground ginger
1/2 teaspoon ground nutmeg
1/4 teaspoon ground allspice
1 cup brown sugar
1/2 cup unsalted butter, softened
1/2 cup vegetable oil
4 large eggs
15 ounces pumpkin, butternut or buttercup squash puree (one can)
 Preheat the oven to 350 degrees.  Grease and flour the pan or pans of your choice.  Whisk together the flours, baking powder, baking soda, salt and spices in a medium bowl.  Beat the brown sugar, butter and oil together until thick, creamy and well combined.  Beat in the eggs one at a time scraping the sides and bottom of the bowl to make sure everything is mixed in.  Stir in the pumpkin and then the dry ingredients.  Mix until evenly moistened.  Transfer the batter to prepared pans.  Bake for 30-35 minutes, until the top springs back when gently touched. Remove from the oven and let cool before frosting.

Frosting
6 tablespoons unsalted butter, at room temperature
8 ounces (one package) of cream cheese, at room temperature
1 teaspoon vanilla extract
3 cups confectioners' sugar
1/2 cup chopped crystallized ginger
2 to 4 tablespoons milk, if needed, to make the frosting spreadable
Combine the butter, cream cheese and vanilla in a medium bowl and beat them together until they are light and fluffy.  Add the sugar gradually beating well. Stir in the ginger, then add the milk a little at a time until the frosting is spreadable.