Showing posts with label pantry staple. Show all posts

January 23, 2012

Glorious Transformation

onions

On a chilly winter's evening, get a cutting board and stand near your stove. Cut the stem and root end off two or three medium sized yellow onions. Slice them in half from stem to root and peel off the skin. Cut each hemisphere of onion into thin strips along its latitudes. Warm a skillet or saute pan over medium-low heat. Pour in a glug of olive oil and add the pile of sliced onions. They are pungent, crisp and pale in color. They make your eyes sting and cry. This temporary torture is the unfortunate price, but you will be rewarded soon. As they begin their quiet sizzle, stir the onions every few minutes to distribute the heat and cook evenly. They will begin to change color, at first a hint of  golden then darker. The goal is not to brown them, but to let them melt and become their better selves.

Add some salt, stir when you think of it, and then go about your business as though nothing truly magical was happening on your stove. The onions will let go of their stiff pretense and start to relax, becoming soft and flexible. Stir. Ignore. Stir again. After 15 or 20 minutes they will have changed color entirely, but don't stop too soon. They need to stay on the heat to realize their true potential. This warm weather vacation will turn them a deep golden brown and bring out all of their sweetness. Keep stirring and checking them until they have become the color of caramel and are soft, limp and unrecognizable as the vegetable you chopped minutes ago.

Now enjoy. Use them to top pizza, focaccia, stir them into risotto, use for soups, add to sandwiches (grilled cheese, anyone?), toss into salads. I have a jarful the fridge to ensure that I can enjoy their flavor as often as possible. It is a glorious transformation.

April 11, 2011

Clarified Butter

DSC_0295

Now that I have finished my big spring cleaning, I am glad to report that the weather has caught up with my spring mind set. The sunny days, budding trees and warmer temperatures are reinforcing my need to embrace and incorporate new things into my days but also reminding me that I need to get back into healthy routines. Now that the kitchen is spruced up and my apron is freshly washed, I'm ready to keep up routines as incorporate new ones.

I enjoy my kitchen routines. I make yogurt every week or so, I feed my sourdough starter daily and bake bread weekly, and I frequently make batches of hummus, almond butter and granola. Having staple foods that I make from scratch helps me to feel connected to my home and my food. With both newness and routine in mind, I finally got around to making clarified butter. It could not be simpler to make and is not only useful for cooking but also more healthful to use than many oils.

Clarified butter is ideal for high heat cooking. In a process slightly more time consuming than melting butter, you remove the milk solids which give regular butter a very low smoke point. The smoke point of an oil is the point at which it begins to break down and loses its flavor and nutritional value. Different oils have different smoke points and the oil isn't healthy to cook with at temperature above its smoke point.

DSC_0299


Although you can find oils from all kinds of nuts, seeds and olives with different smoke points, most of them are grown and processed far away. I like using olive oil, almond oil, coconut oil and others for their flavor and different purposes but it is nice to find a cooking oil that doesn't come from an exotic location. Locally produced butter is easily transformed into something you can use for cooking pancakes, sauteeing vegetables, and browning veggie burgers and fritters in a cast iron pan. 

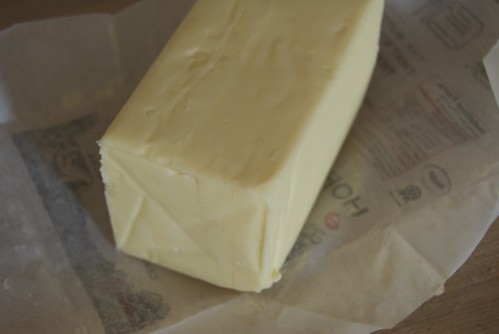
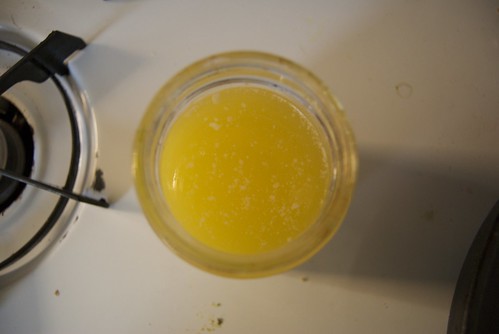
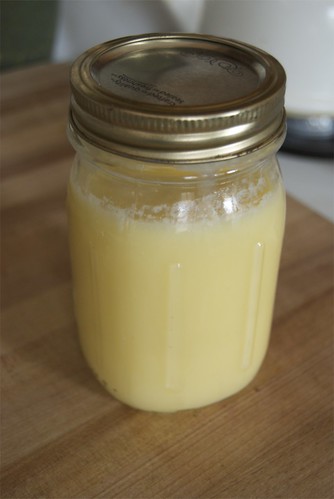
I had read about clarified butter in Heidi Swanson's Super Natural Cooking a while ago, but I just putting off making some of my own. She recommends using it for a lot of the recipes in her book and I tend to use it for whatever I am cooking in my cast iron skillet. Simply melt a pound of butter in a sauce pan. Keep the heat low so it melts slowly. When the block of butter has become a golden liquid, turn off the heat (cooking it longer, until the milk solids begin to brown will make ghee, a version with a deeper, nuttier flavor, often used in Indian cooking). Skim off any foam that has formed on top and discard it. Carefully pour the bright yellow melted butter into a pint sized jar. When you have poured off nearly all of the liquid butter, you will see the cloudy white milk solids in the bottom. Pour out as much of the bright yellow part as you can without getting any of the milk solids. Discard the milk solids.

The clarified butter will be a gorgeous, soft yellow when it solidifies. Store it in at room temperature for up to a month or keep it refrigerated for even longer.

DSC_0302

December 16, 2010

Homemade Tomato Sauce

Homemade Tomato Sauce

So, you've got some ricotta and a bunch of pasta. You could make baked ziti, ravioli, tortellini, stuffed shells, manicotti.... Whatever variation of hearty Italian meal you choose, you will surely need some tomato sauce to pour on top of it, or between the layers of pasta and cheese. Chunky, smooth, deep dark red, or quickly put together, whether it is from a jar or your grandmother's recipe, I think everyone has their own favorite sauce.

If you do have a favorite, why do you think its the best?

I wanted to share my recipe to go along with the ricotta and pasta I recently shared. Tomorrow we'll put it all together into a very homemade lasagna.

Homemade Pasta Sauce
This recipe makes plenty of sauce for 3-4 servings of pasta. I found that for a full pan of lasagna I wanted to double this recipe. 

Olive oil
1 large yellow onion, diced
2 cloves garlic, minced
3 cups crushed tomatoes (I used 2 cups of crushed tomatoes and one cup of slow roasted tomatoes
1/2 teaspoon dried basil
Salt and Pepper to taste


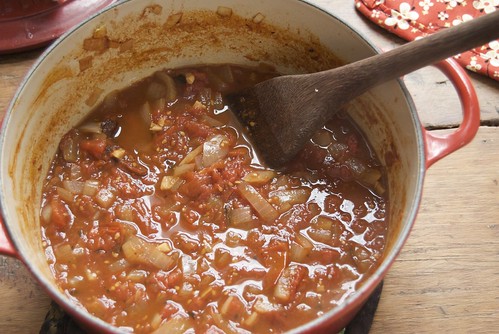
Place a heavy bottomed pot (at least 2-3 quart size) over medium heat. When the pot is heated, add a tablespoon or so of olive oil and the onions. Let the onions cook, stirring occasionally, until lightly browned (about 10 minutes). Stir in the garlic and let cook a couple minutes more. Pour in the tomatoes, stir to combine with the onions and garlic. Bring it all to a simmer and reduce heat to keep simmering for about 30 minutes, or to the desired thickness. Add basil, salt and pepper to taste. If you prefer a smooth sauce, you can puree it using and immersion or regular blender.