Showing posts with label appetizers and side dishes. Show all posts

May 25, 2011

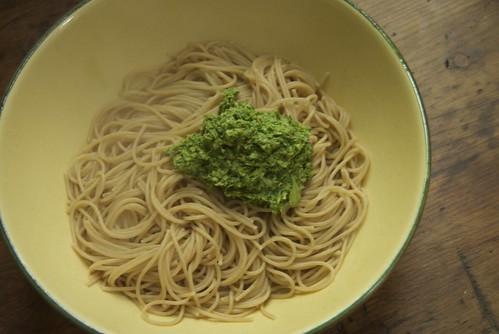
Green Garlic and Arugula Pesto

DSC_0399

When you work all day outside, pulling and hoeing weeds, and you come home with a bunch of green garlic, freshly picked, still caked in soil and you are so hungry and have been wracking your brain all day to think of what to make for dinner, well here is what you do.

You wash off the green garlic, take one of the stems, cut off the roots and discard. Chop the rest of the green garlic, all the way up the green part, into one inch pieces.*  Drop them into the bowl of the food processor. Put a pot of water on to boil and take a package of whole wheat pasta out of the cupboard.

Dinner will be ready soon, just a few more things you have to do. Take some sunflower seeds (about 1/4 cup) and toast them until they are golden brown. Drop these into the food processor with the chopped green garlic. Add a 1/2 teaspoon of salt, some grated parmesan and enough fresh arugula to nearly fill the food processor. Top with a squeeze of lemon and the let the machine whir. As it pulverizes the leaves, shoots and seeds, pour in enough olive oil to create a soft paste -- a pesto.

When the water is boiling, add enough pasta for you and anyone else who will be sharing your meal. When the pasta is cooked, drain out most of the water, but leave enough to turn the pesto into a sauce that will cling to the strands of pasta. Mix as much of the pesto as you wish with the pasta and the bit of cooking water.

Before you dig into this simple pasta with green green garlic and arugula pesto, remember this is a different pesto than you might be used to. It is a bit spicy, a bit bitter, and very green. Don't expect it to taste like the basil pesto that will be to die for during the height of summer. This one lively and unexpected like spring and the first taste of something grown in the soil nearby.

*green garlic is young garlic, pulled before it makes a bulb in the ground, or the new shoots that have grown up from a bulb of garlic that stayed for another year in the ground. It looks a bit like a large scallion or a leek, but it tastes like garlic, just a little less strong. I suspect lots of farms in the northern part of the USA have it this time of year, but if you can't find it you can use regular garlic.

May 6, 2011

Creme Fraiche and Sweet Potatoes

DSC_0374

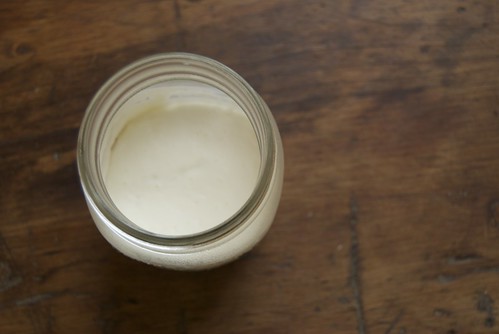
When I was cleaning and getting ready for spring a few weeks ago I needed to freshen up my routines and recipes in the kitchen, too. First I added a couple of new made from scratch staples: butter and also creme fraiche, which can become cultured butter or be enjoyed for its creamy texture and sour, cultured flavor.

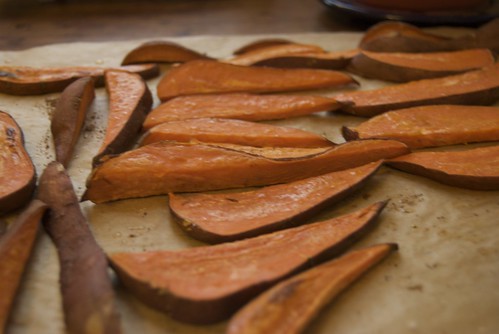
I also bought a new cookbook, Plenty by Yotam Ottolenghi. The recipes are all vegetarian, loosely categorized by ingredient. The photographs make everything look irresistible and I've had fun to trying some new flavors and ways of using vegetables. The recipe for sweet potato wedges with lemongrass creme fraiche made use of one of my new ingredients in a way I hadn't tried before. Although roasting sweet potatoes seems more of a wintery practice, these wedges would work well at a spring picnic or as part of a cook out along side whatever you are grilling. Local, spring produce is still a little ways off here, so I don't mind cooking up a batch of root vegetables, especially when they are accompanied by dipping sauce of cultured cream, lemon grass, citrus and ginger which tastes like the sweet surprise of spring.

Making creme fraiche could not be easier. If you're hesitant to try making yogurt or cheese, here is a homemade dairy product that is fool proof and does all the work for you.  Simply pour a cup of best quality heavy cream into a clean glass jar and add a quarter cup of cultured buttermilk. Stir, cover, and let sit for 12 to 48 hours until the cream is much thicker and has separated slightly (there will be a thin watery liquid as well as the thick cream). That's all there is to it. Now you can make it into cultured butter, strawberry creme fraiche sherbet (can't wait til strawberries are in season here!), use it in place of sour cream, or make this flavorful dipping sauce.


DSC_0384


Sweet Potato Wedges with Lemongrass Creme Fraiche
Adapted from Plenty, by Yotam Ottolenghi
The recipe makes a lot of sauce and since we had some left over, I used it in place of sour cream with some bean and cheese quesadillas. I think it would be good on other kinds of vegetables, too.

For the Sweet Potatoes:
3 medium sweet potatoes (about 2 pounds)
Olive Oil
1 1/2 teaspoons ground coriander
3/4 teaspoon sea salt
1/2 cup chopped fresh cilantro
1 fresh jalapeno (or red chile) finely diced (feel free to adjust the amount to your taste)

Preheat the oven to 400'. Wash the potatoes and cut into wedges. Line a sheet pan with parchment paper. Brush the paper lightly with olive oil. Place the wedges on the parchment, brush them lightly with olive oil, and sprinkle with the coriander and salt. Roast for about 25 minutes or until tender and golden brown. Remove from the oven and let cool slightly (or serve at room temperature, they are good this way, too).

For the dipping sauce:
1/2 lemongrass stalk
3/4 cup creme fraiche
grated zest and juice of two limes
1 inch fresh ginger, peeled and grated
1/2 teaspoon salt

Using the part of the stalk closer to the root (so it hasn't dried out), chop the lemongrass very finely. Whisk all of the ingredients together. When you are ready to serve, place the sweet potato wedges on a serving dish and sprinkle the cilantro and jalapeno on top. Serve with the sauce on the side. 

Serves about 4 people.

January 17, 2011

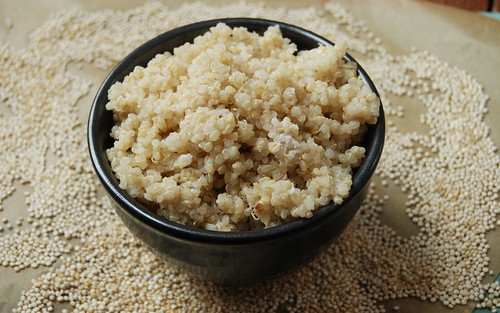
Coconut Ginger Quinoa

coconut ginger quinoa

The idea for this recipe came to me while I was riding on a train. I suppose it was the sort of idea that happens when you are in between being awake and falling asleep. Or when you've been staring out the window at the blurring scenery and your mind wanders, drifts and is just catching random thoughts in its sleepy net. It's not life changing or anything particularly important, but for some reason, as the train rushed along, coconut ginger quinoa came to me.

Do you think I'm crazy yet? Perhaps insane for thinking of an off beat grain when I should have been day dreaming about chocolate cake or cream puffs. Perhaps crazier for sharing with you where this small recipe idea came to me. If I had dreamed of yogurt covered parsnips would I be sharing it here? Maybe if I could make them as simply flavorful and healthful as this quinoa.

I do love quinoa, especially for breakfast with pecans, sliced apples, and plain yogurt with a drizzle of maple syrup. I often make it instead of brown rice since it cooks faster and it is so nutritious. You probably know that quinoa is a complete protein and its a welcome change to have protein in the form of a grain. The coconut milk adds flavor and healthy fats, making this a great dish to pair with vegetables for a satisfying, healthy meal.

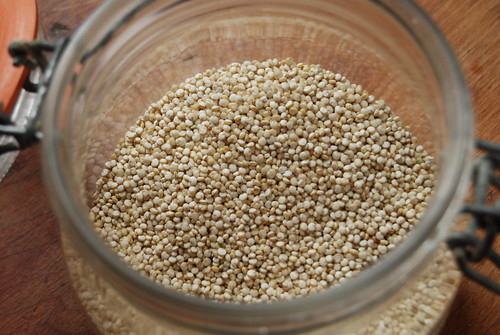
quinoa

Coconut Ginger Quinoa
I love red quinoa, but haven't been able to find it at my local coop. I don't think there is big difference in flavor from one color quinoa to another so use whatever kind you like. This quinoa goes well with roasted vegetables, a stir fry, or a curry. You can adjust the amount of ginger to your taste, this recipe is pretty gingery. If you have left over coconut milk, you could make this other recipe for dessert!

1 cup quinoa 
1 tablespoon chopped fresh ginger
1/4 teaspoon salt
3/4 cup coconut milk
1 cup water

Pour the quinoa into a fine mesh sieve and run it under cold water, shaking the grains around briefly to make sure they are all rinsed. This helps to remove the bitter flavor. Add all of the ingredients to a saucepan over high heat. Cover until it begins to boil. Reduce the heat to low so that it simmers continuously for about 15 minutes. You can tell that it is done cooking when all of the water is absorbed and the grains are much larger in size. The quinoa will be moist, but if there is too much moisture when the grains are cooked, remove the lid and let out the steam. Serve hot. Makes about 4 cups cooked.

September 24, 2010

Compromise and Crackers

DSC_0230

I meant to get back here with a recipe sooner, but once I finished canning my applesauce my sewing machine finally returned from the repair shop.  I've been back in sewing mode with trips in and out of the kitchen, too. I've been working on small attempts at keeping our kitchen stocked with basic staples for breakfast and lunch.

Ray and I differ drastically in our approaches to food. Although we both enjoy a good meal out and a good meal in, food and our kitchen is area that requires frequent compromise and tweaking of what works best for both of us. I tend to do the grocery shopping and most of the cooking and you might have noticed that I prefer to make things from scratch. Ray is more of a grab what is quick and easy and usually that isn't found at home. So I am trying to keep some extra already made meals in the fridge and a snack or two in the cupboard. Its a very evolving process for us to move toward common ground on what we want to eat. Ray is busy with work, while I have ample time to spend in the kitchen. Sometimes he forgets his lunch, sometimes my recipes don't appeal to him, and as much as I want our food budget and every meal to work out perfectly, it is a process that takes time.

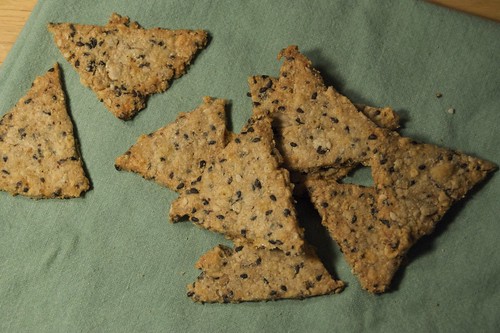
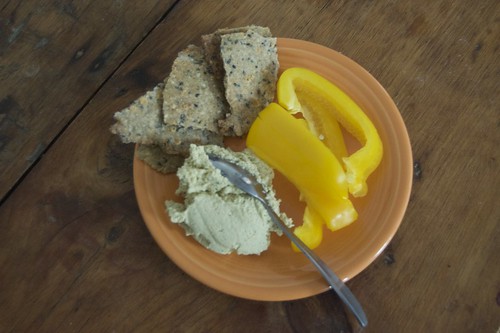
It seems silly to go on and on about this but our differences in to cooking and eating has probably taken more give and take, discussion, and compromise than anything else in our relationship so far. And, I wanted to share with you a recipe for crackers that I made recently. Crackers might not seem very exciting and they are one of those things that for most of my life I though had to come in a box. It turns out they are really easy to pull them out of your oven and this recipe is full of flavor and crunch. I found it was hard to stop munching on these little triangles. These crackers make a good snack or accompaniment to a soup or salad and they go very well with hummus. They are pretty wholesome with protein from seeds and cheese and they fill that empty spot in our cupboard perfectly. I will definitely make these often.

Seed Crackers
Adapted from Vegetarian Cooking for Everyone by Deborah Madison. 
These crackers keep for a few days, but you can easily freeze half the dough until you are ready to bake more. They come together really quickly (especially in a food processor) and it doesn't take long for them to bake.


1 cup whole wheat pastry flour
2 tablespoons butter
1 cup of seeds such as sunflower, sesame, poppy, or cumin or a combination of seeds
2 teaspoons of mustard
2 eggs
1/3 cup grated parmesan cheese
1 cup grated cheddar cheese
1/2 teaspoon salt


Preheat the oven to 350'. Work flour into butter until the butter is in tiny pieces evenly distributed in the flour. Add the remaining ingredients and mix until they are evenly distributed in the ball of dough. Cover and refrigerate for 15 minutes. Lightly dust a piece of parchment paper with flour. Roll out half the dough, turning it over frequently to avoid sticking to the parchment. When the dough is about an eighth of an inch thick, cut it into desired shapes. Leave each cut piece on the parchment, slightly separated from the other pieces and place the parchment on a baking sheet. Repeat with the other half of the dough, or freeze this until you want to use it. Bake for about 15 minutes until crackers are golden brown. Let cool for 15 minutes before eating.

June 17, 2010

Fresh, Colorful, and Crunchy

Spring Rolls with Peanut Sauce
Between trying to spend as much time as possible with family and friends and looking for an apartment and a job in the new place we will be moving to, I haven't had much time to cook, garden, sew or do any of my usual activities.  I am enjoying these couple months of in between time, working and visiting with people, but I am also looking forward to when we are somewhat settled again.

One of my dear friends is also moving to the midwest this summer.  She and her husband will be leaving soon and this past weekend they had a little party to say farewell.  When I asked what I could bring, she asked for fresh spring rolls with peanut sauce.  I was surprised by such a specific request until she reminded me that they were part of the appetizers at our wedding and her husband had really enjoyed them.  Her husband is not the most adventurous eater so I could not hesitate to honor his wishes for something fresh, colorful and crunchy.

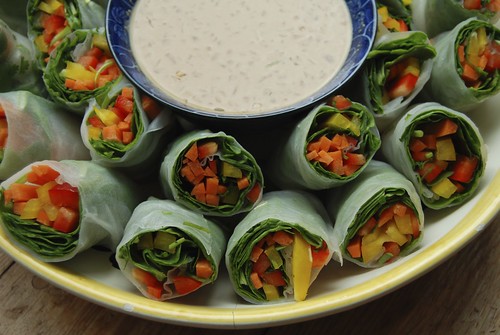
I've made fresh spring rolls a few times, they are so easy to put together, they look beautiful and they are fun to eat.  It occurred to me that they would be a perfect substitute for the ubiquitous veggie platter at a party since they are simply little packets of veggies nestled around a dipping sauce.  These are an ideal way to show case the freshest most flavorful vegetables, ideally using what is in season, and perfect as part of a summer meal.
DSC_0016

DSC_0017

DSC_0019

Fresh Spring Rolls with Peanut Sauce
There are many different possibilities here -- I wouldn't use more than three or four different types of vegetables for a batch, but you can use different combinations depending on what you like.  Some that work best: carrots, cucumbers, spinach, lettuce, sprouts, mushrooms, bell peppers and herbs like cilantro, basil and mint.  Below I have listed the amounts and vegetables that I used.

1 package rice wrappers (available at many grocery stores and certainly at Asian Markets)
1 red bell pepper very thinly sliced
1 yellow bell pepper very thinly sliced
1 carrot sliced into matchsticks
3 cups baby spinach leaves
1/2 cup chopped cilantro


For the sauce:
1/2 cup peanut butter
1/4 cup soy sauce
zest and juice of 2 limes
1 tablespoon apple cider vinegar
1 teaspoon finely chopped fresh ginger
1/4 cup warm water

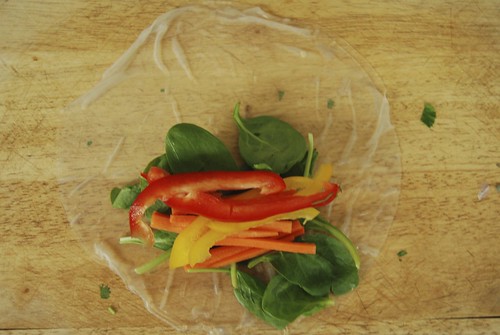
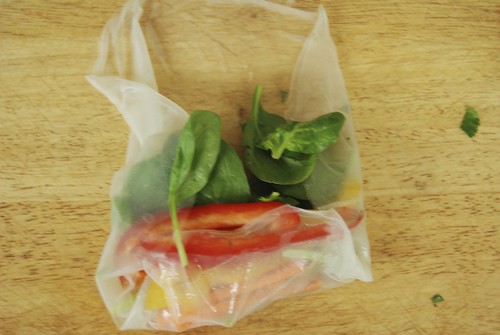
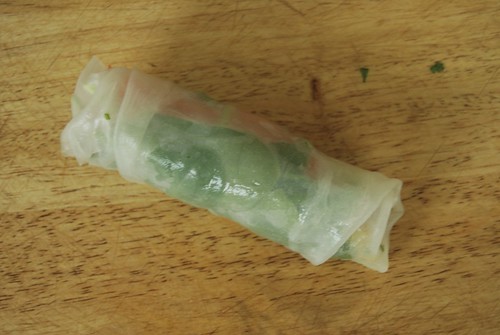
Once all your vegetables are cut, prepare a clean work surface (a cutting board works well).  Fill a dish that is larger than the diameter of a rice wrapper with an inch of warm water.  Place two rice wrappers together in the dish and gently press down to submerge them.  Wait a few moments until the wrappers become totally softened and transparent.  Carefully remove them together, and spread them flat together on the work surface (this takes a little practice, if a few wrappers don't work out, just try again).  Submerge two more wrappers in the water.  Place a small handful of spinach leaves on wrapper (just above 6 o'clock on the circle).  On top of the spinach, add 6 or 7 carrot slices, and two or three pieces of each kind of pepper.  Sprinkle some cilantro on top.  The pile of veggies might not be totally neat and that is fine.  Fold both sides in to contain the veggies slightly.  Then fold the bottom of the wrapper over the veggies.  Hold the veggies in the wrapper and roll them from the bottom to the top so that they are all tightly wrapped in the roll.  It might take a few times until this process becomes simpler, but you'll get it!  Place the finished wrap on a plate and continue the process until all of the filling has been used.  Leave the rolls on the plate while you make the sauce.  

For the sauce, combine all of the ingredients except the water, until smooth.  Add the water, a little at a time, until the sauce has the consistency of a thick salad dressing.  I like it best when it is easy to dip into but it doesn't dribble all over the place.  Before serving, cut the spring rolls in half and arrange them on a platter with the sauce in a bowl in the middle.  They can be made several hours ahead of time, just refrigerate them uncut and covered so they don't dry out. 
This recipe yeilds about 14 spring rolls and enough sauce to dip them in.

February 5, 2010

Take it slow: Make Hummus

Garbanzos
Every couple of weeks I find myself spending the day in the kitchen.  Of course I am there at other times too, making dinner, breakfast, washing dishes -- its not that I ignore the kitchen the rest of the time.  I just find that every so often I am inspired to make several things and I usually do them all at the same time.  Not always the best way to go, but when I have the time to do it, I have to take the opportunity.  Last Sunday was one of these days when I was working on a few different recipes and trying to make some of staple foods that I make almost every week to keep our kitchen stocked with good food.

It makes me think of how, back in the days of cooking by the hearth, women used to spend one day of the week doing all the baking, another doing the washing, etc.  Most of what I know about that probably comes from reading the Little House books and visiting Old Sturbridge Village when I was young.  I do know that in these modern times, we have choices.  There are stores with aisles and aisles of food that could sustain us and we would never have to think about turning on the oven or dirtying a dish.  But that, of course, is not the choice I make.

Most of the time, I want to be connected to my food as deeply as possible. I'm not sure why as cooking and eating is a constant cycle and things that are edible are also usually perishable.  It must be this life cycle and the need to be a creative part of it that fuels my desire to be connected with what I eat.  There are many ways to do this and I look forward to the day that I can also grow the ingredients for the food I prepare.  For now, though, I find small ways to take part in the life of eating.

I make hummus nearly every week.  Mostly I make it because Ray really likes it for lunch and its something I can make instead of buy that he will enjoy.  It is a great staple food to have in the fridge for snacks or meals.  If you don't make a lot of things from scratch, this is a good place to start and its a small, really simple way to shift from buying to making.  In a culture that is full of the ready made and an obsession with instant gratification, its empowering to know that you can create something yourself, rather than having to pay for it.  I believe it is important for everyone to make this shift in some way, whether by knitting, quilting, playing a board game instead of going to the mall, or, well, you could try making hummus!
Hummus Plate
Hummus
I make this in a food processor but I am sure you could make it by mashing the chickpeas and stirring everything together, it just might not be as smooth.  If you are doing it by hand, make sure to finely chop the garlic and cilantro and then experiment with mixing it to a consistency that you like.  You can use canned chickpeas, but I usually use dried ones which I soak in water overnight and then cook in their soaking water.  I bring them to a boil and then simmer for a couple of hours until they are soft.  You can also let them boil for about five minutes, turn of the heat and leave them covered while you are at work, they should be almost totally cooked when you get home.

2-cups cooked chickpeas (see above), with some of the cooking liquid (if you are using canned chickpeas you can use water as the liquid, if needed
1/2 cup tahini, or to taste
1/4 cup olive oil
2 cloves garlic, peeled, or more to your taste
Juice of 1 lemon, or to taste
Salt and pepper
1/4 teaspoon ground cumin, paprika or other spices to your taste
1/4 cup chopped parsley or cilantro

As you can see, all ingredient amounts can be changed or modified according to your taste.  You can also add fresh spinach, roasted red peppers, roasted garlic or other ingredients and flavors.  But to make this basic recipe:  Put all of the ingredients in the food processor.  Process for a minute or two.  Taste and adjust flavors as desired.  For a looser consistency add the cooking liquid.  For a very smooth consistency, continue to process for 2 or 3 more minutes.  Serve with bread, crackers, veggies or whatever you would like.  Store refrigerated in an airtight container for up to a week.

January 19, 2010

Something New

Figs

I am not usually one to jump on the bandwagon.  I prefer to follow my own path and often my immediate reaction to something new and different is one of objection and often criticism.  I know that I should be open minded, but it usually takes time for me to slowly open up and to realize why everyone else seems to like it so much.  I have to make up my own mind and find things for myself which sometimes takes so long that by the time I decide I like the latest trend, everyone else is ready to embrace something even more cutting edge.  I held out as long as I could when it came to getting a cell phone, only recently joined facebook, and seem to continue to stubbornly eschew a lot of technology (much to my tech-loving husband's dismay).  I remember when three quarter length sleeved shirts first became popular, I thought they were awful, but now I love wearing them (perhaps that shows how unfashionable I am).  I have yet to warm to skinny jeans, but with some more time, who knows? 

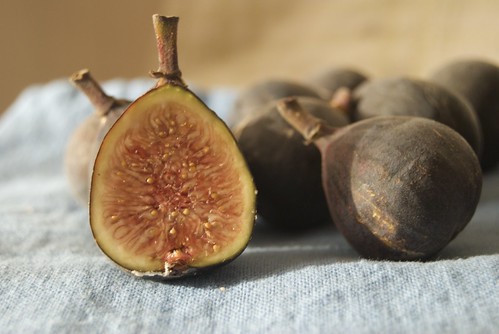
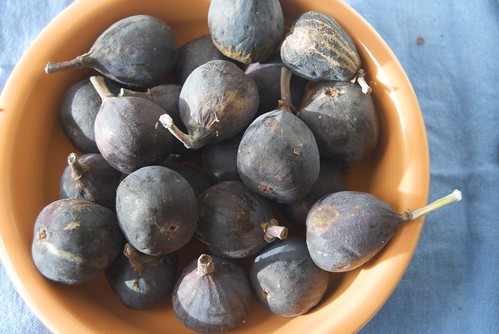
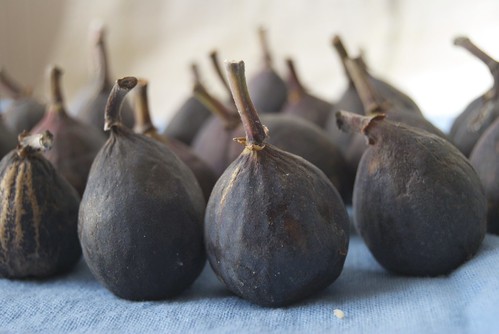
Today, I'm not really talking about a technology or a trend.  Just a fruit:  figs.  Throughout the late summer and fall I noticed them in my favorite local market.  After seeing them for a while, I started wanting to take some home with me, but thinking how impractical and unnecessary they were -- and what would I do with them, anyway?  I decided I didn't need figs and turned my attention to all the local fruits and vegetables at hand.

Then, sometime this fall, Ashely from Not Without Salt started a food photography project on FlickrFood A-Z was started as a way for anyone involved to work on photographing edible items from one end of the alphabet to the other.  I have been working my way through sporadically and admiring other photos in the group.   I have always enjoyed photography and studied it briefly using a fully manual camera and just beginning to learn some of the techniques of developing and printing film.  As you may suspect, it took me a while to warm to digital photography.  In the past couple years, though, Ray has given me full access to his (now our) Nikon D80.  I still have a lot have a lot to learn but it has been fun to experiment with light, color, color and composition as well as the many options that the camera allows.

Now, back to the figs.
Figs

In mid-December,  it was time for the letter F and I couldn't think of anything that I had readily available.  I went to my local market and found both Figs and Fennel.  It was, really, a tough choice. Despite all of my previous admiration of the figs, I wasn't sure which food starting with F would make a more welcome addition to my kitchen.  I finally decided on the figs and brought them home in their delicate plastic pint.  After observing, tasting and trying to digitally capture their soft, thin skin and their sweet flesh with its taste only slightly familiar to me, I let them relax in the fridge for a while.

Days, actually.  It was almost Christmas and I didn't really have a chance to be creative with the figs. I didn't want them to go to waste, though, so I found a recipe from Deborah Madison's beautiful cook book, Local Flavors.  This Fig and Ginger Jam stayed in the fridge for a week or so until we served it on New Years Eve with goat cheese and crackers.  The jam kept the integrity of the figs but the ginger and vinegar added another dimension and intensity of flavor.  That description pretty much sums up what I have been writing about here: how, even when approached cautiously, the new and different only help to enhance and more deeply flavor what is already there.
Figs
Fig and Ginger Jam
adapted from Local Flavors: Cooking and Eating from America's Farmer's Markets by Deborah Madison

1/3 cup aged red wine vinegar
1 tablespoon red wine
1/4 cup honey
1/3 cup raisins
2 teaspoons minced candied ginger or peeled fresh ginger
2 cups (3/4 pound) fresh figs cut into quarters
1/2 teaspoon mustard seeds
3 cloves
1 teaspoon balsamic vinegar, or to taste

Combine the red wine vinegar, red wine, honey, raisins, and ginger in a saucepan.  Bring to a boil and simmer until syrupy, about 10 minutes.  Add the figs, mustard seeds, and cloves.  Cover and cook over low heat until figs are soft, but still hold some of their shape, about 15 minutes.  Check to make sure the pan isn't too dry, if it is, add a little water.  Remove from heat.  When cool, taste and add balsamic vinegar as desired.

P.S. There is a slow recipe coming later this week, I haven't forgotten!

October 27, 2009

Cranberry Salsa

Living in America's Foodiest Small Town it should be expected that I am surrounded by good food.  Since I don't have lots of money to spend eating out, most of this comes from what I make in my kitchen.  However, it is truly fabulous to be able to get so many good ingredients that have been made or grown locally.  Aside from the economic and environmental reasons for rejoicing in the local, there is a certain indescribable deliciousness that I taste in local foods.  Maybe it is intertwined with my hopes to make and grow as much of my own food as I can, or maybe it really does taste better when you buy your food from someone you know.

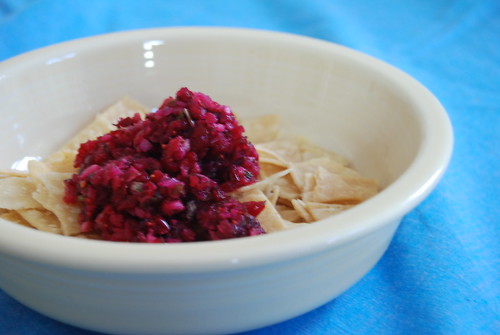
I've been so excited to see new offerings from the farmers -- things that weren't sold at the market just few years ago.  Peaches, plums, pears, sweet potatoes, cranberries!  I first noticed the cranberries last fall, bushel boxes full of the little ruby jewels, shining in the pale autumn sun.  They are back this fall, piled and ready to bounce and rattle home in my bag.  There are so many recipes that can incorporate cranberries with their intense tartness and bright red color.  A few years ago I stumbled across cranberry salsa at a party and was instantly delighted by this different take on a great classic.  I love that this highlights cranberries, as opposed to giving them a supporting role.  I put together this recipe for a pot luck to serve with tortilla chips but it could also go on the table for a twist on the typical thanksgiving sauce and its really good with these quesadillas!

Cranberry Salsa

Cranberry Salsa
2 cups of whole cranberries (fresh or frozen)
1 cup chopped onion
2 cloves of garlic, chopped
juice of one lime 
1/2 cup chopped cilantro 
1 cup of chopped apple 
1 tablespoon honey
1/4 teaspoon salt

Place all ingredients in a food processor and pulse until everything is uniformly finely chopped.  If you are using frozen cranberries, you will want to let the salsa thaw for a little bit before serving.  

June 22, 2009

Thai Tofu Spread


In my kitchen I have a wooden shelf unit, painted orange, which my dad made for me.  I use it to hold my cookbooks.  All three of the shelves are full of beautiful and interesting cookbooks, close at hand whenever I need to look up a recipe.  And yet, I rarely do.  I have memorized, or adapted some of the recipes in these books, but there are so many others waiting to be discovered.  Part of the problem is that I like to use what I have on hand rather than buying specific ingredients for an exact recipe.  I almost always adapt recipes to my liking and make due without the ingredients I can't find in the cupboard or refrigerator.  

One of the books on the shelf is called Hope's Edge, written by Frances Moore Lappe and her daughter Anna Lappe.  It chronicles the two women's journey around the world searching for and documenting positive things people are doing with food, for the environment and against hunger and poverty.  It was written several years ago and some of the people they met have become well known for the work they have done, such as Wangari Maathai and Muhammad Yunus.  Not only is it a fascinating book, it also includes recipes from all over the world and recipes from chefs who have changed or added to the way food is grown, cooked and served.

I don't remember the first time I made this recipe, but I know that every time I have made the Thai Tofu Spread from Chef Karen Franzmeier at St. Martin's Table in Minneapolis, it has been wonderful.  No matter how you feel about tofu, you've got to give it a try.  Its great as a dip or in a sandwich or salad.  I like seeing if people can guess all the ingredients -- they come together to create an amazing flavor and hearty, yet light, taste.  Despite requiring several ingredients, it comes together really quickly and is pretty forgiving if you leave something out.

Thai Tofu Spread
Adapted from Karen Franzmeier at St. Martin's Table

8 ounce firm tofu
1/4 cup grated carrot
1/2 teaspoon minced garlic
2 tablespoons minced red onion
2 tablespoons finely chopped cilantro
1/4 cup smooth peanut butter
1/4 teaspoon lime zest
1/4 teaspoon cayenne pepper
Juice of one lime
3 tablespoons tamari

Squeeze extra water from tofu, then mash it with a pastry cutter or fork.  Combine tofu, carrot, garlic, onion, and cilantro in a mixing bowl.  

In a separate bowl, blend together until smooth: peanut butter, lime zest, cayenne pepper, lime juice and tamari.  Fold into tofu mixture until everything is evenly mixed.  Adjust seasonings to taste.  Serve on bread, crackers, chips or eat plain.  Store refrigerated.