Showing posts with label main dishes. Show all posts
November 23, 2011
Thankful
I have a lot to be thankful for. I try to remember this and keep gratitude nearby, but I know that there are lots of times when it is easier to be frustrated or discouraged than to remember how very lucky I am. Perhaps it isn't luck, but somehow I've wound up with an amazing husband, a loving and supportive family, the chance to do lots of creative work even if it's not yet how I make my living.
I give thanks for the small, but important, things like the down comforter that keeps me warm every night and the things that seem insignificant but that really matter (to me), like all the food we have stored for the rest of the winter. There are cold snowy days that let me be cozy inside, cups of tea, good books and blogs to read, rediscovering knitting and the chance to take more yoga classes. It is crazy how many good things I have in my life and somehow even the challenging things usually turn out okay.
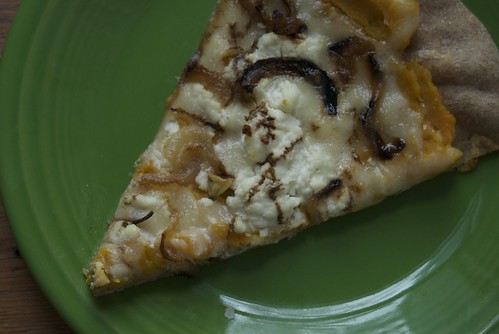
I'm so thankful that there are some of you out there who want to read this, and for the opportunity that this blog has given me to learn more about writing, photography, and the online world. None of this is directly related to that delicious slice of pizza, although I am immensely thankful to have discovered the combination of winter squash, goat cheese, caramelized onions and balsamic reduction that it is made up of.
I know that you are probably thinking more about turkey and pie than pizza and you might just be eating left overs all weekend. But if you happen to be with family or friends for a few days and you are the type (like me) who likes to share lots of time in the kitchen with loved ones (or cook for them), maybe some homemade pizza is in order.
I hope you have a wonderful Thanksgiving!
Winter Squash, Goat Cheese and Caramelized Onion Pizza
I make this one a lot in the fall and winter. It has similar elements to the beet pizza I told you about a while back. I guess I just love the combination of a sweet vegetable with tangy goat cheese and chewy mozzarella.You can use any kind of winter squash (except spaghetti) even leftover mashed squash from you Thanksgiving feast. Here is the basic idea, you can adjust everything as you like
Pizza dough
1 small onion
balsamic vinegar
1 cup pureed winter squash (bake the squash and mash it or run it through a food mill so it is spreadable)
chevre style goat cheese
shredded mozzarella
chopped rosemary (optional)
For the caramelized onions: cut off the each end of the onion, cut the onion in half and thinly slice each half. Place a saute pan (I use a small cast iron pan) over low heat. Add a splash of olive oil and the onions. Cook the onions slowly, stirring occasionally so that they slowly brown but don't burn.
For the balsamic reduction: pour 1-2 cups balsamic vinegar into a sauce pan (the reduction keeps well and is a nice addition to salads, pizzas, risotto and a variety of meat dishes so you can even reduce a whole bottle at a time). Bring the vinegar to a gentle simmer and continue simmering until it has s syrupy consistency. If it gets too hot it may burn or reduce too much so that it is not pourable. When it is syrupy, remove from heat. I store it in a jar in the fridge for months, it is more pourable at room temperature.
Put it all together: Preheat the oven to 450'. If you are using a pizza stone, you'll want the oven to be hot for at least 30 minutes or more to get the stone nice and hot. For pizza on a pan it is not as crucial, but a good hot oven is ideal for pizza.
Shape your pizza dough as desired. Spread the squash on top of the dough, like you would a sauce. Crumble the goat cheese and spread it out across the pizza. Sprinkle on mozzarella. Distribute the caramelized onions around the pizza. Sprinkle on the rosemary if desired. Bake in the oven for 10-15 minutes or until the cheese is melted and a bit bubbly and the crust is crisp (or however you like it). Remove from the oven and drizzle a garnish of balsamic reduction on top. Let the pizza cool for a few minutes before cutting and serving.
September 28, 2011
Spaghetti Squash For Busy People
It's been a busy few months, but I've probably mentioned that a few times, haven't I? Things are gradually slowing down. I can deal with lack of days off, being too tired, and not having time for spontaneity but I am realizing that being so busy is starting to take its toll.
I'm not here to complain, just to point out that when I have so little free time I feel like I am always trying to get somewhere that I just out of reach. I am the type of person who likes to do everything on my list before I can relax. I also happen to have several projects on top of my regular work schedule. All of this is making me too impatient. When I am waiting in line, I find myself unnecessarily frustrated at the slow person in front of me. Traffic is never fun, but lately I've been annoyed at all the red lights and impossible left turns that seem to keep me from every getting where I want to go. Now that I've noticed my impatience, I am trying to remember that waiting can be time for a little day dreaming, a moment of restfulness in the midst of another too full day.
When I'm in the kitchen, I don't feel the need to hurry. I may be hungry but cooking dinner never has to be rushed. Just having a few evenings a week at home to cook and then sit down at the table with Ray is a luxury these days. There have been nights when I've been too tired to think about cooking but usually planning and making dinner is an enjoyable priority. I listen to Marketplace, do the dishes, read my favorite blogs or write for this one while ingredients simmer or bake.
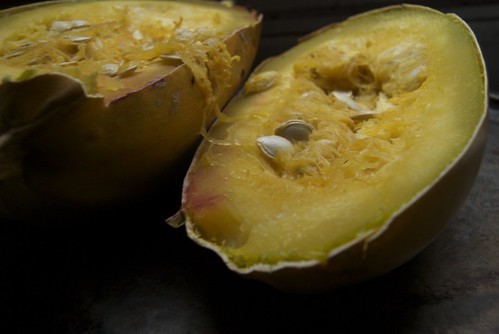
I am still having fun using the different vegetables I get from the farm. Last night I cooked spaghetti squash for the first time. I think it's strange that there is a squash whose flesh so resembles noodles. It makes me wonder which came first, spaghetti or spaghetti squash? Either way, I'm glad I tried it. The tangly strands of squash work well as a main dish with accompaniments and it isn't hard to find flavors that complement its not-too-sweet squashy flavor.
Easy Spaghetti Squash
Cooking the squash takes some time, but just throw it in the oven, set a timer, and do whatever else you need to do.
1 medium to large spaghetti squash
olive oil
one small onion, thinly sliced
2 cloves garlic, minced
1 tablespoon butter (optional, but it adds a nice flavor)
6-8 leaves of fresh sage, finely chopped
1/4 cup gruyere or parmesan cheese, grated
salt and pepper
Cut the spaghetti squash in half, scoop out the seeds and place each half cut side down on a baking sheet. Bake at 350 for 30-60 minutes or until the squash can be easily poked with a fork. Or, cook it whole on a baking sheet -- you'll have to scoop out the seeds after it is cooked, but it only takes a second to get it in the oven. When it is done baking, let the squash cool until you can touch without burning yourself. Using a fork, scrap out the squash into spaghetti like strands.
In an oven-proof skillet heat a tablespoon or so of olive oil. Add the onion and cook over medium heat until to begins to caramelize slightly. Add the garlic and butter if you are using it and continue cooking for another minute or two. Place the squash in the pan with the garlic and onions, sprinkle in the sage and stir everything so all of the ingredients are evenly combined. Stir in the cheese and continue cooking for 3-4 more minutes. Season with salt and pepper. Place the skillet in the still hot oven and cook for 20 minutes more. Let cool for a few minutes before serving.
July 28, 2011
Don't Fear the Zucchini
Are you enjoying your summer produce? Whether it comes from a farmers' market, a super market, a CSA share or your own back yard, I hope you are finding and enjoying the abundance of fruit and vegetables that are thriving this summer. At the farm we are harvesting a wide variety of crops, spending hours picking beans, choosing the best ears of corn to harvest, and finding plenty of summer squash.
Zucchini, yellow squash, patty pans, and other types of summer squash are growing abundantly. By mid-summer the plants are huge. Spiny stems up to my waist, leaves big enough to make a good rain hat. The yellow and black cucumber beetles buzz around and eat as much as they can, but they can no longer destroy the squash plants that have become a jungle of leaves and stems. One or two plants that seemed so little in the spring can produce more squash than a family might care to eat in a week. If you turn your back for too long you will have baseball bats where innocent green squash once grew.
Don't fear the zucchini*. After you have grilled it, sauteed it, baked it into bread and chocolate cake (what better excuse to make a chocolate cake than zucchini that needs to get used up?) you can hide it in your freezer for a while. Without a garden of my own, I don't have a zucchini problem, but I usually make a point of freezing a few before the season is over. Simply grate them up and freeze the grated squash in an airtight container. For very large over grown squash, I cut the flesh away from the very seedy middle, discard the seeds and grate up the flesh. If you have a food processor with a grater attachment that makes the process even faster.
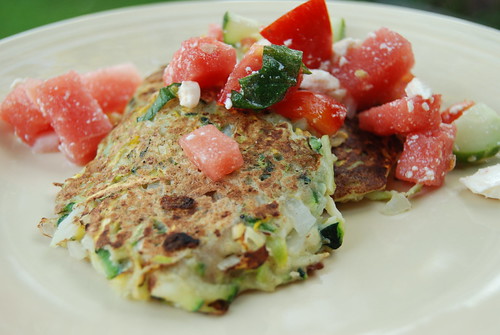
You can use the grated zucchini for baking in the middle of winter, letting the heat of the oven remind you of the hot day in the garden or at the market, when you picked the zucchini that ended up in your freezer. I also use the grated squash to make savory pancakes. If you aren't sick of summer squash yet, I recommend you make these quick cakes while summer is still here so you can eat them topped with fresh salsa or the watermelon salad below.
*I am using zucchini and summer squash interchangeably. While there may be subtle differences in taste, I think most summer squash is pretty much the same and can be used for the same purposes.
Zucchini and or Summer Squash Pancakes
I make these with very simple ingredients, but there are endless possibilities. You could add some cheddar or feta cheese, herbs, or other grated veggies. I usually make the cakes big enough so that each person gets 2 or 3 for a meal, but you could also make them into bite sized appetizers. Be sure to drain the squash well, especially if it has been frozen.
2-3 medium summer squash (about 8 inches long) to yield about 4 cups grated
1 small onion, diced
1 egg
2 tablespoons flour
salt and pepper
Grate the squash. Place it in a colander and gently press as much liquid out of it as you can. In a bowl, mix the squash with the onion, egg, and flour. Add salt and pepper.
Place a skillet over medium heat. When it is hot, add clarified butter or coconut oil to grease the pan. Scoop about half a cup to a cup (depending on how many and how big you want the cakes to be) of the batter onto the pan. The batter shouldn't spread much and I have a large skillet, so I usually cook four cakes at a time. Cook for about three minutes, then flip. The cooked side should be golden brown. Cook for about three minutes on the other side, flip again if not done to your liking. Continue this process until all of the batter is make into cakes.
Makes about eight 3-inch cakes. Serve topped with fresh salsa, watermelon salad, lemongrass creme fraiche or other topping of your choice.
Watermelon Salad
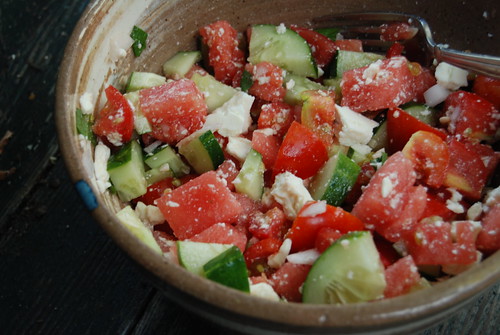
Like all summer salads, this is a celebration of what is fresh and available. I made it one night with cucumbers and mint, and another time with basil. I'll give you the basics and you can go from there.
4-6 cups cubed watermelon
2 cups tomatoes, diced
1 cucumber, quartered lengthwise and sliced across
1 medium onion, diced
several leaves of basil or mint, torn into small pieces
1 cup crumbled feta
1-2 tablespoons lime juice
Salt and pepper to taste
Combine all ingredients in a large bowl. Adjust ingredients and flavors as you desire.
March 16, 2011
Icing on the Cake
Black beans are a staple in our kitchen. I cook up a batch nearly every week. They're not fancy food, nothing glamorous or particularly photogenic about them. But they taste so good and never disappoint. Often I'll serve them on top of brown rice, garnished with grated cheese, salsa and veggies. I think I love them best, though, with a batch of home made flour tortillas.
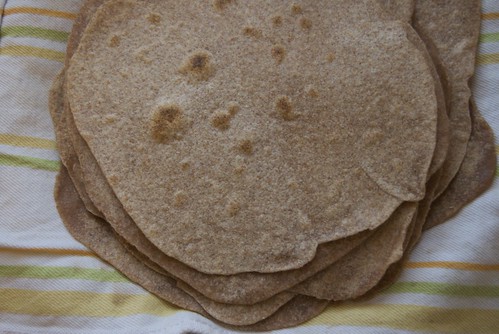
Tortillas are high on my list of things that I could easily buy but they are so much better made from scratch. I tell myself I am saving money since we already have flour, water, salt and oil. I'm just making silly excuses. Tortillas are usually inexpensive to buy, but the homemade version are a simple luxury. When we have black beans for dinner these warm floury disks are the icing on the cake, if beans can be called cake and homemade tortillas can be called icing.
I know that most people these days are looking for ways to save time and buying a bag of tortillas and can of beans will make a good meal in fewer minutes than cooking it all from scratch. On the other hand the minutes of kneading, rolling and cooking might give you the time you wouldn't other wise have to day dream, talk, catch up on the day's news, listen to music or a podcast.
Black Beans and Whole Wheat Tortillas
Making beans and tortillas this way takes extra time but most of that is not doing active work, just letting things cook or rest. Sometime this fall, from a few different sources, I discovered my new favorite method of cooking beans. It requires a bit of planning ahead but no need for hours of soaking the dry beans. I'll list the ingredients and then explain.
1 cup dry black beans
1 medium onion
2 cloves garlic
1/2 teaspoon cumin
1/2 teaspoon salt
Water
1/2 cup chopped cilantro
Turn the oven to 350 degrees. In a dutch oven or other oven proof pot and lid, place the dry beans. Dice the onion, mince the garlic and toss them into the pot. Add the cumin and salt. Add water to the pot until the beans are covered by at least an inch. Cover the pot and put it in the oven. After about 30 minutes, open the oven, take the lid off and make sure the beans are simmering away, make sure the water has not evaporated and add more water if it has. Check after another 30 minutes to see if they are ready -- they should hold their shape but give no resistance when you bite into one. If you are planning on serving them soon, remove the pot from the oven. If you are cooking them ahead of time, you can turn off the oven when the beans are done and leave them there for a few hours. When you are ready to eat, you can reheat them on the stove.
If the beans are soupier than you want them to be, simmer them on the stove to evaporate some of the water. I love the flavor of the beans just like this, but once they have cooked you could add corn, peppers, chilies, tomatoes. Just make sure you don't add anything acidic (like tomatoes, vinegar or lime juice) before they are fully cooked as acid will keep them from cooking. A few minutes before you are ready to serve them, stir in the cilantro. Yields about 4 cups of beans.
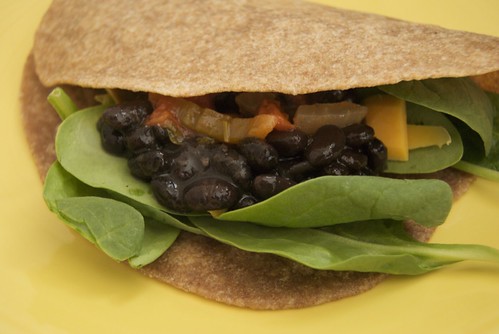
I like to set up a little buffet with beans, fresh greens, avocado, salsa, grated cheese and sometimes rice to go in the tortillas.
Whole Wheat Tortillas
You can make these entirely with whole wheat or with a mix of white and wheat flour. Adding white flour will make them a softer and more flexible. Once the tortillas cool the might become a little bit stiff, just gently reheat them so they can be easily folded.
3 cups (14 ounces) whole wheat flour or 2 cups whole wheat and 1 cup white flour
1/2 teaspoon salt
1/4 cup (2 ounces) olive oil
about 3/4 cup very warm water
In a medium bowl, mix the flour and the salt. Add the oil and stir to distribute in the flour. Add the water, a little at time. Mix the water into the flour to create a smooth, elastic dough. Add more water if you need to, but the dough should hold together well and be slightly stiff but easily kneadable. Cover the dough and let rest on the counter for at least 30 minutes or up to 4 hours.
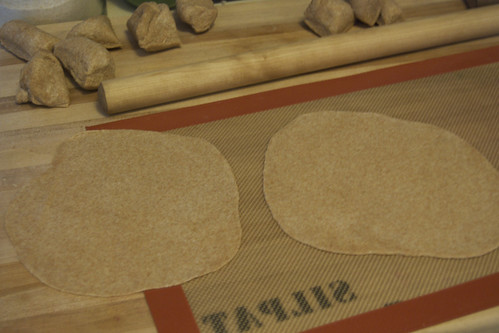
Divide the dough into 12 pieces, as evenly as possible. Place a cast iron skillet (at least 12 inches in diameter) over medium-high heat. Take a piece of dough and use your hands to shape it into a small disk, about an inch thick. On a floured surface (or on parchment or other non-stick surface), begin rolling the dough with a rolling pin. Turn it frequently to keep the tortilla fairly round (the shape does not affect the taste!). Roll it until it is about 1/8th of an inch thick and 7-10 inches in diameter.
When the pan is hot, place the rolled out tortilla flat on the pan (do not grease or oil the pan). When it begins to bubble and puff up a little bit, flip it over. You will see it puff up a bit on the other side, too. Cook the tortilla until the bubbles are just beginning to brown, if you cook it too long it won't fold and bend easily. While one tortilla is cooking, you can roll out the next one. If you get ahead on rolling, don't stack the uncooked tortillas because they will stick together. After each tortilla is cooked, stack in in a clean tea towel on a plate. They are best served warm, but will keep in an airtight container for a few days.
October 26, 2010
Winter Squash, Leek, and Goat Cheese Turnovers
Winter squash taste like fall to me. Like cool sunny days dappled with brightly colored leaves, like crisp nights brightly lit by the moon. Like empty tree branches scratching the sky. It tastes like winter, too. Dark evenings in the kitchen and clouds of breath in the freezing air. I cook squash fairly often, it makes for a hearty vegetarian meal with so many variations and possibilities, both sweet and savory. I realize that I have featured it quite a lot here. But I can't resist sharing another recipe and I can't promise that this will be the last.
I've been working more evenings at my restaurant job which means that I am not around to cook dinner. These turnovers are a flavorful meal we can pull out of the freezer and make for dinner without much trouble. There are several steps involved in making them, but you can freeze them before baking and pop one in the oven whenever you want. The result is an elegant combination of flavors that is worthy of so much more than an easy weeknight meal. These turnovers make a substantial vegetarian main course. They are both simple and out of the ordinary and would work just as well for an on the go meal as for a sit down dinner party.
As I am writing this, the wind is whipping the leafless tree branches and the rain that is coming down feels like it could almost be snow. I am glad to have a meal that warms me twice: first preparing the turnovers and, later, enjoying one on a plate.
Squash Leek and Goat Cheese Turnovers
The idea for this recipe came from Fields of Greens by Annie Somerville. I based the dough on the gallette recipe from Deborah Madison's Vegetarian Cooking for Everyone it is a very buttery dough which makes it so flaky and flavorful. If you are serving several people, you could also roll out the dough into a big circle, place the fillings in the middle and fold the dough around it to make a beautiful gallette. Makes 5 turnovers.
For the Filling:
1 1/2 pounds (about 3 cups) butternut or buttercup squash, cubed
4 cloves of garlic, minced
2 tablespoons chopped fresh sage
2 tablespoons olive oil
1 large leek, thinly sliced to about 2 inches from the leaves
salt and pepper
1/4 cup dry white wine
5 ounces soft goat cheese
For the pastry:
1 cup unbleached white flour
1 cup whole wheat flour
1/2 teaspoon salt
12 tablespoons unsalted butter, very cold and cut into small pieces
1/3-1/2 cup water
Mix the flours and salt in a bowl. Add the pieces of butter and cut into the flour, using a pastry blender, utensils or your fingers, until the butter is in very small pieces and evenly distributed in the flour. Pour in a small amount of the water and toss with the flour to evenly mix. Add just enough water so that the dough comes together in a ball without any leftover flour. Press the dough into a flat disc and cover with parchment paper. Leave the dough in the refrigerator while you prepare the filling.
In a baking dish, toss the cubed squash with the garlic, sage and one tablespoon of the oil. Bake at 350' for about 20 minutes or until the squash is soft, but not mushy. While the squash cooks, heat the rest of the oil in a skillet on the stove. Add the leeks and stir for a couple of minutes. Cover and let the leeks steam until tender, about 8 minutes. Add the wine and cook until all the liquid is absorbed. When the squash is done, toss it with the cooked leeks and add salt and pepper to taste.
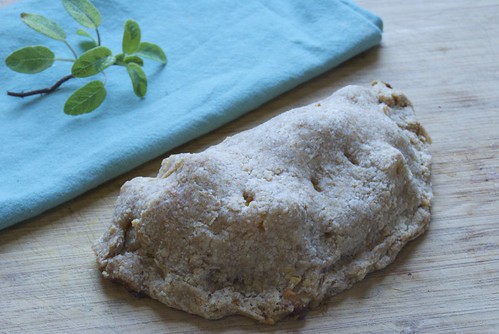
To make the turnovers, divide the dough into five equal pieces. On a piece of parchment or waxed paper, roll out the dough (turning it over frequently to make sure it doesn't stick) into a circle or oval, about 6-8 inches in diameter. On one half of the round of dough, place 2/3 to 3/4 cup of the squash and leek mixture and add a couple of tablespoons of the goat cheese (or as much or little as you like). Make sure to leave an edge of dough around the filling and fold the empty half of the rolled out dough over the filling. Carefully press the folded over top onto the bottom half of the dough and crimp the edge to keep it closed. Pierce a few small holes in the top of the turnover to let out steam when it cooks.
If baking immediately, place on a baking sheet in a 350' oven for 25 to 30 minutes, until the pastry is golden brown. Let cool for 10-15 minutes before eating. If freezing, place each turnover on a sheet pan and freeze. Once they are frozen you can store them in an airtight container for a week or two before using. If baking from frozen, they will take 30-40 minutes.
November 8, 2009
Savor Each Bite
Still sinking deeper into Autumn. Leaves are piling up on the edges of the streets while naked trees scratch the gray skies with their sharp, empty branches. I scuff my way through the piles for the deep satisfaction of their crunch, swirling lightness and that unmistakable smell of a pile of fallen leaves. I breathe it in and hold the musty, earthy smell in my nose and lungs as long as I possibly can.
I do love this time of year, the time beyond all the vibrant and always astonishingly beautiful foliage. I love the wind that comes up to shake the naked trees and swirl their dropped leaves into piles along the curb. I love the clouds that hang gray and sometimes bleak, covering the sky with no sign of rain, snow or ever leaving. Although I may tire of it in a few weeks or months I find myself eagerly welcoming these cloud-blanketed days for they give me permission to be cozy and productive in the kitchen.
We've been living in our apartment for over a year and I've recently become nostalgic for late fall evenings spent with a cooking project and NPR. Even if I've been on my feet all day making food at work, it won't stop me from a few more hours of truly satisfying edible alchemy. Almost daily, I find myself taking inventory of what's in the kitchen or what I might find at the farmer's market this week and dreaming up combinations of ingredients into a meal. Its practically involuntary at this point, but each possibility brings a little jolt of excitement for what I will create, even if its just something simple. I guess I'm a bit of a nerd, but I've reached the point in life where I am content to do the things I enjoy and not worry (too much) about the rest. So, many Saturday or Sunday evenings I find myself holed up in the kitchen.
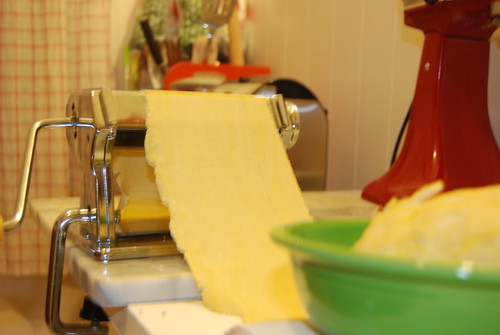
Last weekend I finally got to making the butternut squash ravioli I had been thinking about for weeks. Home made pasta is so worth the effort and, actually its not that much work, it just requires extra time and usually patience. The first time I made this recipe was a few years ago when I was making dinner for my mom and step-father in my first grown up apartment. At the time, I didn't have a pasta roller, so I pushed and pushed at it with a rolling pin to get it as thin as I could. Now I have a pasta roller and not only does it make thinner sheets of pasta but it is also quite fun to watch the dough change from a stiff lump, not unlike play dough, to those long uniform sheets. But of course you can do it either way, depending on what is available to you.
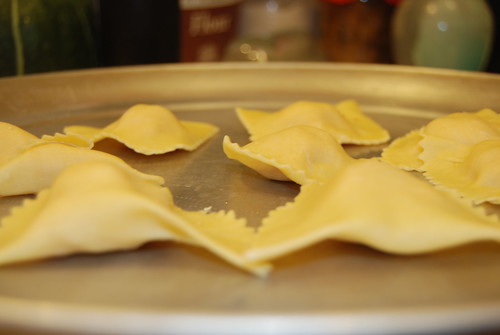
After baking the squash and mashing it with breadcrumbs, butter, and Parmesan I could have eaten that mixture and been immensely satisfied. Instead I forged on, stuffing the squash into little half moon pillows, dropping them into boiling water and then, while they cooked, tossing garlic, sage, and toasted pecans into melted butter followed by the cooked ravioli. Is your mouth watering yet? Mine definitely was at this point and when the ravioli landed on a plate sprinkled with parmesan I savored each bite slowly.
Butternut Squash Ravioli with Toasted Pecans and Sage
This recipe is adapted from Deborah Madison's Vegetarian Cooking for Everyone. The combination of the hearty ravioli with the brown butter sauce is flavorful and satisfying. It serves 4-6 people, and I was only serving two so I froze the ravioli we wouldn't eat and made a half batch of the brown butter. Sometime this winter we'll enjoy the meal again.
For the Pasta:
3 cups flour
3 eggs
3 teaspoons of olive oil or water
1/4 teaspoon salt
Pile the flour on a counter top work surface. Shape it into a mound with a well in the center Put the eggs, oil and salt into the well. Break up the eggs with a fork and begin piling the flour in from the sides to create a smooth mass of dough that doesn't stick to your hands. Knead the dough, picking up as much of the remaining flour as it will hold until it is smooth and moist but not sticky. Cover the dough and let it rest for 10 to 15 minutes before rolling it out.
OR, Place the flour and salt in a food processor. Turn on the motor and add oil, then the eggs. Work until little particles are formed (it will look like coarse corn meal). Take the dough out of the food processor, gather it all together and knead until smooth. Cover the dough and let it rest for 10 to fifteeen minutes.
For the Filling
2 cups of cooked butternut squash*
2 tablespoons butter
Salt and pepper
1/2 cup freshly grated Parmesan
1/2 cup dried breadcrumbs
Mash the squash and beat it with the butter until smooth. Season well with salt and pepper. Mix in the cheese and breadcrumbs until it is evenly combined. Resist the temptation to eat all of the filling then and there!
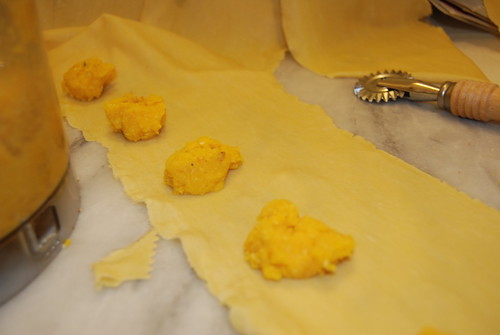
After it has rested, roll out the dough with a pasta machine until it is very thin (I rolled it out through the second to last setting on my pasta machine). Dot the dough with mounded teaspoons of filling and then fold it over to cover it (as pictured above). Cut the dough into half circles or squares and moisten them with water to tightly seal the edges. It takes some time to fill all of the pasta so keep the remaining sheets under a damp dishcloth so they don't dry out. Once you are done filling all of them, cover the ravioli with the damp dishcloth so that they stay moist until you cook them.
For the Brown Butter with Toasted Pecans and Sage
4 to 6 tablespoons of butter
1 garlic clove, minced
2 tablespoons chopped sage leaves
2 tablespoons chopped parsley
2 teaspoons chopped thyme
1/3 cup pecans, toasted and coarsely chopped
freshly grated Parmesan
In a skillet which will also hold the finished pasta, melt the butter with the garlic, sage, 1 tablespoon parsley, and thyme and cook until the butter is lightly browned and has a nutty aroma. Cook the ravioli in boiling salted water for 4 or 5 minutes, then drain. Add the pecans to the butter with the remaining parsley, then add the ravioli to the sauce. Cook, gently tossing in the butter, for 30 seconds then serve dusted with Parmesan.
*Cut the squash in half lengthwise, remove the seeds and cut side down on a baking pan. Bake until soft, about 30 or 40 minutes. Scoop out the flesh and measure 2 cups.
I do love this time of year, the time beyond all the vibrant and always astonishingly beautiful foliage. I love the wind that comes up to shake the naked trees and swirl their dropped leaves into piles along the curb. I love the clouds that hang gray and sometimes bleak, covering the sky with no sign of rain, snow or ever leaving. Although I may tire of it in a few weeks or months I find myself eagerly welcoming these cloud-blanketed days for they give me permission to be cozy and productive in the kitchen.
We've been living in our apartment for over a year and I've recently become nostalgic for late fall evenings spent with a cooking project and NPR. Even if I've been on my feet all day making food at work, it won't stop me from a few more hours of truly satisfying edible alchemy. Almost daily, I find myself taking inventory of what's in the kitchen or what I might find at the farmer's market this week and dreaming up combinations of ingredients into a meal. Its practically involuntary at this point, but each possibility brings a little jolt of excitement for what I will create, even if its just something simple. I guess I'm a bit of a nerd, but I've reached the point in life where I am content to do the things I enjoy and not worry (too much) about the rest. So, many Saturday or Sunday evenings I find myself holed up in the kitchen.
Last weekend I finally got to making the butternut squash ravioli I had been thinking about for weeks. Home made pasta is so worth the effort and, actually its not that much work, it just requires extra time and usually patience. The first time I made this recipe was a few years ago when I was making dinner for my mom and step-father in my first grown up apartment. At the time, I didn't have a pasta roller, so I pushed and pushed at it with a rolling pin to get it as thin as I could. Now I have a pasta roller and not only does it make thinner sheets of pasta but it is also quite fun to watch the dough change from a stiff lump, not unlike play dough, to those long uniform sheets. But of course you can do it either way, depending on what is available to you.
After baking the squash and mashing it with breadcrumbs, butter, and Parmesan I could have eaten that mixture and been immensely satisfied. Instead I forged on, stuffing the squash into little half moon pillows, dropping them into boiling water and then, while they cooked, tossing garlic, sage, and toasted pecans into melted butter followed by the cooked ravioli. Is your mouth watering yet? Mine definitely was at this point and when the ravioli landed on a plate sprinkled with parmesan I savored each bite slowly.
Butternut Squash Ravioli with Toasted Pecans and Sage
This recipe is adapted from Deborah Madison's Vegetarian Cooking for Everyone. The combination of the hearty ravioli with the brown butter sauce is flavorful and satisfying. It serves 4-6 people, and I was only serving two so I froze the ravioli we wouldn't eat and made a half batch of the brown butter. Sometime this winter we'll enjoy the meal again.
For the Pasta:
3 cups flour
3 eggs
3 teaspoons of olive oil or water
1/4 teaspoon salt
Pile the flour on a counter top work surface. Shape it into a mound with a well in the center Put the eggs, oil and salt into the well. Break up the eggs with a fork and begin piling the flour in from the sides to create a smooth mass of dough that doesn't stick to your hands. Knead the dough, picking up as much of the remaining flour as it will hold until it is smooth and moist but not sticky. Cover the dough and let it rest for 10 to 15 minutes before rolling it out.
OR, Place the flour and salt in a food processor. Turn on the motor and add oil, then the eggs. Work until little particles are formed (it will look like coarse corn meal). Take the dough out of the food processor, gather it all together and knead until smooth. Cover the dough and let it rest for 10 to fifteeen minutes.
For the Filling
2 cups of cooked butternut squash*
2 tablespoons butter
Salt and pepper
1/2 cup freshly grated Parmesan
1/2 cup dried breadcrumbs
Mash the squash and beat it with the butter until smooth. Season well with salt and pepper. Mix in the cheese and breadcrumbs until it is evenly combined. Resist the temptation to eat all of the filling then and there!
After it has rested, roll out the dough with a pasta machine until it is very thin (I rolled it out through the second to last setting on my pasta machine). Dot the dough with mounded teaspoons of filling and then fold it over to cover it (as pictured above). Cut the dough into half circles or squares and moisten them with water to tightly seal the edges. It takes some time to fill all of the pasta so keep the remaining sheets under a damp dishcloth so they don't dry out. Once you are done filling all of them, cover the ravioli with the damp dishcloth so that they stay moist until you cook them.
For the Brown Butter with Toasted Pecans and Sage
4 to 6 tablespoons of butter
1 garlic clove, minced
2 tablespoons chopped sage leaves
2 tablespoons chopped parsley
2 teaspoons chopped thyme
1/3 cup pecans, toasted and coarsely chopped
freshly grated Parmesan
In a skillet which will also hold the finished pasta, melt the butter with the garlic, sage, 1 tablespoon parsley, and thyme and cook until the butter is lightly browned and has a nutty aroma. Cook the ravioli in boiling salted water for 4 or 5 minutes, then drain. Add the pecans to the butter with the remaining parsley, then add the ravioli to the sauce. Cook, gently tossing in the butter, for 30 seconds then serve dusted with Parmesan.
*Cut the squash in half lengthwise, remove the seeds and cut side down on a baking pan. Bake until soft, about 30 or 40 minutes. Scoop out the flesh and measure 2 cups.
September 19, 2009
What We Have on Hand

As I've been stocking up our pantry and freezer for winter, I've been thinking about all the good things we will get to eat when everything outside is frozen and the farmer's market is long gone. Most of all, I want to make sure that we do actually eat it all and use what is on hand in our cupboards. Lately, with this great market right around the corner I have been guilty of dashing out to buy extra ingredients to stay true to recipes or components of dinner. Sometimes you just can't make things without the essential ingredients, but I love the idea of being so well supplied that we can open the pantry or the freezer and see what we should make with what we have on hand.
I try to keep stocked with some of the staples we use most often and my cooking style tends towards modifying recipes with the ingredients I have rather than dashing out quite so much. I've been inspired to read recipes by Melissa Clark and Mark Bittman in the New York Times in which the authors pull together quick and satisfying meals with what they have on hand. It seems somehow rewarding to see them publishing recipes that came from something they threw together for a weeknight meal. Cooking at home of course saves money and allows you to eat better and it can be really relaxing to put something together that doesn't require a trip to the store (of course many people are probably better than I am at planning ahead with grocery shopping!).
The other night I realized I was hungry and, in looking through the cupboard I decided to make a batch of polenta. Its not the fastest meal possible, but I also had some slow roasted tomatoes and ricotta cheese and greens which I thought would be fabulous on polenta. The recipe that I use is a combination of a classic polenta recipe and a vegan one which includes quinoa, adding protien, texture and flavor. The recipe can, of course, be modified depending on what you have available and it can be used in many different ways: as a soft, porridge style polenta, a cooled and then pan fried version, or baked in the oven. All of these versions can be covered with toppings ranging from grilled vegetables, sauces, cheeses, sausage or other meats or whatever you have available.
Quinoa and Corn Grits Polenta
There are a lot of options here: You can make a recipe without dairy, adding toasted sunflower seeds instead of cheese, or you can use some milk and cheese to the recipe for a slightly richer taste. Both ways are delicious!
1 Tablespoon Olive Oil
1/2 yellow onion, diced
2 cloves minced garlic
3 cups of water OR 1 3/4 cups water and 1 1/4 cups milk
1/2 cup quinoa, rinsed
1/2 cup corn grits or polenta (basically the same thing)
1 teaspoon salt
1 teaspoon black pepper
1/3 cup grated parmesan cheese and or 1/3 cup toasted sunflower seeds
Heat a sauce pan to medium high. Add the oil, let it heat up, then add the onion. Cook the onion until it is fragrant, then add the garlic. Reduce heat if necessary to cook until transparent, about 5 minutes. Add the water or milk and water. Stir once or twice and allow it to come to a boil. Add the polenta and quinoa, reduce the heat to medium low. Stir frequently until the quinoa is cooked and the mixture begins to pull away from the edges of the pot while stirring (about 15 minutes). Remove from heat and add salt and pepper, cheese and or sunflower seeds.
At this point you can spread the polenta onto an oiled sheet pan and allow to cool until firm. Once cooled you can cut it into pieces and gently crisp it on a skillet in olive oil. You can also cover the cooled polenta with sauce, cheese and other toppings and bake in the oven. Or you can eat the polenta while it is still soft and hot with whatever toppings or accompaniments appeal to you.
April 1, 2009
Spicy Peanut Stew: An Illustrated Recipe*
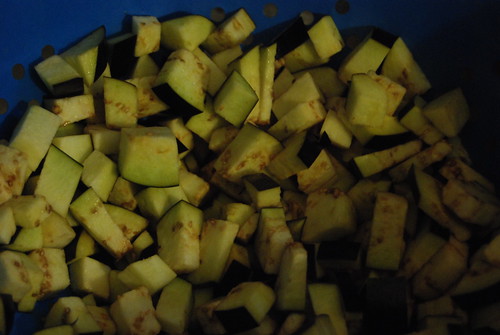
Cube one medium sized eggplant into 1/4 inch pieces. In a colander, toss with 1 teaspoon of salt. After 30 minutes, rinse the cubed eggplant well, drain, and set aside.

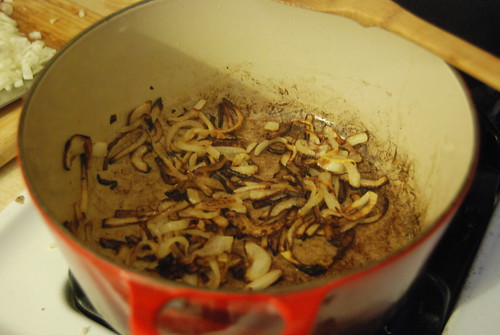
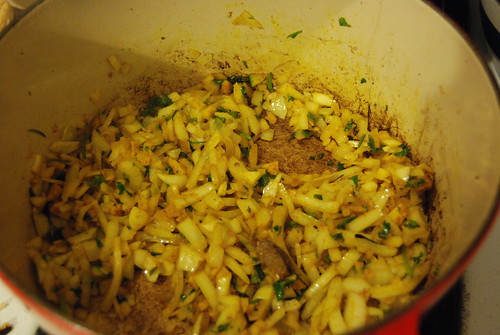
In a good-sized pot, heat 3 tablespoons of oil over medium-high heat. Add two thinly sliced shallots** and cook until they are soft and well caramelized, about 10 minutes. Stir often during this time.

When they are done, transfer shallots to a medium sized bowl. Add a bit more oil and the eggplant. Cook eggplant until tender and lightly browned. Remove the eggplant to the bowl with the shallots.
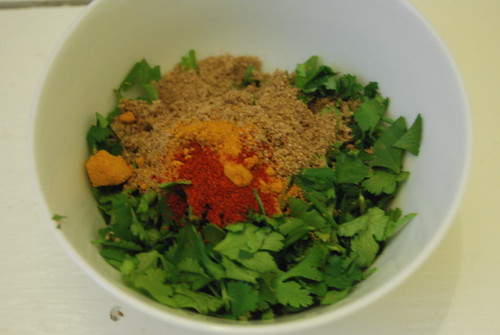
Meanwhile, peel and finely chop two inches of fresh ginger. Seed and mince two jalapenos. Measure out 1 teaspoon ground cumin, 1 teaspoon ground coriander, 1/4 teaspoon tumeric, and 1/8 teaspoon cayenne.

Add another tablespoon of oil to the pot, and heat over medium-high. Add the ginger and jalapenos and cook, stirring, for 30 seconds. Add the spices and, continuing to stir cook for another 30 seconds. Add 1 chopped onion and cook, scraping browned bits of spices off the bottom of the pan, for about 5 minutes until the onion is soft and translucent.

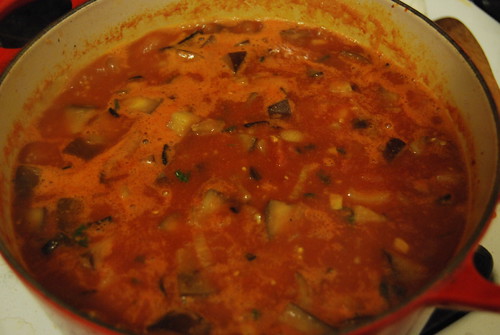
Next, add 1/3 of a cup of tomato paste and cook for a minute, stirring often. Then add 1 small can of diced tomatoes, 4 cups of vegetable stock (or water), and the eggplant and shallots. Sprinkle in some salt and bring to a boil, cooking for 5 minutes.

Put 1/2 cup peanut butter*** in a medium bowl and a cup or two of the broth. Stir until completely combined, then pour into the the rest of the stew. Reduce heat to a simmer and add one medium sized zucchini, cut into quarters lengthwise then sliced across into small wedges. Cover the pot and continue to simmer until all the vegetables are tender.

Turn off the heat and add 2 tablespoons of lemon juice and 1/3 of a cup of chopped cilantro. Let cool slightly and adjust seasonings to taste. Serve over rice and garnish with cilantro and chopped peanuts.

*This recipe comes from The New York Times, via my friend Heidi.
**I used a medium-large onion instead, because I could not find shallots when I was grocery shopping.
***I think the stew could use more peanut butter, the flavor wasn't very strong. If you just want a hint of peanut butter, 1/2 cup is enough but next time I will increase it because I want the flavor to come through more.

In a good-sized pot, heat 3 tablespoons of oil over medium-high heat. Add two thinly sliced shallots** and cook until they are soft and well caramelized, about 10 minutes. Stir often during this time.

When they are done, transfer shallots to a medium sized bowl. Add a bit more oil and the eggplant. Cook eggplant until tender and lightly browned. Remove the eggplant to the bowl with the shallots.
Meanwhile, peel and finely chop two inches of fresh ginger. Seed and mince two jalapenos. Measure out 1 teaspoon ground cumin, 1 teaspoon ground coriander, 1/4 teaspoon tumeric, and 1/8 teaspoon cayenne.

Add another tablespoon of oil to the pot, and heat over medium-high. Add the ginger and jalapenos and cook, stirring, for 30 seconds. Add the spices and, continuing to stir cook for another 30 seconds. Add 1 chopped onion and cook, scraping browned bits of spices off the bottom of the pan, for about 5 minutes until the onion is soft and translucent.

Next, add 1/3 of a cup of tomato paste and cook for a minute, stirring often. Then add 1 small can of diced tomatoes, 4 cups of vegetable stock (or water), and the eggplant and shallots. Sprinkle in some salt and bring to a boil, cooking for 5 minutes.

Put 1/2 cup peanut butter*** in a medium bowl and a cup or two of the broth. Stir until completely combined, then pour into the the rest of the stew. Reduce heat to a simmer and add one medium sized zucchini, cut into quarters lengthwise then sliced across into small wedges. Cover the pot and continue to simmer until all the vegetables are tender.

Turn off the heat and add 2 tablespoons of lemon juice and 1/3 of a cup of chopped cilantro. Let cool slightly and adjust seasonings to taste. Serve over rice and garnish with cilantro and chopped peanuts.

*This recipe comes from The New York Times, via my friend Heidi.
**I used a medium-large onion instead, because I could not find shallots when I was grocery shopping.
***I think the stew could use more peanut butter, the flavor wasn't very strong. If you just want a hint of peanut butter, 1/2 cup is enough but next time I will increase it because I want the flavor to come through more.
Subscribe to:
Posts (Atom)