September 29, 2010

Why I DIY

I recently started reading the site Scoutie Girl, and this morning Tara posed this question: Why do you DIY? She has some great reasons to do it yourself and I wanted to share some of my motivations and thoughts on DIY, too.

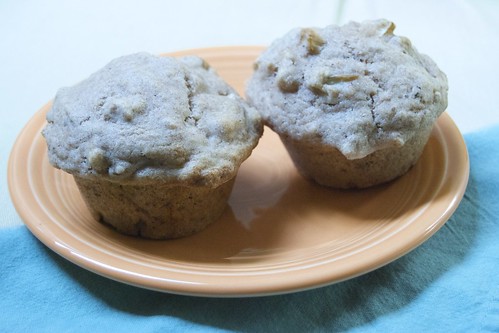
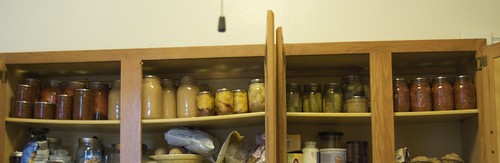
Making it myself is a big part of how I interact with the world. I don't want to just be an observer and consumer. I can't help it, I am a maker  and creator. By making something I am putting a bit of myself into the world and starting a sort of give and take, a dialogue between being an observer and creator. It is also really important to me to be able to rely on my own hard work and creativity. I know that I won't need to buy any salsa this year, since we have plenty that I canned in our cupboard. That is so satisfying.

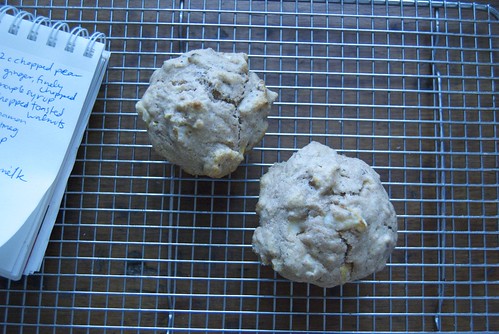
I am curious and I think I often want to know what it is like to make something, whether it is a batch of homemade croissants or a skirt to wear this weekend, I want to know and understand the process. I also like to see if I can actually succeed at making something

I like a challenge. I'm not a really competitive person, but I like to think that I can make something that I need that will (ideally) be just the way I want it. I was working on a little project last night and I realized that everything I am making for Seedling Design has come from something that I wanted to make for myself. I love making things that are just right for what I need and now I am so excited to be able to share these since, I suspect, they will be just right for many other people to. It reminds me of what my Mom has always said about gift giving, that you should always give something that you would like to receive. I am thrilled to be making a small business sharing the things that I love.

DSC_0176

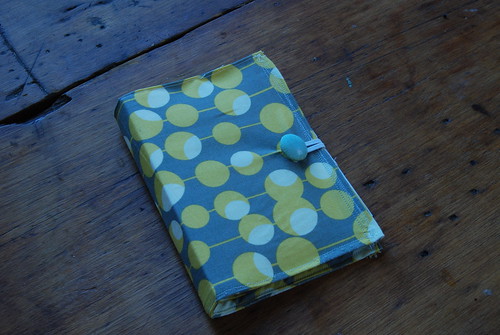
My latest creation makes me wonder, though. I made a little book, almost like a planner, because I sometimes need to jot things down when I am on the go. I usually keep dates and to do lists in my head, but I am hoping I can declutter my brain a bit by having somewhere else to write them. I wanted something nice looking and handy. I love it, but I realize that Apple may have cornered this market with the ubiquitous iphone. I have a cell phone, but its not smart or anything and I'm fine with that. So, I've made the low tech, no batteries needed, perfect place to jot notes, to do lists or numbers. It may not be the thing everyone else needs, but it fits in perfectly with why I DIY.

DSC_0178

I don't want or need anything high tech, I'm happy with what I can make myself.

I would love to know why you make things yourself, please share in the comments and check out Tara's post, too!

September 26, 2010

Fuel for the Day

 DSC_0215

Once a week, or sometimes less, I drive Ray to work (he usually bikes and our car hangs out in its spot behind our apartment) and on the way we stop at a coffee shop and get some breakfast. Its a nice little part of the morning together. Other times our routines are out of sink and we eat our cereal or yogurt and granola separately at the kitchen table. The mornings here have been surprisingly dark lately as autumn settles in. As the day wears on, the sun comes up higher and warms the air, the grass, and my back under a wool sweater. On these cool fall mornings, its nice to have something warm in my belly to get the day started.

Last week I made some ginger pear walnut muffins with those pears I found on my run. I love muffins as an easy breakfast any day of the week and I try to make them full of fruit and nuts so they provide good fuel for the day. These turned out to be the perfect combination of sweet soft fruit, crunchy nuts, and spices. There's nothing like a freshly baked muffin to perfect a cool fall morning.

 DSC_0204

Ginger Pear Walnut Muffins 
I like muffins that have as much fruit as muffin, but you can adjust the amount of added fruit, nuts, ginger, and maple syrup to your taste.


1 1/2 cups white flour
1 cup whole wheat flour
1 teaspoon cinnamon
1/2 teaspoon nutmeg
1 1/2 teaspoons baking powder
1/4 teaspoon baking soda
1/2 teaspoon salt
1 cup butter milk
1 tablespoon grated fresh ginger
1 egg
2-4 tablespoons maple syrup
4 tablespoons melted butter
1-2 cups pears, cored and diced into 1/4-1/2 inch pieces
1/2- 1 cup chopped toasted walnuts


Preheat the oven to 400 degrees. In a medium bowl combine flours, cinnamon, nutmeg, baking powder, baking soda and salt. Measure out the buttermilk and add the ginger, egg, and maple syrup. Beat gently together. Pour the buttermilk mixture and melted butter into the flour, add the fruit and nuts and stir to combine, its okay if there are lumps. Spoon into prepared muffin tin and bake for about 20 minutes, or until a toothpick comes out clean. Let cool for 15 minutes before eating.

September 24, 2010

Compromise and Crackers

DSC_0230

I meant to get back here with a recipe sooner, but once I finished canning my applesauce my sewing machine finally returned from the repair shop.  I've been back in sewing mode with trips in and out of the kitchen, too. I've been working on small attempts at keeping our kitchen stocked with basic staples for breakfast and lunch.

Ray and I differ drastically in our approaches to food. Although we both enjoy a good meal out and a good meal in, food and our kitchen is area that requires frequent compromise and tweaking of what works best for both of us. I tend to do the grocery shopping and most of the cooking and you might have noticed that I prefer to make things from scratch. Ray is more of a grab what is quick and easy and usually that isn't found at home. So I am trying to keep some extra already made meals in the fridge and a snack or two in the cupboard. Its a very evolving process for us to move toward common ground on what we want to eat. Ray is busy with work, while I have ample time to spend in the kitchen. Sometimes he forgets his lunch, sometimes my recipes don't appeal to him, and as much as I want our food budget and every meal to work out perfectly, it is a process that takes time.

It seems silly to go on and on about this but our differences in to cooking and eating has probably taken more give and take, discussion, and compromise than anything else in our relationship so far. And, I wanted to share with you a recipe for crackers that I made recently. Crackers might not seem very exciting and they are one of those things that for most of my life I though had to come in a box. It turns out they are really easy to pull them out of your oven and this recipe is full of flavor and crunch. I found it was hard to stop munching on these little triangles. These crackers make a good snack or accompaniment to a soup or salad and they go very well with hummus. They are pretty wholesome with protein from seeds and cheese and they fill that empty spot in our cupboard perfectly. I will definitely make these often.

Seed Crackers
Adapted from Vegetarian Cooking for Everyone by Deborah Madison. 
These crackers keep for a few days, but you can easily freeze half the dough until you are ready to bake more. They come together really quickly (especially in a food processor) and it doesn't take long for them to bake.


1 cup whole wheat pastry flour
2 tablespoons butter
1 cup of seeds such as sunflower, sesame, poppy, or cumin or a combination of seeds
2 teaspoons of mustard
2 eggs
1/3 cup grated parmesan cheese
1 cup grated cheddar cheese
1/2 teaspoon salt


Preheat the oven to 350'. Work flour into butter until the butter is in tiny pieces evenly distributed in the flour. Add the remaining ingredients and mix until they are evenly distributed in the ball of dough. Cover and refrigerate for 15 minutes. Lightly dust a piece of parchment paper with flour. Roll out half the dough, turning it over frequently to avoid sticking to the parchment. When the dough is about an eighth of an inch thick, cut it into desired shapes. Leave each cut piece on the parchment, slightly separated from the other pieces and place the parchment on a baking sheet. Repeat with the other half of the dough, or freeze this until you want to use it. Bake for about 15 minutes until crackers are golden brown. Let cool for 15 minutes before eating.

September 21, 2010

Canning 2010

Canning 2010 

My shelves are stocked for the winter, I hope. I am not sure what other projects I will decide to do, but I think I am mostly done canning for the season. I realize this is not perfect place to store my jars, but this is where I had space. By the way, the shelves were bowed like that when we moved in, they seem quite sturdy, though.

I made: 8 quarts of tomatoes (whole and crushed), 9 quarts of apple sauce, 4 pints of pears, 8 half pints of spiced peaches, 4 half pints and 1 pint of tomato jam, 6 pints and 1 quart of dill pickles, 13 pints of salsa and 4 half pints of mustard. I'm glad I'm writing this here so that next year I will remember how much I made. Hopefully I will remember to make note of how long it lasts, too.

September 17, 2010

Friday Ramble

DSC_0191

On my run today, I came across a box in front of a neighbors house, full of little home grown pears with a sign saying "Help Yourself." I couldn't pass up locally grown fruit and such generosity so I ran home with my hands full. They are sweet and slightly crisp, I would love to use them in my favorite fall dessert, but we'll probably just eat them before I get a chance.

DSC_0192

I bought Ray this adorable vintage gadget for his birthday. It is much cuter than the fancy grind and brew coffee maker we have and it gives Ray the option of making cold brewed iced coffee with a french press. I'm not a coffee drinker so I can't say whether it makes for a better cup, but it is so cute and I love having another hand powered, useful kitchen tool. We've been dreaming about a cider press, but it is really impractical considering we don't have any apple trees or the ability to drink vast quantities of cider.  Someday....

I bought the grinder from the vintage section of Etsy. Now that I have an Etsy shop I have been looking around at more of the things people make and sell and I am really in awe. It is so amazing to see what people are printing, crafting and creating. I'm completely convinced that buying handmade (and vintage or used) is the way to go for so many reasons and it is possible to find carefully crafted versions of almost anything you could want.

On that note, I've been thinking about consuming and simplifiying. I read this article last month and it made me wonder, as I often do, if I should get rid of everything (or most things) that I own. I definitely admire those who do, but my thought process usually comes back to point that I don't feel compelled to consume, I would rather make than buy, and I don't feel that my possessions or financial status has anything to do with my worth or my happiness. Almost everything we have in our apartment is carefully chosen, meaningful, useful or inspirational. I'm sure we could live happily with less but I'm pretty careful about what I buy and acquire, so I feel that there is a decent equilibrium. Then again, I didn't hesitate to grab those pears!

Speaking of simplifying and not buying, have you heard of Neighborgoods? Its a website that facilitates borrowing from your neighbor. If you have something you are willing to lend, you can list it on the website and you can also list things you would like to borrow. I am a member, but I haven't shared or borrowed anything yet. It seems like such a good idea, especially now that meeting our neighbors isn't an automatic thing (at least where I have lived recently). I hope that I will have a chance to meet some of my neighbors this way and I love the idea that everyone doesn't have to own one of everything, we can share.

I am going a bit crazy because my sewing machine is in the shop so I haven't been able to complete any projects with that. I will be working at my restaurant job all weekend, but next week I am planning some adventures in the kitchen which will hopefully end up as a couple of go slow make it yourself posts. If you are interested in exploring some recipes for things you can make instead of buy and you haven't seen them yet, check out hummus, yogurt, and whole wheat croissants. Have a wonderful weekend!

September 14, 2010

Homemade Mustard

mustard

In my quest to make things from scratch, I have realized that there are so many things that at first seem unscratchable. It's so easy to go to the grocery store and bringing home boxes, cartons and jars of food that sometimes it seems like that is the only way to get them. But with just a little time and effort pretty much everything can be made from raw ingredients in our own kitchens. I know not everyone has the time or wants to make the effort, but for some reason I can't help myself. I often wonder what drives me to do this. I think it's the thrill of knowing that I can make it myself and don't need to rely on someone else to do it for me, its because it tastes better and doesn't contain strange ingredients, and its an inexplicable curiosity. This last one is what led me to try making mustard.

I am not a condiment person and I use mustard infrequently. Other than to fuel my obsession interest in making it myself, I am not exactly sure what inspired me to try making a condiment that is rarely used in my kitchen. Maybe it was when I needed a tablespoon or two for my balsamic vinaigrette dressing and we didn't have any. Maybe it was because I stumbled upon a recipe in the Ball Complete Book of Canning. Whatever the reason, I now have plenty of mustard and after making it myself, I am thinking about new and exciting uses for it like this recipe and grilled sandwiches with brie, apple, and spinach.

Not only is it satisfying to make something yourself, it also means that you know exactly what is in it. This mustard is simple to make and if you can find a store that has bulk spices, the ingredients are inexpensive and they yield an ample amount of mustard (well, I guess that depends how much mustard you consume, but it makes about four half pint jars -- some of mine will be given as gifts). If you have never canned before, this is an easy project to start with. Unless you grow your own mustard seeds, the ingredients can easily be found year round, so if you are swamped with preserving the fall harvest, this could be a project for the cold months when nothing is growing nearby.

For me, there is something so rewarding about making things myself and I love the creative process. I know I'm not the only one who feels this way. Do you like making things from scratch? What is your favorite thing to make instead of buy?

Brown Beer Mustard
Adapted from The Ball Complete Book of Home Preserving
Once you get the basics, there are so many variations of mustard you can make. I chose this recipe because it was pretty basic. The beer adds some flavor but it is not overpowering, and of course all the alcohol cooks out. Darker beers with produce a stronger flavor and color.
I used 8-ounce jars and filled four of them with this recipe.

1 pint of beer
1 cup brown mustard seeds
1 cup water
1/2 cup white vinegar
1/2 cup lightly packed brown sugar
1/4 cup dry mustard
1 tablespoon onion powder

In a medium saucepan, combine beer and brown mustard seeds. Bring to a boil then remove from heat, cover and let stand for about 2 hours, until the seeds have absorbed most of the liquid.

In a blender or food processor, puree marinated seeds and remaining liquid until blended and most of the seeds are well chopped (it should still be slightly grainy).

Transfer mixture to a stainless steel saucepan and whisk in remaining ingredients. Bring to a boil over high heat, stirring constantly. Reduce heat to medium and boil gently, stirring frequently until volume is reduced by one third (about 15 minutes).

Prepare canning pot, jars and lids. For canning basics go here. Process the jars in boiling water for 10 minutes. The mustard will keep in the cupboard for up to one year. If you prefer not to can it, you can refrigerate it for several months.

September 9, 2010

Falafel, as promised.

Falafel

I know it is only the second week of September, but it really feels like fall here. Some trees are showing more than just hints of red and yellow and I've mostly been keeping the windows closed in our apartment. I would have taken a couple more weeks of summer, but now that my mind has switched to autumn mode, I can't complain. One of the best things about this time of year, late summer or early fall, is that there is so much good fresh local food available and with temperatures that allow oven and stove use, there is lots of cooking to be done.

Recently I made falafel (to go inside my homemade pita bread). I often think of falafel as more of a winter food (maybe because in the summer I do less bread baking) but I realized that late summer is the ideal time to eat it. Falafel goes so well with fresh veggies which are decidedly less fresh and flavorful in the cold months. I was so happy to eat it with lettuce and tomatoes from the farmer's market. I even had fresh cucumbers and dill to make a simple tzaziki sauce to put on top.

Falafel is really easy to make, it just takes time to soak the beans. It is often deep fried, but I make little patties and pan fry them in olive oil. Its full of protein, good flavor, and goes so well with garden or market fresh veggies.

Falafel
Adapted from How to Cook Everything Vegetarian by Mark Bittman
The chick peas (garbanzo beans) need to be soaked for at least 6-8 hours before you make this recipe.

1 3/4 cups dried chickpeas
2 cloves garlic, peeled and crushed
1 small onion, quartered
1 tablespoon ground cumin
A pinch of cayenne, or to taste
1 cup chopped fresh cilantro (or parsely if you don't like cilantro)
1 teaspoon salt
1/2 teaspoon freshly ground pepper (or to taste)
1 tablespoon lemon juice
Oil for frying (I use olive oil)

Put the chickpeas in a bowl and cover with water by 2 or 3 inches. Let soak for at least 6 hours or up to 24 (check occasionally to make sure they are still covered with water and have not absorbed it all).

Drain the chickpeas and put them in the food processor with all the other ingredients except the oil. Pulse until the mixture is very finely chopped but not quite smooth. Taste and adjust seasonings. 

Heat a deep skillet over medium-high heat. Add enough oil to coat the bottom of the pan. Form the chickpea mixture into little patties, about 1 inch thick and 2 1/2 inches across. Place patties into the hot pan, as many as will fit without touching. Cook for 2 or 3 minutes until browned, then flip and cook on the other side. Continue cooking patties until all the chickpea mixture is used. Serve 2-3 patties on pita bread with fresh greens, chopped tomatoes, fresh salsa, cucumbers or tzatziki (see recipe below). If you have left overs, the falafel will keep, covered, in the fridge for 3 or 4 days.

Serves 6 

Tzaziki Sauce

1 cup plain yogurt
1 cup chopped cucumbers
1 tablespoon chopped fresh dill
1 tablespoon lemon juice
1 tablespoon olive oil

Puree all ingredients in a blender or food processor until smooth.

September 7, 2010

Pita Bread

DSC_0057

The autumn after I graduated from college I spent two months living in Oregon, a little bit south of Eugene. I lived in a tent in the woods, a few hundred feet from Aprovecho Research Center. I often think of these two months as a magical time in my life. Have you ever had the experience of meeting a group of people and having them come together, get along, and interact in a way that could never have been planned but that couldn't be much more perfect?

My experience that fall was quite unique. Spending my days with friends I had just met, planting seeds in a warm garden bed, milking goats, waking up under tall trees and drinking peppermint tea on cool mornings, gradually warmed by the sun. We made our own rocket stoves, chopped and hauled trees in sustainable forestry, saved so many seeds, felted hats, and learned a bit of blacksmithing.  When were weren't cooking and eating huge meals, riding bicycles, or learning about permaculture, we took walks, escaped to Crater Lake, and lounged in hot springs.

During those two months as interns we got a taste of so many sustainable living skills and a view of a unique and flourishing community that had grown up around Aprovecho. We learned about baking sour dough and took turns baking bread weekly. The local baker, who also taught us blacksmithing, had a beautiful oven for transforming dough into perfectly baked loaves of sourdough. The first time I ever made pita bread, we each got a small ball of dough to flatten into a round disk. In the hot oven they puffed up into a pocket of hot air surrounded by perfectly cooked dough. No matter what kind it is, there's not much better than eating fresh warm bread.

Dough

Pita bread is especially delightful in the way that it puffs up into a pocket with very little work or effort on the part of the baker. The yeast and the heat take care of it for us. Around here this week, it really feels like fall. The weather is perfect for baking bread, watching the clouds and letting my mind wander to memories and feelings from autumns past.

I've made pita bread many times since my first experience, quite a few Septembers ago. Its a great bread to have around for lunches, easy to stuff with whatever fixings you like. In our continual challenge of figuring out what Ray should bring for lunch at work, I made a batch of pitas and a container of hummus for him to eat for a few days. Later this week I'll share a recipe for falafel which is a wonderful filling for pita bread.

Pita bread

Whole Wheat Pita Bread
Adapted from How to Cook Everything Vegetarian, The Bread Bible, and New Recipes from the Moosewood Restaurant. 

I am including measurements for the flours in ounces as well as cups. I think it is a much easier and of course more precise way to measure flours for bread, if you don't have a scale you can use the cup measures, but I recommend finding an inexpensive scale for measuring when baking. 

7.5 ounces (1 1/2 cups) whole wheat flour
7 ounces (1 1/2 cups) unbleached white flour
1/2 ounce (2 teaspoons) salt
2 teaspoons yeast (I use non-instant yeast, but instant yeast also works well)
1 ounce (2 tablespoons) olive oil
10.4 ounces (1 1/4 cups) water at room temperature

Measure all ingredients into a mixing bowl and combine, first stirring with a wooden spoon and then kneading with your hands.  When all the ingredients have come together in a shaggy lump, knead briefly, then let the dough sit for 5 minutes. 

Knead the dough for another five minutes, adding a little flour as needed to keep it from getting too sticky (add up to 1/4 cup of flour, but no more). After this kneading, the dough should be smooth and uniform and a little bit sticky.

Place the dough in an oiled bowl and cover with a dish towel or plastic wrap. Let it sit someplace warm until the dough doubles in size. If you want to wait to make the pita bread, you can refrigerate the dough at this point for up to 24 hours, just make sure it is covered well so it doesn't dry out. 
Once the dough has doubled in size (if refrigerating, remove and let sit for about an hour before continuing with this step), remove it from the bowl and divide into eight equal pieces (a knife or bench scraper is ideal for this, rather than tearing the dough). Gently roll each piece into a ball. Place the balls of dough about an inch apart on the counter, covered with a dish cloth and let them rise for about an hour.

During this hour, preheat the oven to 450 degrees. If you have a baking stone, place that in the oven when you preheat it. When the dough has again risen, not quite double in size, dust the counter with a little bit of flour. Shape each ball of dough into a flat circle, about six inches in diameter. You can carefully use a rolling pin or use your hands to gradually flatten them out. The pitas seem to puff up most successfully if the middle is equal to or slightly thicker than the sides of the flattened dough. Let this dough rest for about 20 minutes.

If using a baking stone, open the oven and place one or two dough circles on it. Try to work quickly so the heat doesn't escape from the oven. If you are using a sheet pan, place two to three (or however many fit without touching) on the pan and place it in the oven. Bake for 3-4 minutes, until the pita is puffed up, but not browned. Sometimes, they don't puff up. This could be because the oven is not hot enough. It might help to let the oven reheat for 5 minutes between batches. Even if they don't have a pocket inside, they are still really good with any of your favorite fixings.

When you remove the pitas from the oven, place them in a clean dishtowel so they can stay warm and moist. If they are too browned or not covered they will dry out too quickly and be more difficult to stuff and eat. 

September 2, 2010

My Shop and a Giveaway!

market

I am very excited to announce that I have opened a shop on Etsy.com.   I've been making things pretty much my whole life and have dabbled in selling them off and on. Finally I have reached a place in my creative process where the ideas are flowing and I am sewing as much as I can.

I know that we live in a world where there is so much stuff. So many things to buy that we don't need, that fill up our closets and collect dust in the corners of rooms. As someone who loves making things, I often think about whether or not I should add more to the ever growing piles of things that are made, manufactured and created. For me, creating is so important so I can't give that up. I also love sharing the creative process and encouraging others to make, rather than buy.  But, as someone who is trying out making and selling what I create, I also think its really important to spend and acquire mindfully.

caulimarket

Buying handmade is one way to choose carefully what you purchase, to know exactly where it came from and even who made it. When you choose quality handmade items you are investing in an artist or crafts person and, chances are, you will get something that you will want to use for years and years and it will last that long.

Of course this blog is not about selling things but my creative pursuits are important to me which is why I share them here.  I have added a link to my shop on the side bar in case you want to visit it.
In honor of buying and selling carefully made, handcrafted items which can contribute to a more sustainable world, I am doing a give away. One lucky reader will win a fabulously useful Portable Placemat, which, along with the bags above are some of the items in my shop.


DSC_0188
DSC_0184

I created these because I got sick of seeing people grabbing plastic utensils with their take out day after day. This portable placemat includes a cloth napkin and sustainable bamboo fork, knife, and spoon. The placemat rolls up so you can stash it all in your desk, lunchbox, bag or wherever you will find it handy. To participate in this giveaway, please help me spread the word about my work. Tell someone else about my blog or my etsy shop and tell me about it in the comments. I'll randomly choose a winner on Friday September 10 (make sure there is some way I can get in touch with you if you win).

September 10: Michelle and David are the lucky winners! Thanks to everyone who commented, read the blog post and checked out my shop!