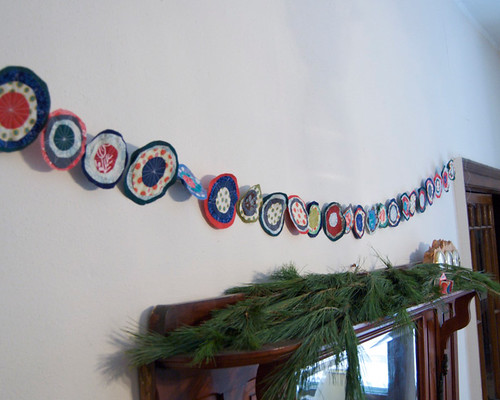
I made this festive garland and I wanted to share. I started making these multicolored circles as ornaments that would hang alone. When I saw them all together I wanted to keep them this way. The great thing about this project is that I used scrap fabric to make it. I love mixing bright colors and patterns, but you could also use varying shades and patterns of one color. Or you could combine a couple of colors like red and green, gold and white or blue and silver.
You could put this garland on a tree or hang it anywhere that needs a bit of festivity.
Materials:
Fabric, in various colors or patterns
Scissors
A sewing machine
A sewing needle
Heavy duty thread for stringing the garland, upholstery or quilting thread works well
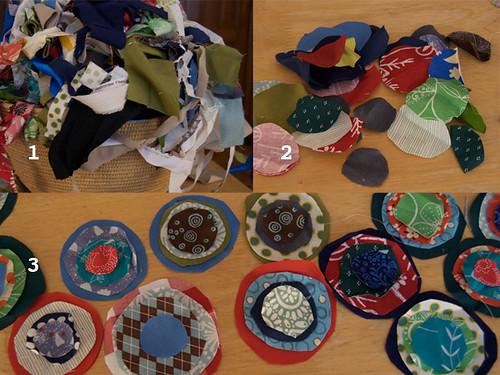
1. I save all of my scraps from making other things and I have plans for a few projects in mind to use them. For this project, I chose pieces that were big enough to cut large circles (about 4 inches in diameter) and three smaller sizes.
2. Cut the circles in a variety of sizes. There is no need to measure, but just make sure that there are approximately four different sizes.
3. Match up the circles. I chose to give each one four layers, starting with the largest and making sure that each circle is about a quarter of an inch smaller than the one on top so you can see each layer of fabric.
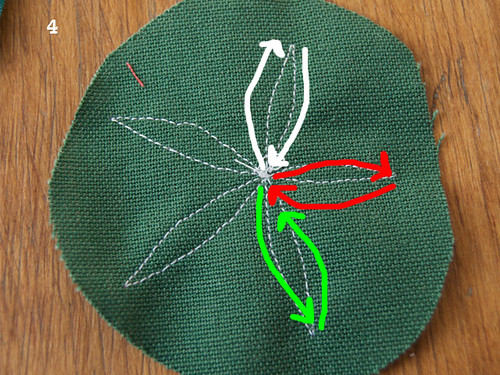
4. Sew the circles together. The back of this one shows the sewing pattern, but, to keep all the circles lined up, I sewed them from the front. You can use whatever method of attaching the circles together that you want. A simple stitch in the middle will hold them together. However, I liked sewing them together in a star pattern. It binds the layers together smoothly and adds another element of design to each piece.
To sew in this pattern, start in the middle of the smallest circle. Sew out toward the edge of the second largest circle. From there, turn and sew back toward the middle. Repeat this as few as three times or as many as five to make this star shape and completely bind the circles together.
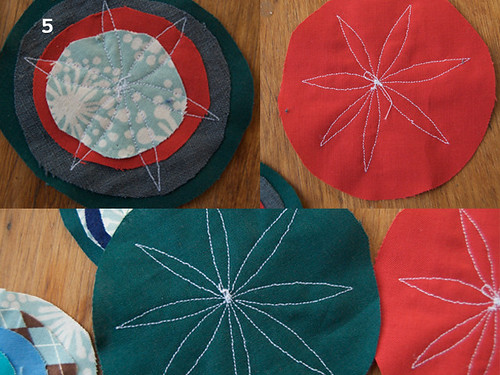
5. A few examples of the way that I sewed the circles together. On the larger circles I often made more than five points. It is not necessary, just a bit of design. Finish sewing all of your circles together before putting them together as a garland.
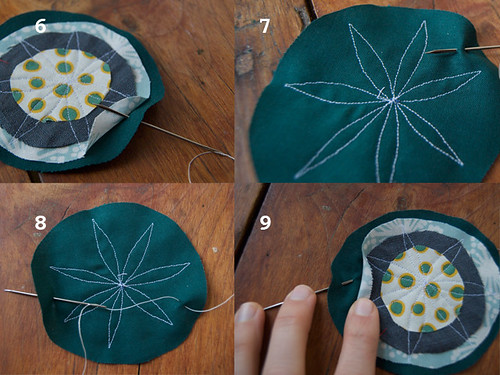
6. Now its time to put all of the circle pieces into a garland. Using your needle and thread, start on the edge of the first circle. You can hide the stitching, by poking the needle into the biggest circle's fabric under the second largest circle. Choose a spot on the upper half of the circle (once the circles are stitched onto the thread, they will be able to move, to keep them from falling forward, you want to stitch through the upper half of the circle). Holding the circle so the side with all the layers is facing you, poke the needle through the back to the front.
7.Then, poke the needle toward the back. Pull the thread through the two holes.
8. Find a spot across the circle from the other needle holes and sew to the other side (in the photo the upper half of my circle is on the bottom, until I flip it over in step nine).
9. The needle is poking through to the front of the circle. Poke it through to the back of the circle again.
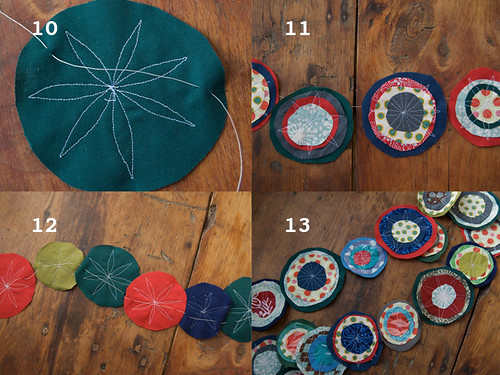
10. Here, you can see the way the stitching will look from the back.
11. Continue stitching circles onto the thread, sliding them down the thread as needed, until all of the circles are attached to the thread.
12. They look pretty, like Christmas lights or balls from the back.
13. Once all of the circles are stitched onto the thread, you are ready to hang your garland. Make sure to leave plenty of thread on both ends to hand it from. The circles can slide closer or farther from each other as needed.
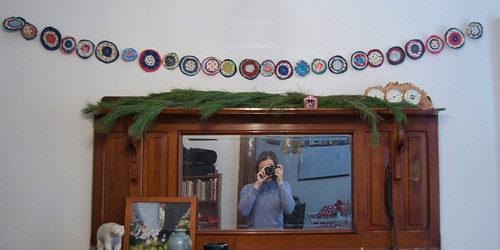
I hung my garland over the mantle in our living room, with some pine boughs, it's looking quite festive.

This looks wonderful, Anna! I think it would make a good project with kids as well (picking out the fabric, matching the circles). Perhaps when we get ourselves a sewing machine. xxoo
ReplyDeleteJess- I was thinking the same thing, I just forgot to mention that here. Luckily you have plenty of Christmases (or other festive occasions) ahead to do projects with your kids!
ReplyDeleteIt's beautiful and its something I can see hanging up all the time, not just at the holidays...
ReplyDeleteI'm thinking I'd like to have it hanging from my garden fence in the summer.
Once again you've done amazing work. Beautiful!
ReplyDelete