Since I've been pregnant, or was it before that?, I have somehow acquired the unfortunate habit of waking up for an hour or so in the middle of every night. Maybe I've fallen into the old pattern of first and second sleeps. I am usually too cozy and warm to get out of bed before it feels like actual morning and most of the time I don't mind taking time for my mind to wander. There are the nights, though, when, in the darkness, the concerns of the day grow to unnecessary proportions.
Everyone has their worries and I don't begin to think that mine are unique or special. I hope that once our little one arrives the mixture of joy and exhaustion will chase away the seemingly endless uncertainties and questions that now seem inevitable. I know that six months from now I will be able to chuckle at the way that figuring out just what we need (and don't need) for baby now seems so important and daunting. Then again, I'll probably never get past worrying about how we will ensure not just that our child survives but that we will be able to teach him to be a good person, prepare him for the world, and make sure we all have fun.
Besides listening to Ray when he says it will all work out, I find solace in the simple processes that are part of every day nourishment. Returning to the kitchen, provides a simple, necessary routine and a chance reconnect with every day processes and realities. Often it is easiest to fit in cooking and baking around other work but I remember that I need the meditation of preparing food to keep me present and grounded in each day. There is something about the combination of creativity, practicality and repetitive monotony in the kitchen that is both challenging and soothing.
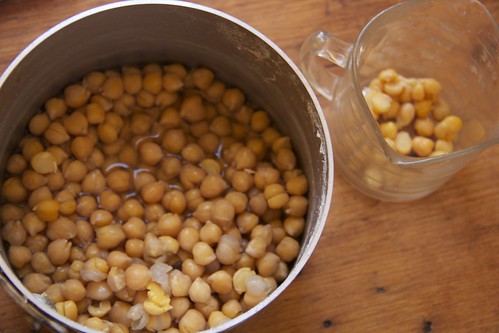
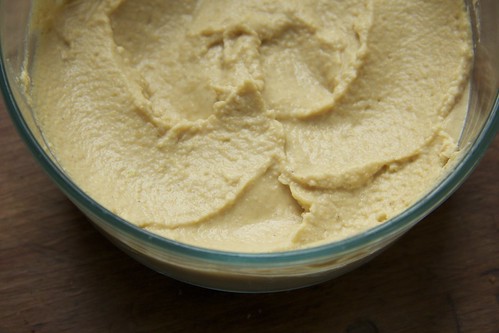
The way I have been making hummus lately really exemplifies this. I have been making it off and on for a few years, often because I know that a hummus sandwich is Ray's homemade lunch of choice. The challenge is that it can't be any hummus spread on bread, it needs to be smooth and creamy and as close to the kind in the store as possible. I have discovered that the trick to the smoothest hummus is the somewhat tedious task of removing the skins from the cooked chickpeas. I usually make a small batch which gives me just enough time to collect my calm while slipping the little beans out of their translucent white skins. The rest of the recipe comes together in no time.

Best Homemade Hummus (so far)
I posted about hummus long ago but my process has evolved over time. This recipe was inspired mostly by the hummus recipe in Cook This Now by Melissa Clark. I add most of my ingredients to taste but have listed measurements below. If you want a really specific recipe using this technique, I'm sure this one is great.
2 cups cooked chickpeas (*see below for cooking instructions)
1/3 cup tahini
2 tablespoons lemon juice
1-2 garlic cloves
1/4 cup olive oil
salt, cumin and paprika to taste
additional cooking liquid from the chickpeas, or warm water as needed
Remove the skins from the chickpeas by squeezing one between your thumb and forefinger until the bean part slips out and you are left holding the empty skin. Repeat this until all (or as many as you want) the chickpeas are skinned. Discard the skins and place the chickpeas in the food processor.
Add tahini, lemon juice and the amount of garlic you desire. Process until smooth, or nearly so (the hummus may still be too thick to be completely smooth). With the motor running, pour in the olive oil. Add salt and cumin or paprika if using. Taste to adjust seasonings, adding additional lemon juice if you wish. If the hummus is still not smooth and creamy enough, add small amounts of the chickpea cooking liquid or warm water. I have found that once the hummus is chilled in the refrigerator the consistency is thicker than when it is freshly blended. To remedy this, I add more liquid to make a slightly thinner and softer hummus than I want the final product to be. Keeps for at least one week in a refrigerated airtight container.
*Cooking chickpeas isn't quite as easy as opening a can but they taste better and are less expensive. 1 cup of dried chickpeas yields about 3 cups of cooked. Start with 3/4 cup of dried chickpeas. Place them in a bowl and pour in enough water to cover them with a couple inches. Let them soak for several hours or overnight. Pour the chickpeas and their liquid into a pot, making sure that they are covered with a couple inches of water. Add 1/2 teaspoon of salt and bring to a simmer. Let them cook this way for about 45 minutes. When they are ready the chickpeas should be soft and yielding to the fingers or teeth. Let cool before removing the skins.

I should definitely try your recipe. It looks very smooth and full of moisture.
ReplyDelete